
This is a trail camera that will notify you using a cellular network that there has been activity nearby.
My project is a Wireless Trail Camera, I know you could buy a trail camera cheaper then making it, but wheres the fun in that. The idea came to me one day as I was out checking my trail cameras, The area I hunt is a good hours travel from where I live. So putting out trail cameras is a must if you want to find out if there is any activity in the area. The problem is I have to go every so often to retrieve the SD card only to find out there was nothing on it. What I wanted was a way to be notified that there was some activity on the camera before I go out. I didn't need the images sent to me, just a report of activity and time of day.
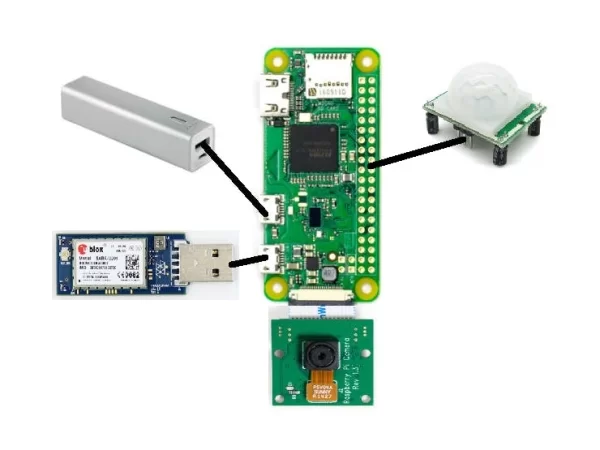
Enter Hologram Nova Cellular USB modem and the Raspberry Pi Zero design contest. I thought there is a good way to create a trail camera that could send me some feedback that would work in most places I hunt.
Now before I get too far into this, I have to say after creating the project, I realized the Raspberry Pi Zero probably isn't the best choice for this project as it doesn't contain any power management features I could find. It would use up the battery within a couple of days and to extend the up time, a solar panel would be required making the camera pretty bulky.
Assembly:
Once I received the kit from Hackster (thank you), the first thing to do was to setup the Raspberry Pi.
- Download the OS you want to use or use the one that came on the included SD card, I used Raspbian on the raspberry pi download site. Either version desktop or Lite will work.
- While it was downloading I decided to solder the pin header to the board, it will be needed later.
- Once the OS is download, follow the instruction here to create your image on a SD card.
- Put the SD card in the pi and connect it to a display and power cord. The PI should boot up.
- Configure the PI by using raspi-config.
sudo raspi-config
- Make sure to expand the filesystem to make sure it uses the whole SD card
- Enable SSH
- Enable Camera
- And in advance options, I enabled the different gpio protocols to have them available.
- Update and reboot.
- Raspberry pi should be configured now
Now I had to wait a bit for my pi camera to come in, I actually purchased one that had an IR Cut filter on it so that the camera could be used day or night, this projects doesn't use the IR Cut filter, but since it was the same price as other cameras, I figured I'd get it for a future enhancement.
- To install the camera, there was a flat ribbon cable that came with the case for the raspberry pi.
- open the connector by moving the black clip in the connector out about 1mm
- insert the small end in the Raspberry Pi with the contacts facing the board.
- push in the black locking clip to secure the cable in
- Do the same thing to the other end of the cable on the camera.
- Power up the Raspberry Pi and ssh into it.
- Test the camera by running raspistill or raspivid
raspistill -o image.jpg
If all works well, you now have a working raspberry pi camera.
Add the PIR sensor
** I tried to add a fritizing diagram here, but for some reason my laptop just would not let me create one. If I can get it created, I will add it, but for now the instructions on how to connect the pir is below.
To add the PIR sensor you will need 3 wires with female to female connectors
- connect the 3 wires to the PIR sensor, 5v, GND, and out (center pin 3.3v)
- connect the other end of the 5v wire to the PI pin 2
- connect the other end of the GND wire to PI pin 6
- connect the PIR out to GPIO pin 7
- Run the motionsensor.py
- if its working properly, the screen should show motion detected.
- press ctrl c to exit the script.
You now have a working motion system. Use the motion.py to take an image when motion is detected. This script has a 15 second sleep after a picture is taken.
Before you run the scripts, you should create a couple of directories. These directories will be used for the various scripts.
$mkdir archive
$mkdir images
$mkdir tmp
If you don't have the motion.py script automatically startup when the Pi restarts, you can start it like this. It should run in the background afterwards.
$nohup python motion.py&
Adding notification:
Configure your Hologam Nova USB modem as using the hologram instructions here. Once the SIM card is configured, connect the Nova to the Raspberry PI.
At this point, python already installed on your PI, we will need to add the Hologram python sdk to it using the instruction here.
You should now be able to run a test command to send a message to your hologram dashboard
hologram send --cloud --devicekey YOUR_KEY --topic 'test_topic' 'Hello from PI'
With the nova now able to send messages to your Hologram dashboard, you need a way to find out when a message comes in. I created a email route so that when a message come in to the report topic, it will automatically forward the message to my email.
- Click on the routes in the Hologram Dashboard

- Click new route
- Add a nickname for the route
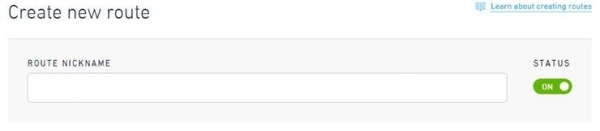
Add a topic, I had added “report” here
Source: Trail Camera