
A few weeks ago I received the new version of the Nwazet Camera Box Bundle, re-designed to fit the B+ Raspberry Pi.
It reminded me that I had promised my dad that I would fit a Pi camera system into his porch so he could keep an eye on his beloved motor home when he was in the garden. I'd not got round to doing this as I hadn't quite found a camera viewing solution that would be easy enough for him to use (and for me to figure out!).
Last week whilst browsing the Raspberry Pi forum I came across a camera viewing application for the Raspberry Pi called MotionPie. It almost turns your Raspberry Pi Camera Module into an IP camera, and is really (really!) easy to set up and use – perfect for old papa Average!
With my new CCTV-style case, and this seemingly simple yet brilliant camera application – a project was born!
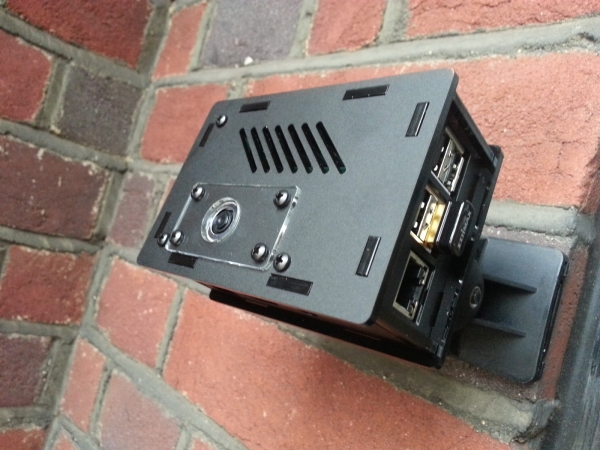
The Nwazet camera case is perfect for our CCTV Pi solution as it has an adjustable mounting bracket, a fish-eye lens, and a nice stealty black look. It comes with all the parts you need, and even the fixings for mounting it to a wall.
Assembly
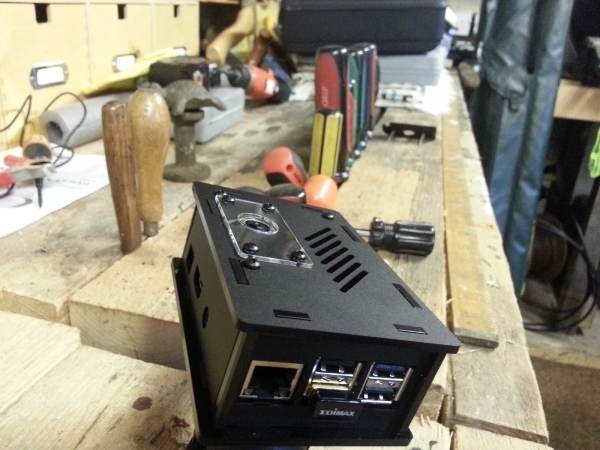
First on the list is to assemble the case. This is easy with the help of the very detailed guide on their blog. You first need to remove all the protective film on the individual panels, then then put it all together. No point in me covering that part – their instructions are very clear and can be found here: http://nwazet.com/camera-box-bplus/assembly
Installation
Installing the camera is simply a case of finding the right spot, drilling a couple of holes and screwing the mount to the wall. Obviously you need to consider things like glare, lighting, moisture, power source and all of the other ‘common sense' factors. This case isn't waterproof, so it needs to be installed indoors.
Note: You may want to skip to the Camera Software section below to set up MotionPie first so you can test where you want the camera before drilling any holes.
First mark where your camera will be mounted. Remove the mount panel and use it as a guide to mark your drill holes:
Now grab your drill and screws/rawl plugs. The case comes with these fixings, but I left those at home so it was off to Papa Average's workshop to grab some spares. I'm pretty sure this was his favourite part – any excuse to use his tools and supplies:
Camera Software
This is the part that had me puzzled for a while. There's a lot of different ways to get your camera streaming to a screen/computer, but I hadn't had much time to look at them. The few that I did try didn't quite offer the ‘simple' factor that is so very important when trying to get my father to adopt new technology
MotionPie
Then I came across MotionPie. This clever application comes as an image that you simply write to an SD card and put straight into your Pi – no code, no messing around. It feels a bit like cheating, but it does work very well and will keep papa Average happy as it's so easy to use.
Download the Image
To install MotionPie you need a blank SD card and the MotionPie image available here (hit the big green download button). You can use a 4Gb SD card but you may want something bigger if you want to use the recording features of MotionPie.
Think of an image as an operating system, like Windows. This image is a dedicated image for MotionPie, which makes it very easy to install.
Once the file has downloaded, unzip the files to a folder and move to the next step.
Write the Image to an SD Card
Pop your SD card into your PC (using an SD card adapter if needed) and open up your favourite image writing software – I use Win32DiskImager for Windows.
Open up Win32DiskImager – you should see the drive letter for your SD card in the top right ‘device' section. Make sure this is right before continuing.
http://www.averagemanvsraspberrypi.com/2014/09/turn-raspberry-pi-into-cctv-security.html
Now click on ‘Write' to burn the image on to the SD card. A warning will show, telling you you can corrupt the device. Don't worry about that, it's a standard message. Click ‘Yes' to proceed:
For more detail: Turn a Raspberry Pi into a CCTV Security System