
There are thousands of free radio stations on the internet, and with this project you can listen to all of them from one tiny little box. So let’s build our streaming radio using a Raspberry Pi, a speaker and a few odds and ends…
What you’ll need
A wireless internet connection
2 x momentary switches
4 x female-to-male leads (to connect your Pi to a breadboard)
2 x 220-ohm resistors
4 x male-to-male leads
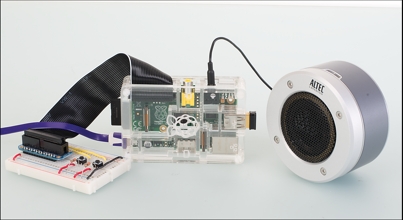
Speakers connected to 3.5mm headphone jack
Step-by-step
Step 01 Let’s get set up
Firstly, we need to prepare our Pi. Using Raspbian, and a Pi connected to the internet, open a terminal and switch to the root user:
sudo su
And update your list of packages, then upgrade your Pi to the latest software:
apt-get update && apt-get upgrade -y
Step 02 Install some extra packages
We need to install the Python packages to access the GPIO. In a terminal, logged in as root, enter the following.
apt-get install python-rpi.gpio
Now install MPlayer, which is what will be playing our audio.
apt-get install mplayer
Step 03 Set up your hardware
We will be using GPIO 23 and 24 to provide connections for two push buttons.
You will need 4 female to male leads to connect GPIO 23,24,3v3 and GND to the breadboard. You will also need 4 male to male leads, and 2, 220 ohm resistors. Please refer to the diagram for wiring guidelines.

Step 04 Setup the software
Copy the code listing into a file called radio.py and put that in your home directory – we’ll use the code as is for this guide, but feel free to edit the code to suit your needs later on.
Now open a terminal and switch to root, and edit your network interface config:
nano /etc/network/interfaces
Step 05 Wi-Fi configuration
We want the Pi to automatically connect to your router via Wi-Fi during boot.
Edit your /etc/network/interfaces file to resemble this:
auto lo
iface lo inet loopback
iface eth0 inet dhcp
allow-hotplug wlan0
auto wlan0
iface wlan0 inet dhcp
wpa-ssid “ssid”
wpa-psk “password”
Replace the “ssid” and “password” with your own details, but keep the quotation marks.
Step 06 Configure the radio to start at boot
In a terminal, as root, navigate to /etc/init.d/ and then create a file called radio
using nano.
For more detail: Turn your Raspberry Pi into a portable Wi-Fi streaming radio