
Learn how-to enable the adafruit 7″ touchscreen to be displayed correctly using powershell on a running Windows 10 IoT Raspberry PI device.
Update: Public release of Windows 10 IoT Core
This project has been tested with the public release and upon first use of a fresh install it may ask you to select a language, and you may find you have vertical scrolling issues on the touch screen – If your default language is not one of the top few, you can easily attach a usb mouse with a middle scroll button to vertically scroll. Otherwise everything appears to work just fine.
Original Project
I have somewhat of a passion of powershell for many reasons, but for now I would like to link the concept of an up and running raspberry PI 2 device that you would like to use powershell to quickly add to your project the Adafruit LCD Panel which was perfectly outlined in Jan Tielens project (please take a look at it if you haven't already).
Evidently, it was Jan's project that inspired me to acquire the Adafruit LCD Panel to tinker with and while updating the config.txt file on a new image build or removing the SDHC card and mounting it to update the config.txt file is perfectly fine, I feel that powershell can and should do the heavy lifting and will use it to achieve the same task and allow me to delve deeper into using the screen when time permits. hopefully. after all it is all fun learning.
Before we start please keep in mind that authoring an article is not my strong point and my photo and video work may be sub-optimal. I hope it helps someone learn as Jan's project helped myself.
Part 1. Ensuring you environment is set-up correctly
For this to work as smoothly as possible, you will have a Windows 10 (or Windows 8.1 with Powershell v5) PC connected to a network switch either by wired or wireless means or directly to your Raspberry PI 2 device by means of cross-over cable.
You will also have your Raspberry PI 2 device with Windows 10 IoT Core already running and connected by wired means to the same network switch or connected to your Window PC by cross-over cable.
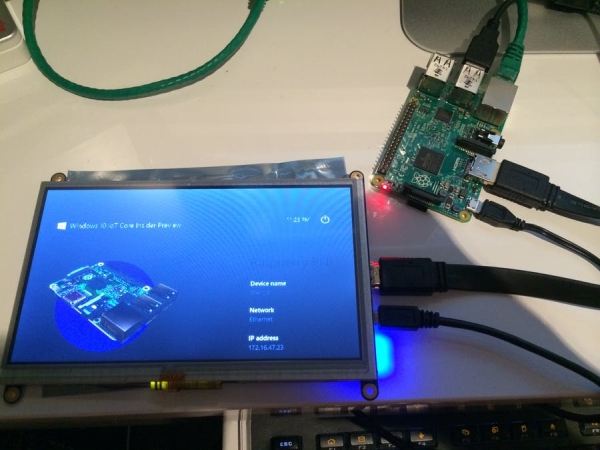
In this example my devices have the following IP addresses:
- Windows 10 PC has the IP address 172.16.47.20
- Windows 10 IoT Raspberry PI 2 has the IP address 172.16.47.23
Part 2. Ensuring you can connect to the Windows 10 IoT Raspberry PI Device
The Microsoft Windows 10 IoT Team did a great job with there article which you can find here (worth a read), but I feel there may of been some confusion so I will list my steps to achieving remote connectivity for completeness.
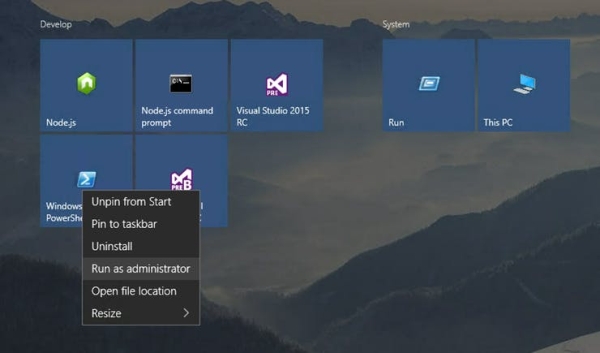
Step 1. Open Powershell in Administrative mode
On my Windows 10 PC I have the powershell items and a few others on the 8.1 Tile based start screen. You can also find Powershell within the start menu.
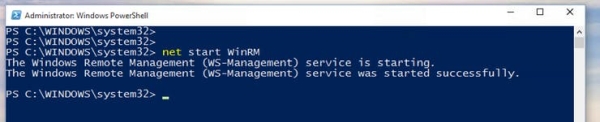
Step 2. Set-up Powershell – Start Windows Remote Management
First you will need to ensure that the Windows Remote Management (WS-Management) service is running on your Windows 10 PC.
You can use the following powershell command to get this status:
Get-Service | Where-Object {$.Name -eq "WinRM"}
If you the WinRm (Windows Remote Management) Service is not “Running” then you can type the command:
Start-Service WinRM
However this comes with very little feedback, so today we will use:
Net Start WinRM
If the service is already started it will just tell you it cannot start the service because it is already running.
Please see the three screenshots below for further detail.
Step 3. Set-up Powershell – House Keeping
It is recommend to remove the psreadline module as it causes a StackOverflowException issues with this current version, you can read more about it in the above Windows 10 IoT Powershell project.
Remove-Module psreadline -force

Step 4. Set-up Power Shell – Trust your Raspberry PI 2 Windows IoT Device
So that you are able to issue Remote Powershell commands and allow Visual Studio 2015 RC (for the future) to be able to talk to your device in the most simplistic way possible you should trust your Windows IoT device.
In the same powershell window type the following:
set-item WSMan:\localhost\Client\TrustedHosts -value 172.16.47.23
Next you will need to confirm your action and type “Y” and then press enter – Please see the screenshot for the expected output.

Step 5. Connect to your Raspberry PI 2 Windows 10 IoT Device
Type the following in your same powershell window to start a remote powershell connection:
Enter-PSSession -ComputerName 172.16.47.23 -Credential Administrator
After you press enter, you should receive the password box, go ahead and enter your password. If your password is accepted it can take up to 30 seconds to give you the remote powershell prompt.
The default password on a new install is: p@ssw0rd
Once logged into your remote powershell prompt it will look something like this:
[172.16.47.23]: PS C:\Users\Administrator\Documents>
You will want to move your remote powershell prompt to the correct EFIESP containing the config.txt file folder below by doing one of the following:
[172.16.47.23]: PS C:\Users\Administrator\Documents> CD C:\EFIESP
or
[172.16.47.23]: PS C:\Users\Administrator\Documents> CD \
[172.16.47.23]: PS C:\> CD EFIESP
Now that we are in the EFIESP folder your remote powershell prompt will look like this:
[172.16.47.23]: PS C:\EFIESP>
See the screenshots for more detail
Source: Use Powershell to adjust the Adafruit 7″ Touchscreen