
Send email alerts with LightBlue Bean using Node-RED on Raspberry Pi.
Ever find yourself in this situation…
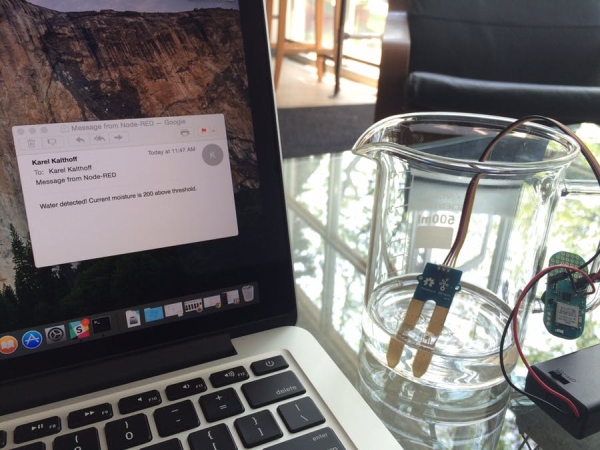
It’s happened to me. But, worry no more with this water detection system which is fun to build and capable of saving you some $$$ when the plumbing busts.
This example shows how to use Node-RED on a RaspberryPi to send an email whenever a moisture reading exceeds a threshold. Node-RED connects to the LightBlue Bean once a minute, requests the moisture and sends an email if water is detected.
Node-RED is a visual programming interface for the Internet of things. If you haven’t used Node-RED with the LightBlue Bean before, here is more information.
This example uses a RaspberryPi to run the Node-RED server. The node red server acts as an internet access point for the LightBlue Bean. Here are the full installation details for using the LightBlue Bean and Node-RED.
This is what the Node-RED flow for the project looks like:
What do the different nodes do?
- 1 min interval: Triggers the nodes it’s connected to on a set interval. In this example the interval is 60 seconds.
- Bean serial: This is a node developed specifically for the LightBlue Bean. It connects to a specified Bean and allows you to send and receive serial messages.
- Moisture threshold: Compares the current moisture to a high threshold. If it’s too wet it sends a string with the moisture reading to the next node.
- Email: Sends the string passed from the previous node to a specified address.
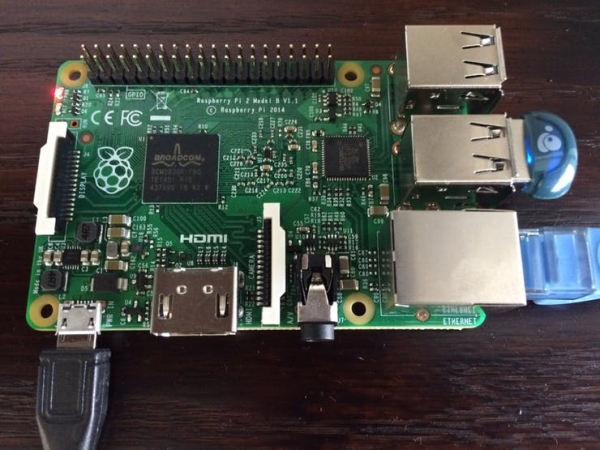
Step 1: Get Node-RED up and running on the RaspberryPi
Follow these instructions to set up Node-RED.
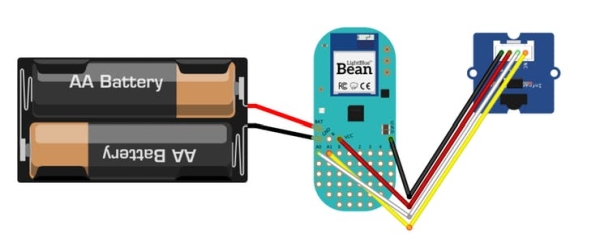
Step 2: Gather parts
You will need:

Step 3: Wire the Bean
Solder the wires accordingly and connect the Grove moisture sensor using the 4 pin male jumper to Grove conversion cable.
Step 2: Program the Bean
Use the following code to measure the moisture:
int sensorPin = A0; int sensorValue = 0; void setup() { Serial.begin(9600); } void loop() { sensorValue = analogRead(sensorPin); Serial.println(sensorValue); Bean.sleep(1000000000); }
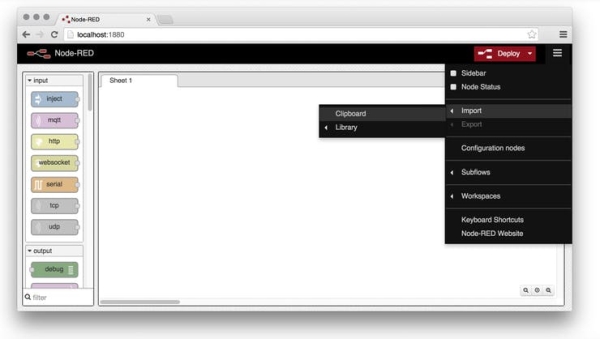
Step 3: Copy file to clipboard
Copy the JSON data below to your clipboard:
[{"id":"912350e5.6edcb","type":"bean","name":"Water Sensor Bean","uuid":"","connectiontype":"timeout","connectiontimeout":"2"},{"id":"5ec0d702.a13f28","type":"bean serial","name":"Bean Serial","bean":"912350e5.6edcb","newline":"\\n","bin":"false","out":"char","addchar":true,"x":302.5,"y":83,"z":"ab0aaa47.54f558","wires":[["5bc0a855.a43f58"]]},{"id":"5bc0a855.a43f58","type":"function","name":"moisture threshold","func":"context.previousMoisture = context.previousMoisture || 0;\nvar moisture = msg.payload;\n\nvar upperThreshold = 400;\n\n// Check if the new moisture is different from the previous\nif (context.previousMoisture != moisture){\n // Check if moisture outside threshold\n\tif ( moisture >= upperThreshold){\n // Compose alert email\n\t\tmsg.payload = \"Water detected! Current moisture is \" + (String(moisture)-upperThreshold) + \" above threshold.\";\n return msg;\n\t}\n}","outputs":1,"valid":true,"x":505.5,"y":83,"z":"ab0aaa47.54f558","wires":[["918c428b.6e73c"]]},{"id":"6915426.f96eabc","type":"inject","name":"1 min interval","topic":"","payload":"!","payloadType":"string","repeat":"60","crontab":"","once":false,"x":143.5,"y":83,"z":"ab0aaa47.54f558","wires":[["5ec0d702.a13f28"]]},{"id":"918c428b.6e73c","type":"e-mail","server":"smtp.gmail.com","port":"465","name":"","dname":"Email","x":679.5,"y":83,"z":"ab0aaa47.54f558","wires":[]}]
Step 4: Import project file to Node-RED
Go to http://<your pi's ip>:1880/ in your browser. Click the menu in the top right corner and choose import > clipboard
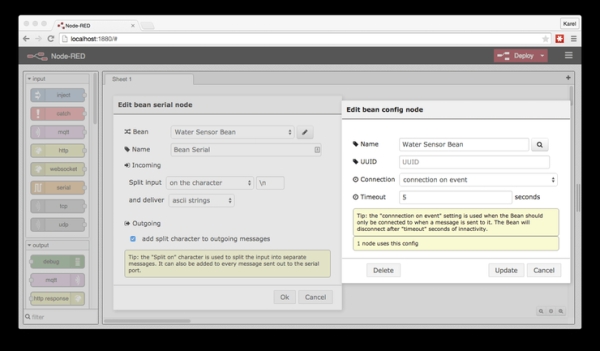
Step 5: Add your Bean
Double click the Bean serial node and click on the pen to edit the Bean settings. Update the name to be the name of your Bean. It is important you write the exact name as it’s the only way for Node-RED to find and connect to the correct Bean.
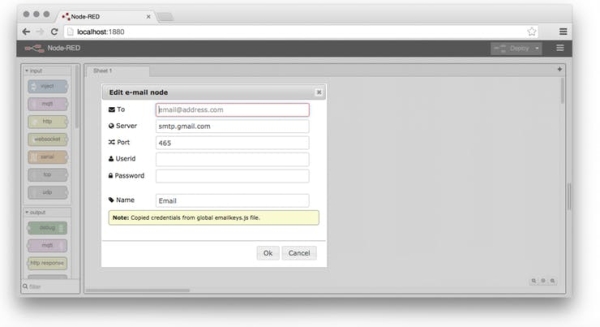
Step 6: Set up email
Double click the email node and fill in the account details for your email.
Step 7: Deploy
Click deploy in the top right corner to update server.
Step 8: Activate water detection system
Place the sensor in water to send warning email.
Source: Water Detection System