
How to make your own webcam as a motion detection camera, which will not only stream live video but also send you motion captured video.

In this tutorial we will learn, how to make your own webcam as a motion detection camera, which will not only stream live video but also send you motion captured video and images on Google drive as well as alert on gmail. If you want, it can also record video/ Images to local drive. So lets get started.
This project can be used in,
- Home Security System,
- Burglar Alert System,
- CCTV Monitoring System,
Thanks to motioneyeos, with the help of motioneyeos you can make complete home security system with raspberry pi by no time.
Components Required:
- Raspberry pi 4,
- Pi Cam V2.1,
- WebCam, (any webcam, I am using my old webcam),
- Lan Cable.
We can connect two cameras or more if you want.
Required Software:
Download Motioneyeos:
Select motioneyeos raspberry pi version, In my case I am using raspberry pi 4. Download motioneyeos.
Formatting SD Card:
We will need to format our SD card with the help of SD card formatter.
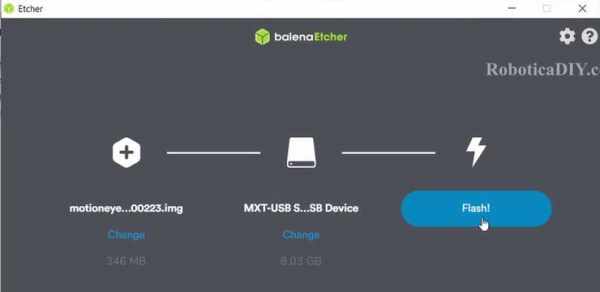
Etcher:
Select Image, Select SD card and click on Flash. Etcher will Flash motioneyeos image into SD card. After flashing complete, remove SD card and insert it in the raspberry pi.
Setup Camera:
Connect Camera either webcam or picam or Both. In this tutorial I am connecting both the camera & plug the power.
Connecting Raspberry pi with LAN Cable:
First time setup, you will need LAN cable for connecting raspberry pi and your router. After first time setup we will change connection type to wifi, so next time you don’t need LAN cable.
Waiting for motioneyeos boot:
Wait for at least two minutes this is very important step.
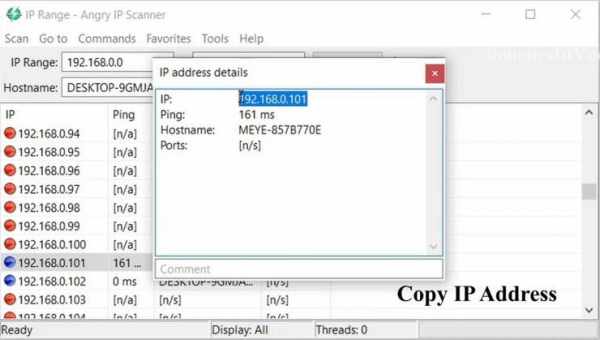
Angry IP Scanner:
After powering raspberry pi wait for two mintues then open Angry IP scanner, For finding IP address we will need IP scanner, but you can also see IP address on your router admin page. Click on Test. It will show you all the IP addresses which are connected to your router, search for MEYE-XXXX, copy IP address.
OpenJDK (Optional):
If Angry IP scanner shows you error while opening or give you a message download OpenJDK. Then you will need to download and install this software.
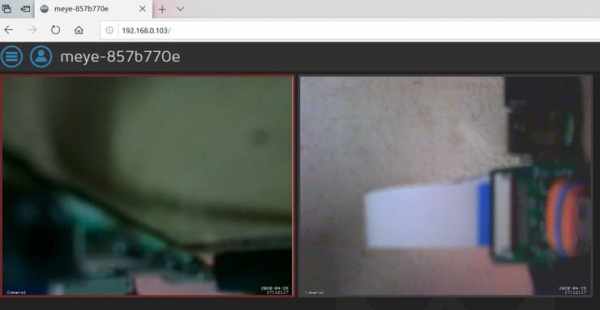
Streaming Live Video & Setup:
Paste that IP address you copied earlier in angry IP scanner or router admin page. Now you will be able to see one camera on screen.
Below image is final output.
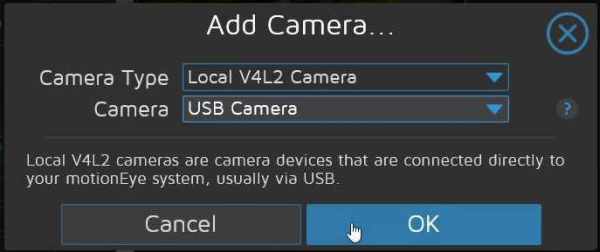
Add Camera:
Click on add camera and select camera type and camera. Click on apply.
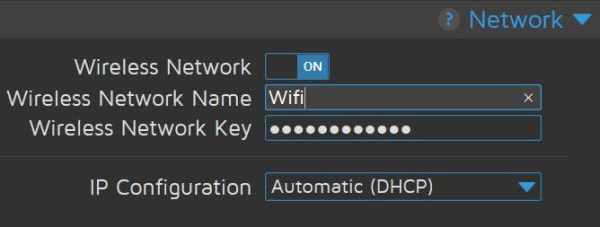
Network:
Turn on Wireless network and enter your WiFi Credential and Click on Apply and wait for it to restart.
After it restart, go to power click on shutdown.
Now you can remove your LAN cable, plug the raspberry pi power again, search for IP address with IP scanner. If you don’t to find IP address every time you can set static IP address.
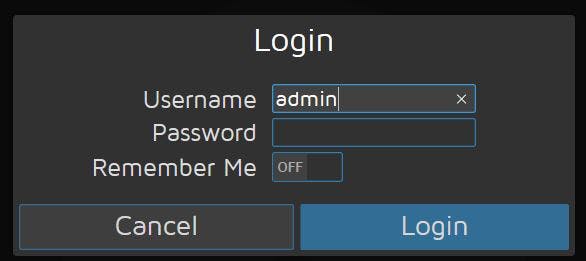
Admin Login:
If you are unable to see options in menu, click on profile icon and USERNAME: admin and leave blank for password, click Login.
TextOverlay
You can change text & text size which is appearing left and right bottom side of camera.
Source: WebCam-Motion-Detection-With-Motioneyeos-Using-Raspberry-Pi