
This project demonstrates a basic idea of the Internet of Things (IoT) whose applications are extending from smart homes to wearables to healthcare.
“The Internet of Things has the potential to change the world just as the Internet did. Maybe even more so” – Kevin Ashton.
Here in this project, I am demonstrating a method to switch on/off and blink an LED from a website which can be accessed worldwide. This project can be developed further making it useful in our day-to-day lives. Instead of the LED used here, if we connect the PI to AC mains via a relay, it becomes a Home Automation.
Step 1: Components Required
The components required for this project are:
1. Raspberry Pi 3
2. LED
3. 270 ohm resistor
The Raspberry Pi should be provided with an SD card loaded with an appropriate OS (preferably Raspbian) and should be connected to a monitor via HDMI to VGA converter or to a laptop via SSH. Apart from the above components, a router with internet connection should also be present with the Raspberry pi being connected to it.
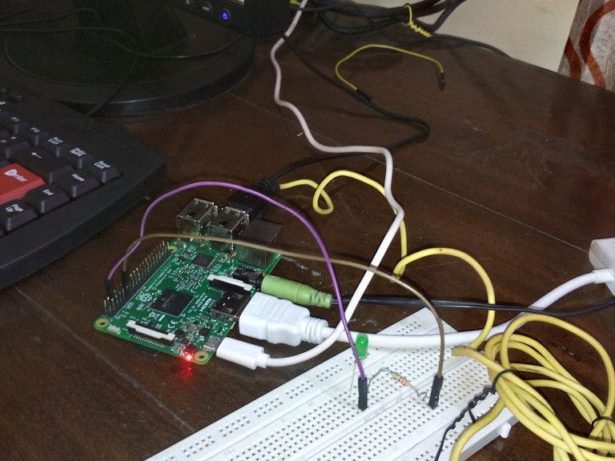
Step 2: Connections
The connections in this project are very simple. Connect the positive pin of LED to GPIO 17 pin and the negative to a 270 ohm resistor, the other side of which is connected to GND pin.
Step 3: Installing WiringPi library
WiringPi is basically a GPIO interface library for Raspberry Pi. There are 2 methods to install the WiringPi library.
(All the commands given below are to be executed on the Pi's terminal).
Method 1
1. Make sure your Pi is up to date with latest versions of Raspbian by:
sudo apt-get update
2. Install git by using the command:
sudo apt-get install git-core
3. Obtain WiringPi using git by:
git clone git://git.drogon.net/wiringPi
4. To build/install WiringPi library
cd wiringPi./build
Method 2
Try out this method only if method 1 doesn't work out.
https://git.drogon.net/?p=wiringPi;a=summary
Click the above URL and check for the link marked snapshot at the right hand side. Click the top one which will download a tar.gz file like wiringPi-xxxxxxx.tar.gz (xxxxxxx represents a combination of letters and numbers which is unique for each download).
Then open the terminal and type these commands:
tar xfz wiringPi-xxxxxxx.tar.gzcd wiringPi-xxxxxxx ./build
Thus the WiringPi library will be installed by one of the above methods. For more details about WiringPi library, please visit http://wiringpi.com/. To make sure Wiring Pi is installed and works properly, run the gpio -v command; it should return the current version of Wiring Pi along with the basic Raspberry Pi info.
Step 4: Installing a web server

Apache is a popular web server application you can install on the Raspberry Pi to allow it to serve web pages. On its own, Apache can serve HTML files over HTTP, and with additional modules can serve dynamic web pages using scripting languages such as PHP.
In our project we are using an HTTP server and its PHP extension. MySQL database is not used here.
First install Apache HTTP server and its PHP extension by:
sudo apt-get install apache2 php5 libapache2-mod-php5
In order to test if the Apache server is working properly, navigate to the browser and type your Pi's IP address. To get Raspberry Pi's IP address, type ifconfig on the terminal. Next to the wlan0 entry, you will see inet addr: 192.168.x.x which is the IP address of the Raspberry Pi. You should see an It works! page.
Now we should test whether its PHP extension is working. The above “It works!” html page is present in “/var/www/” directory as index.html. Now, delete this html file and create a new PHP file index.php. Then type the php code below :
Read More: WiFi-controlled LED using Raspberry Pi 3