Story
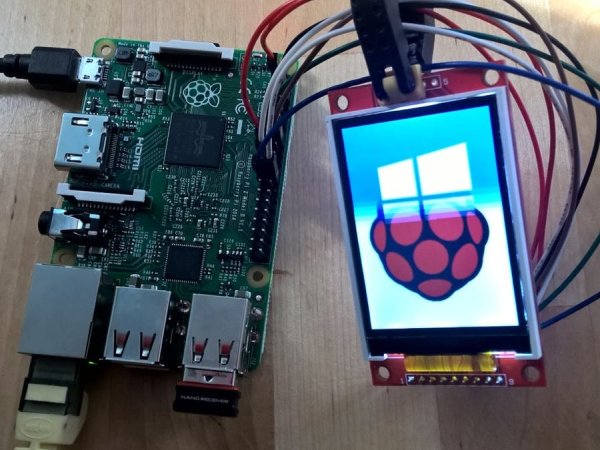
I recently bought a Raspberry Pi and had bought a (2.2 Inch Serial TFT SPI LCD Screen Module HD 240 x 320 5110 Compatible) display off the web a while ago. I wanted to connect the two together, so not being able to find a specific sample on the web, I wrote my own.
The closest I found was https://ms-iot.github.io/content/en-US/win10/samples/SPIDisplay.htm. This sample was invaluable in getting me started.
I also used the data sheets (ILI9341, tm022hdh26) for the said display.
The only thing that this project does is alternately display the windows logo and the raspberry pi logo.
In practice, this display is really really slow. It has to write 153000 bytes to fully update the screen. Over a 10Mhz spi bus, it takes a while.
Oldieman has provided details on how to get this working on the Adafruit PiTFT Mini Kit 320×240 2.8″ TFT+Capacitive Touch screen ADA1983.
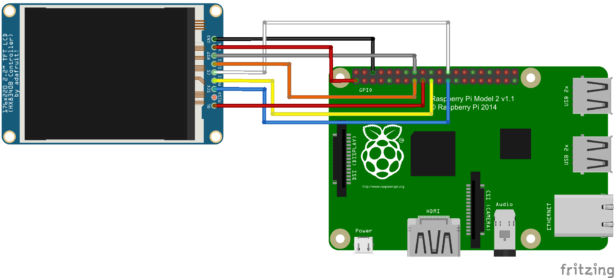
To physically connect the display to the raspberry pi, I connected the following:
power: Raspberry PI 3.3V dc power (pin 1) to LCD's VCC (pin 1)
ground: Raspberry PI GND (pin 6) to LCD's GND (pin 2)
chip select: Raspberry PI SPI_CE0_N (pin 24) to LCD's CS (pin 3)
reset: Raspberry PI GPIO23 (pin 16) to LCD's Reset (pin 4)
data command: Raspberry PI GPIO22 (pin 15) to LCD's DC/RS (pin 5)
mosi: Raspberry PI SPI_MOSI (pin 19) to LCD's SDI/MOSI (pin 6)
clock: Raspberry PI SPI_CLK (pin 23) to LCD's SCK (pin 7)
led power: Raspberry PI 3.3V dc power (pin 17) to LCD LED (pin 8)
I've only included the actual code to drive the LCD and it should be a simple case to integrate that into a project.
Schematics 
You should be able to use this code for only displays like http://www.adafruit.com/product/1480 as it also is driven by the same chip.
For more detail: Windows 10 ILI9341 TFT LCD spi display


