Zombie Detecting Smart Security Owl (Deep Learning)
Hi everyone, welcome to T3chFlicks! In this Halloween tutorial, we’ll be showing you how we put a super spooky twist on a mundane household classic: the security camera.
How?! We’ve made a night vision owl which uses image processing to track people. Oh, and it hoots, just like the real thing!
We’ve been super excited about this project and we’ve been waiting to do it ever since the new Raspberry Pi 4 dropped. It’s got 4GB RAM, which opens the door to loads of really exciting possibilities, including doing some image processing with deep learning models in real-time.
If you want to keep an eye out for approaching zombies on Halloween, or just check your garden the rest of the year round, this is the one for you. Security doesn’t have to be boring to be effective!
Supplies:
For this build, you will need:
- Raspberry Pi 4 (4GB Ram) Amazon
- Night Vision Camera Amazon
- Micro Servo Amazon
- Fake Owl Amazon
- Glue Amazon
- Paint Amazon
- Screws Amazon
- USB speaker Amazon
- Large (5v+) portable power supply Amazon
- 3D printer Amazon
Step 1: Step 1: Decapitate

a. Pull the head off the owl (sometimes you just have to be brutal) by pulling hard on its head where it attaches to the spring.
b. The owl’s head connects to the body by a cylinder which sits on top of a large spring. Remove this cylinder by taking out the screw.
c. The cylinder you just removed is made of two parts, a plastic cup and a bearing which sits inside it. Remove the bearing from the cylinder using a screwdriver (or similar tool).
d. Using the screw which connected the cylinder to the spring, attach the servo to the cylinder.
e. Remove the spring by unscrewing the three screws that secure it to the body.
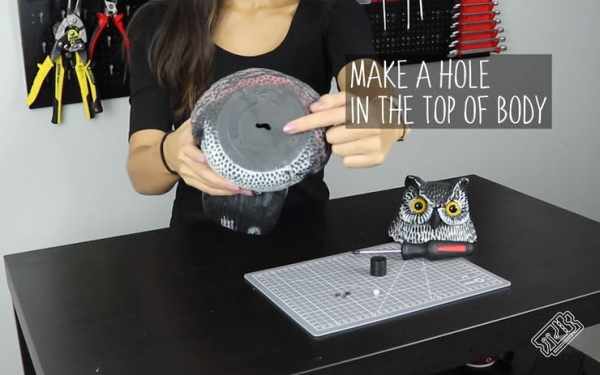
f. Make a hole in the top of the owl’s body which is large enough to fit some wires and the camera cable. We used an inelegant combination of a drill and a screwdriver to do this.
Step 2: Step 2: Add Smart

a. 3D print the camera case and paint it to match the owl – we used some cheap acrylic paints. Painting isn’t a vital step, but it does dramatically improve the overall look!
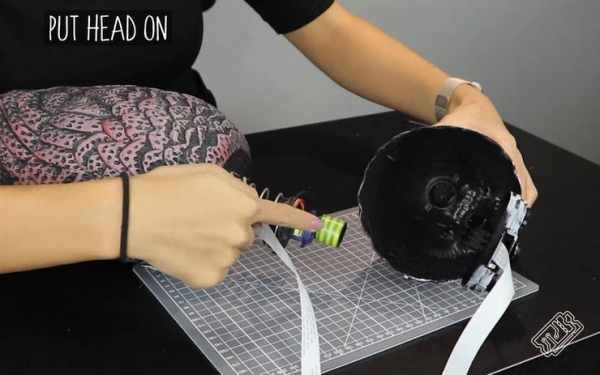
b. With the owl’s head upside down, screw the top of the camera case into the inside of its head, where the beak protrudes.
c. Put the camera into the case and connect the camera cable.
d. Glue the servo to the top panel of the spring.
e. Connect long wires to the servo pins (5V, Gnd, signal)
f. Feed the camera cable and wires for the servo through the spring and through the hole you made in the top of the body so they are inside the owl’s hollow body.
Step 3: Step 3: Fill Her Up

a. Remove the plug from the bottom of the owl and increase the size of this hole by cutting the plastic. Continue increasing the size until the Raspberry Pi and speaker can fit through into the body of the owl.
b. Once the hole is big enough for all the components to fit inside, pull the camera cable which you fed through the top of the owl out of the base and plug it into the Raspberry Pi.
c. Similarly, pull the servo wires through and plug them into the Raspberry Pi:
- +5v on servo => +5V on Pi
- Gnd servo => gnd Pi
- Signal servo => pin 12 Pi
d. Plug the USB speaker into the Pi.
e. Insert the SD card into the Pi.
f. Power Pi using portable power supply.
g. Insert the Pi, power supply and speaker into owl through the hole in the base.
Step 4: Step 4: Setup the Pi

ALL THE CODE CAN BE FOUND AT https://gitlab.com/t3chflicks/cctv-owl !
a. Download Raspian and upload it to your SD card using Balena Etcher.
b. To access your pi remotely
Add a file called wpa_supplicant.conf and put your wifi credentials in
ctrl_interface=DIR=/var/run/wpa_supplicant GROUP=netdev update_config=1
network={
ssid="MySSID"
psk="MyPassword"
}- Add a file called ssh to your boot sd card
c. Insert the SD card in the pi and try an access via ssh.
Step 5: Step 5: Moving the Head

Code tutorial for moving the head (controlling a servo with a raspberry pi) https://gitlab.com/t3chflicks/cctv-owl/tree/master/tutorials/1_move_the_head
To control a servo running on the Pi we are going to create script that controls the GPIO pins which the servo is connected to.
a. Connect the servo to the Pi:
- +5v on servo => +5V on Pi
- Gnd servo => gnd on Pi
- Signal servo => pin 12 on Pi
b. You must first set up the gpio pins to use PWM on the signal pin of the servo.
c. Then, it is as simple as selecting the duty cycle (explained here) of the signal pin to move the servo from 90 degrees with a duty cycle of 7.5 to 0 degrees when the duty cycle is 2.5 and to 180 degrees with a duty cycle of 12.5
import RPi.GPIO as GPIO
import time
GPIO.setmode(GPIO.BOARD)
GPIO.setwarnings(False)
GPIO.setup(12, GPIO.OUT)
p = GPIO.PWM(12, 50)
p.start(7.5)
try:
while True:
p.ChangeDutyCycle(7.5)  # 90 degrees
time.sleep(1)
p.ChangeDutyCycle(2.5)  # 0 degrees
time.sleep(1)
p.ChangeDutyCycle(12.5) # 180 degrees
time.sleep(1)
except KeyboardInterrupt:
p.stop()
GPIO.cleanup()
Step 6: Step 6: Making It Hoot

Code tutorial for making the owl hoot (playing audio with a raspberry pi) https://gitlab.com/t3chflicks/cctv-owl/tree/master/tutorials/2_hoot
a. Plug in the USB speaker.
b. Download a sound – we chose a spooky hoot.
c. Play the sound by running this command: omxplayer -o alsa:hw:1, 0 owl_sound.mp3
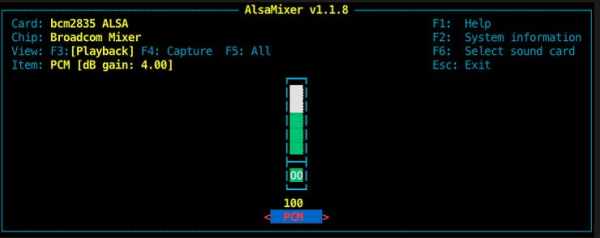
[d. If this doesn’t work, check what output your Pi is using and at what volume by using the command alsamixer – you will be greeted with the mixer screen where you can change the volume and select your media device. To increase the volume of your sound, do the command like this omxplayer -o alsa:hw:1, 0 owl_sound.mp3 –vol 500 To play this sound using Python, have a look at our test script.]
import subprocess
command = "omxplayer -o alsa:hw:1,0 owl_sound.mp3 --vol 500"
player = subprocess.Popen(command.split(' '),
stdin=subprocess.PIPE,
stdout=subprocess.PIPE,
stderr=subprocess.PIPE
)
