If you don’t intend to establish a significant website on a hosting service, you have the option to create your own web server at home. Previously, we provided instructions for setting up a web server on a Raspberry Pi 3, 4, or Zero. However, you don’t even require a full Raspberry Pi for this task. With the Raspberry Pi Pico W, a Wi-Fi-enabled microcontroller priced at just $6, you can perform basic web serving.
Although the Raspberry Pi Pico W might not be the most apparent choice, a bit of MicroPython code and some HTML can enable us to serve basic static web pages using the Pico W. This project consists of two components: the HTML, which is what your web browser will display, and the MicroPython code, which functions as the means to serve the code.
In this project, we will host a fundamental web page using a Raspberry Pi Pico W. Additionally, we will illustrate how to enhance your pages with CSS and JavaScript to add a touch of interactivity. Lastly, we will demonstrate how to make the content accessible to the world by forwarding external requests to our Raspberry Pi Pico W.
HTML for Raspberry Pi Pico W Web Server
HyperText Markup Language (HTML) serves as the fundamental cornerstone of the internet. It acts as a framework for crafting web pages, and it has undergone refinements to accommodate contemporary websites.
The HTML utilized for our Pico W web server can range from straightforward to intricate, with some important considerations. The site’s HTML is loaded into a Python variable, limiting the extent of feature utilization due to the Pico W’s modest 264KB of SRAM. Additionally, serving images or referring to external files such as CSS and JavaScript on the Pico W is unfeasible, as the HTML is stored within a Python variable that lacks access to the device’s file system.
Consequently, any images or external CSS/JavaScript resources must be accessed from an external source. While embedding CSS and JavaScript directly within the HTML code is feasible, we recommend utilizing Bootstrap’s CSS and JavaScript through its Content Delivery Network (CDN).
To create a basic HTML page
1. Launch a text editor according to your preference, with Notepad being a suitable option, although we favor Notepad++.
2. Configure the document type to HTML and proceed to establish an HTML tag. This action informs the browser that the content is in HTML format, and the tag signifies the commencement of the HTML document.
<!DOCTYPE html>
<html>
3. Introduce a fresh HTML tag, namely <head>, and within the <head> element, employ <title> to specify the title displayed in the browser window. The <head> section serves as a repository for page metadata essential for the web browser’s comprehension. In this case, we are utilizing it to define the page title, which represents the fundamental step for creating a functional webpage.
<head>
<title>Tom's Hardware Pico W Web Server</title>
</head>
4. Generate a <body> segment, which serves as the area where the content visible to the user is presented.
<body>5. Generate a page title or headline by employing the <h1> tag, which represents the largest headline tag available.
<h1>Tom's Hardware Pico W Web Server</title>
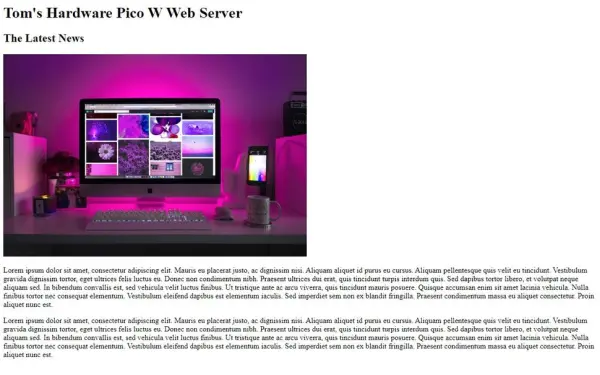
6. Create an additional section heading with the <h2> HTML tag and provide a title for the section. In our demonstration, we’ve named it “The Latest News.” While the <h2> tag is less prominent than <h1>, it continues to highlight the significance of this new section.
<h2>The Latest News</h2>
7. Embed a picture by employing the tag, with a reference to an external Content Delivery Network (CDN). Ensure that the complete image URL is accessible, and confirm that you have the appropriate permissions to utilize the image. In our demonstration, we have chosen an image from Pexels.com, a platform offering free licensed images. You can adjust the image dimensions using the
tag. You can either indicate the size as a percentage of its original dimensions or set specific pixel measurements.
<img src="https://images.pexels.com/photos/1779487/pexels-photo-1779487.jpeg?cs=srgb&dl=pexels-designecologist-1779487.jpg", width=640px height=427px>
9. Finally close the body and then the HTML document.
</body>
</html>
10. Save the file as index.html.
Please retain the code within this file for future use.
Python Code for Raspberry Pi Pico W Web Server
We have established a dedicated page for our enthusiastic readers and are now in the process of creating a mechanism to deliver it to them. To achieve this, we will craft a concise MicroPython application responsible for extracting the contents of our “index.html” file and serving it as a web page.
1. Follow the instructions provided in this guide to configure your Raspberry Pi Pico W, progressing through the steps until you reach “How to make an LED blink.”
2. Begin by generating a new, empty file.
3. Import two modules: the first one is “socket,” which serves as a low-level networking interface, and the second is “network,” which we will employ to establish a connection to our Wi-Fi access point.
“`python
import socket
import network
“`
4. Create an object called “page” and utilize it to reference the HTML file residing on our Pico W. This action opens the file in read-only mode.
“`python
page = open(“index.html”, “r”)
“`
5. Read the contents of the file into a new object named “html” and subsequently close the file. This operation effectively loads the entire HTML content into the “html” object.
“`python
html = page.read()
page.close()
“`
6. Establish an object named “wlan” to establish a connection from our code to the Wi-Fi chip on the Pico W.
“`python
wlan = network.WLAN(network.STA_IF)
“`
7. Activate the Wi-Fi and connect to your designated access point using your password.
“`python
wlan.active(True)
wlan.connect(“ACCESS POINT”, “PASSWORD”)
“`
8. Create an object, “sta_if,” which will serve as the interface between the Pico W and the Wi-Fi access point.
“`python
sta_if = network.WLAN(network.STA_IF)
“`
9. Output the IP address of the Pico W, making a note of it as it will be required later. The resulting data is encapsulated within a list object, containing our IP address, netmask, and DHCP server address. The IP address is the first element in the list, so we can extract it using [0].
“`python
print(sta_if.ifconfig()[0])
“`
10. Configure the Pico W to listen for connections on port 80 from any IP address. To allow the reuse of the same IP address after a reset, we employ “socket.SO_REUSEADDR.” This resolves the issue where a full power cycle is needed to reuse the IP address.
“`python
addr = socket.getaddrinfo(‘0.0.0.0’, 80)[0][-1]
s = socket.socket()
s.setsockopt(socket.SOL_SOCKET, socket.SO_REUSEADDR, 1)
s.bind(addr)
s.listen(1)
“`
11. Create a loop to continually execute the subsequent code sections.
“`python
while True:
“`
12. Set the Pico W to accept an incoming connection and create a file that will serve as our web page.
“`python
cl, addr = s.accept()
cl_file = cl.makefile(‘rwb’, 0)
“`
13. Inside this loop, generate another loop, and within it, create an object named “line” to read the contents of our web page line by line.
“`python
while True:
line = cl_file.readline()
“`
14. Employ a conditional statement to cease reading the contents when encountering carriage returns or line breaks.
“`python
if not line or line == b’\r\n’:
break
“`
15. Formulate a “response” object to store the HTML content for the web page.
“`python
response = html
“`
16. Configure a client response, transmitting the HTTP status code and content type to the browser, and then dispatch the HTML content for rendering in the user’s browser. Following this, the connection is terminated.
“`python
cl.send(‘HTTP/1.0 200 OK\r\nContent-type: text/html\r\n\r\n’)
cl.send(response)
cl.close()
“`
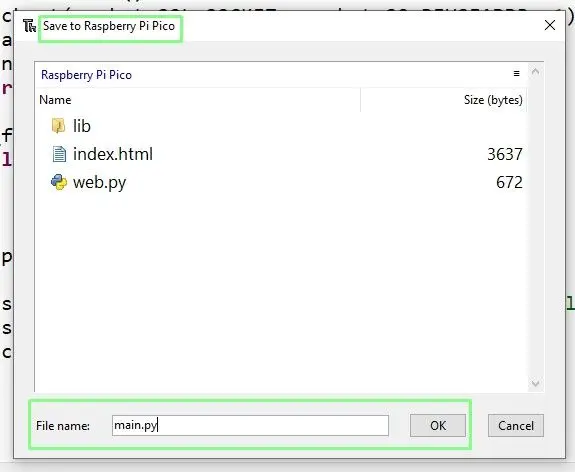
17. Save the file as “main.py” on your Raspberry Pi Pico W. This action ensures that the code will execute automatically when the Pico W boots up.
Complete MicroPython Code Listing
import socket
import network

page = open("index.html", "r")
html = page.read()
page.close()

wlan = network.WLAN(network.STA_IF)
wlan.active(True)
wlan.connect("ACCESS POINT","PASSWORD")
sta_if = network.WLAN(network.STA_IF)
print(sta_if.ifconfig()[0])
addr = socket.getaddrinfo('0.0.0.0', 80)[0][-1]
s = socket.socket()
s.setsockopt(socket.SOL_SOCKET, socket.SO_REUSEADDR, 1)
s.bind(addr)
s.listen(1)
while True:
    cl, addr = s.accept()
    cl_file = cl.makefile('rwb', 0)
    while True:
        line = cl_file.readline()
        if not line or line == b'\r\n':
            break
    response = html

    cl.send('HTTP/1.0 200 OK\r\nContent-type: text/html\r\n\r\n')
    cl.send(response)
    cl.close()
Copying index.html to the Raspberry Pi Pico W
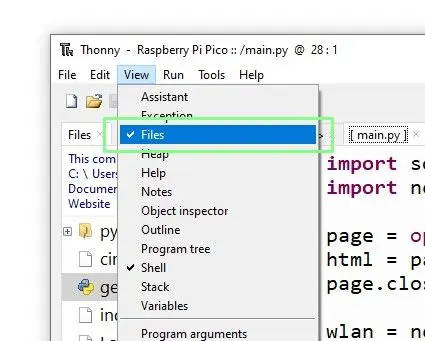
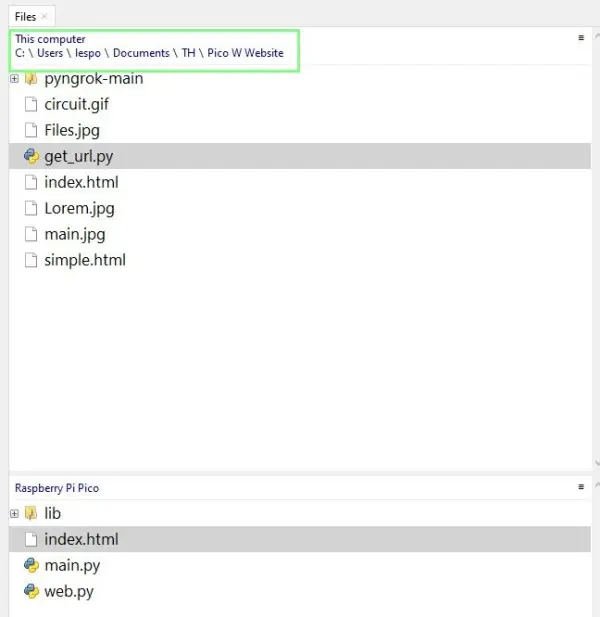
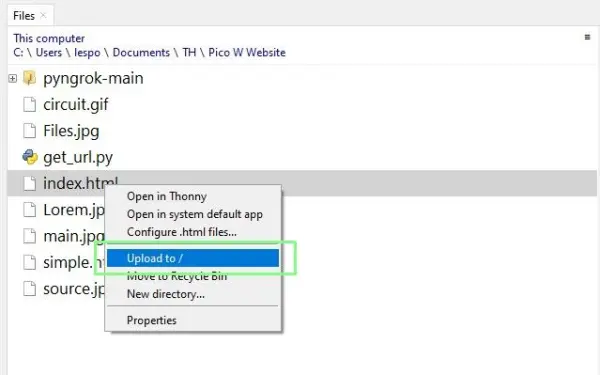
To access Thonny’s file management feature, navigate to the “View” menu and select “Files.” This will open a file manager within Thonny. The upper window represents the source, which typically corresponds to the primary drive of your computer. The lower window, on the other hand, represents the target, specifically the Raspberry Pi Pico W.
2. In the top window navigate to the location of your index.html file.
3. To transfer the file to your Pico W, simply right-click on “index.html” and choose the “Upload to /” option.
4. Disconnect the Pico W from your computer, and then plug it back in to initiate a reboot, thereby activating the web server.
5. Using your PC, launch a fresh web browser window or tab, and navigate to the IP address associated with your Pico W. Within a short span of time, you will witness the page materialize within the browser window.
Improving our HTML
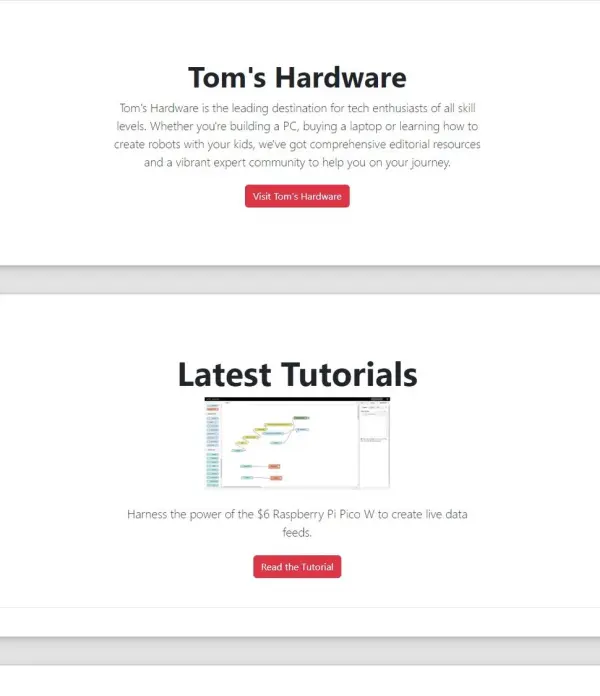
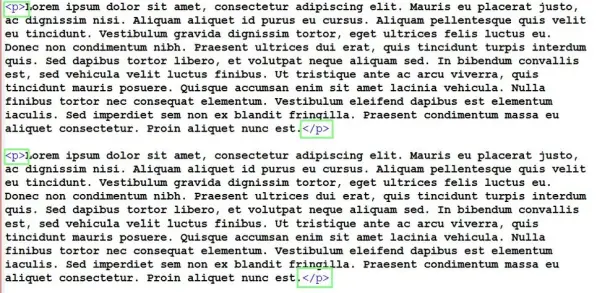
By leveraging Bootstrap and its content delivery network (CDN), we’ve significantly enhanced the visual appeal of our webpage. In essence, this enhancement preserves the fundamental building blocks of HTML, including <h1>, <p>, and <img> elements, while introducing additional elements like dividers and custom CSS for a more polished appearance.
Bootstrap stands as a comprehensive framework encompassing HTML, CSS, and JavaScript, allowing for the swift creation of professional-looking websites. Whether you’re aiming to develop a quick demonstration site for clients or your personal projects, Bootstrap serves as an excellent starting point.
For our demonstration, we’ve customized the Heroes template, substituting the CSS and JavaScript links with BootstrapCDN links.
If you’d like to make use of our code, you can access the download link here.
Forwarding Requests to our Raspberry Pi Pico W Web Server
Currently, our server is limited to being accessed solely by devices within the same network. To make our Raspberry Pi Pico W web server accessible to the broader internet, we must first determine our external IP address and then configure port forwarding to direct external requests to our Pico W.
It’s worth noting that the process for accomplishing these tasks can vary slightly from one router to another. The following steps outline how to approach these tasks on a router provided by your internet service provider (ISP):
1. Begin by obtaining your external IP address. You can easily do this by using a search engine like Google and searching for “What is my IP address?” Take note of the displayed IP address.

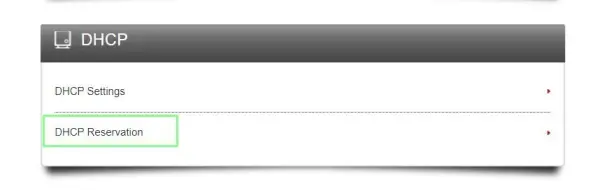
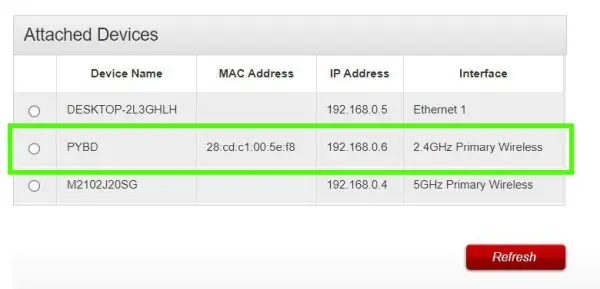
Step 2: Access your router’s Advanced Settings and navigate to the DHCP Reservation section. The objective is to guarantee a fixed IP address for our Pico W device within the local network, and DHCP reservation provides the method to achieve this.
3. Choose your Pico W from the roster of connected devices.
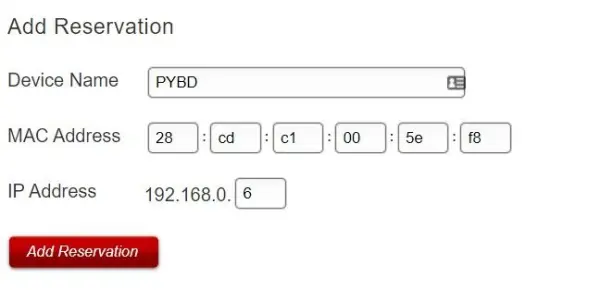
4. Include the reservation in the IP Lease Table and proceed to click on “Apply.” This action will ensure that your Pico W consistently obtains the same IP address while operating within your home network.
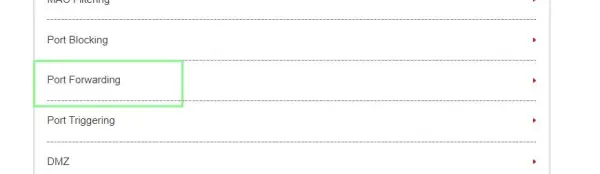
5. Proceed to access the Port Forwarding menu within your router settings. In our particular scenario, this option was located within the Advanced Settings section, specifically under the Port Forwarding category.
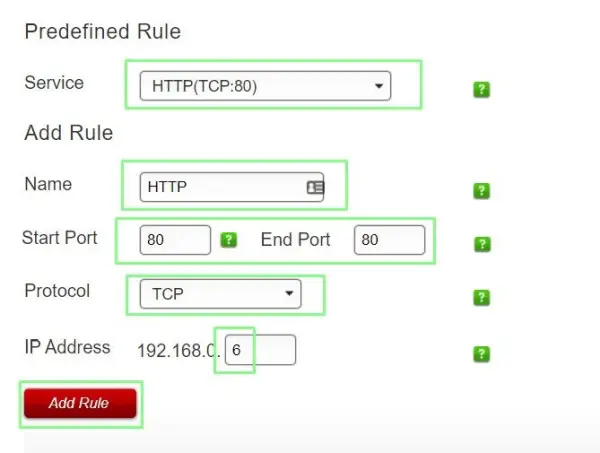
6. Configure the service to utilize HTTP on port 80, and establish a rule to manage HTTP traffic. Define the starting and ending port as 80, specify the protocol as TCP, and set the IP address to match that of your Pico W. Afterward, save the configuration and put the rule into effect.
7. On a separate device connected to a distinct network, such as a cellular network, launch your web browser and navigate to your external IP address. You will then be able to access the web page provided by your Pico W.