I want one! (how to order)
Something not working?
Raise an issue.
(In early 2014 we ran a Kickstarter campaign to fund the first production version, which is due for delivery in June 2014. If you missed it, you can get one from Pimoroni.)1
Contents
- 1. Pi to Go!
- 2. User Guide
- 2.1. Warnings!!!
- 2.2. Installation and Use
- 2.2.1. Quick Start
- 2.2.2. Installing the Software
- 2.2.3. Connecting the Power and the Pi
- 2.2.4. Turn On, Turn Off
- 2.3. Choosing and Configuring Batteries (Etc.)
- 2.3.1. Choosing Default Supply Profiles
- 2.3.2. Using the Configuration Tool on the Pi
- 2.3.3. Command Line, Python API and Daemon Config Hacking
- 2.4. Troubleshooting and FAQ
- 2.4.1. Wh…?
- 2.4.2. Pi Models: A, A+, B, B+, 2/B+
- 3. Background: Mobile Pi Power
- 3.1. The Prototypes
- 3.2. The Perfect Battery Pack
- 4. The MoPi Software Suite
- 4.1. simbamond, the simbamon daemon
- 4.2. The Python API
- 4.3. MoPi from the Command Line
- 4.4. Configuring Your Power Supplies
- 4.5. Monitoring
- 4.6. simbamon: a simple battery monitor
- 4.6.1. Design Notes
- 4.6.2. Implementation
- 4.6.3. Installing simbamon
- 5. How it Works: the Hardware
- 6. Testing
- 6.1. The Longer-Lasting Snack
- 6.2. Battery life
- 6.2.1. Battery life under load
- 6.2.2. What the sun says
- 6.3. Methods in the Madness: Debugging and Software Development
- 7. In the Wild: Applications
- 7.1. Outdoor Adventure Kit
- 7.2. Outdoor Experimenter Kit (Light)
- 7.3. Outdoor Experimenter Kit (Light and Air)
- 7.4. Kickstarter Backer Projects
- 7.4.1. Night Camera
- 7.4.2. K9
- 7.4.3. Self-Balancer
- 7.4.4. Garden Camera
- 7.4.5. Remote Switch
- 8. Batteries, Holders and Chargers
- 9. Other Directions
- 9.1. A Possible Charging Circuit
- 9.2. Other Options
- 10. Linux is Lovely
- 10.1. Glitches in the Pi’s I2C Bus
- 10.2. Installing I2C
- 10.3. Debugging with I2C Tools

1. Pi to Go!
MoPi is mobile and 24/7 power for the Pi. On your bike, up a tree, or for your home server: we’ve got you covered.
Features:
- multiple inputs — standard batteries, car power sockets, old laptop supplies, solar panels, and more… all attachable via standard screw terminals
- hot-swap power replacement without stopping work
- shutdown the Pi cleanly when batteries discharge
- integrated on/off switch
- usable as a UPS (uninterruptible power supply) by attaching both batteries and mains
- on-board LED indicators and on screen linux system notifications
- configuration of multiple battery chemistries and number of cells from a UI on the Pi
- full API in Python, plus a shell-friendly command-line interface
- stackable headers allowing connections of multiple boards at once (e.g. MoPi + XLoBorg, or MoPi + AirPi, or etc.).
- PCB remoting pads for the power switch
- self-resetting fuse for over-current protection
- two-way communication via the I2C bus
- remote power-off: tell MoPi to power down the Pi when logged-in remotely (after a clean shutdown, of course)
- timer-based wake-up: tell MoPi what time you want your Pi to wakeup, then power it down and MoPi will boot the Pi as requested
- 3.3V supply mod: swap three resistors and supply 3.3V, overpowering the Pi’s on-board regulator and saving the power that is dissipated there, for weight and battery life critical applications like ballooning
- supports Pi models A, B and B+
- wide input voltage range: 6.2V to 20V2
And it even fits in the Pibow (and other well-known Pi cases):
2. User Guide
2.1. Warnings!!!
- DO NOT plug MoPi onto your Pi while the Pi is powered up!
- DO NOT touch electronic components when they’re powered up — you may damage them, or burn your fingers!
- AVOID handling circuit boards when charged with static!
- ALWAYS read the small print on all components supplied with your MoPi
- ALWAYS treat batteries and other power supplies with respect — if abused the energy they contain may surprise you in dangerous ways!
- DO NOT feed MoPi to your dog, eat nuts if you’re allergic to them, or lose your sense of humour.3
2.2. Installation and Use
2.2.1. Quick Start
If you’re in a hurry:
- Install the battery monitoring software and shutdown:
- sudo apt-get update
- sudo apt-get install simbamond4
- sudo poweroff
- Connect your batteries to the MoPi
- Attach the MoPi to your Pi and press the Power Button for 3 seconds
For more details on each step, see below.
2.2.2. Installing the Software
As noted above, you can install the battery monitoring software like this:
- sudo apt-get update
- sudo apt-get install simbamond
(We assume you’re using the Raspbian flavour of Debian GNU Linux here.)
Occasionally this method may cause glitches (if you’ve a very old version of the rest of the operating system installed, for example). The most cautious recipe is to update your firmware and the operating system, then install the MoPi software, and to reboot between each step:
- sudo apt-get update
- sudo apt-get upgrade
- sudo reboot
- sudo rpi-update
- sudo reboot
- sudo apt-get install simbamond
- sudo poweroff
Note that if you’re installing the software without MoPi attached, or without power attached to MoPi, you will get a warning message5; just ignore it at this point!
2.2.3. Connecting the Power and the Pi
Next connect one or more power supply to MoPi using the screw terminals on the underside of the board. Then gently push fit MoPi onto your Raspberry Pi’s GPIO pins. Make sure you do this with the Raspberry Pi turned off, or you risk a reset.
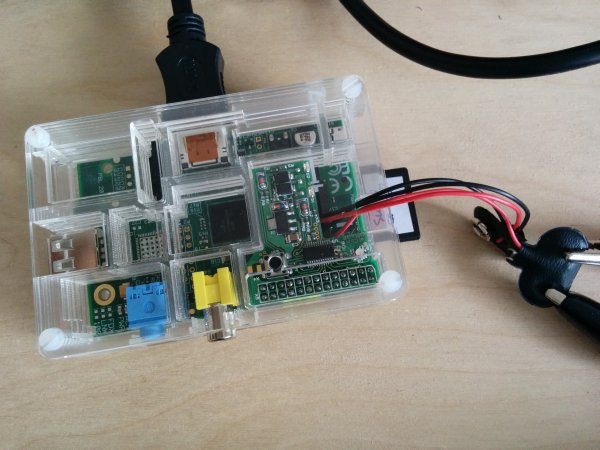
The components on the MoPi are as follows:
When connecting two power sources (e.g. two battery packs, or one solar panel and one battery pack) the ground wires (-ve, typically black) both share the middle connector on the screw terminals. The live wires (+ve, typically red) then get one each of the other connectors. The lower of the supply connections shown in the schematics corresponds to source 1; the other to source 2.
When you’ve connected your supplies, MoPi then fits onto the Pi as shown on the right:
The charge level of each source is signalled by the two amber LEDs on the top of the board, and the overall health of the supplies by a single RGB6 LED.
2.2.4. Turn On, Turn Off
When the Pi is powered off, press the power button for 3 seconds to turn it on.7
When the Pi is powered on, press the power button for 3 seconds to turn it off. This will shut the Pi down cleanly (which can take up to around 30 seconds). If you hold the power button down for 10 seconds, the power will shut down immediately.
2.3. Choosing and Configuring Batteries (Etc.)
The short story is this:
- Any power supply connected to the MoPi must be capable of at least 6.2V under load, and no more than 20V.
- The MoPi must be configured correctly both to avoid damage to rechargeable batteries and to avoid unexpected shutdowns!
How do I configure MoPi? There are 3 ways:
- Choose one of the on-board defaults—easy peasy!
- Use the Configuration Tool8 on your Pi—straightforward.
- Use the command-line interface, and/or edit the daemon config data on your Pi—advanced.
Let’s take each of these in turn…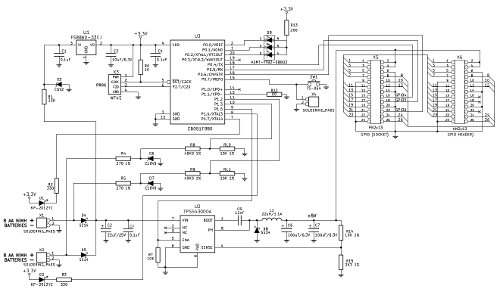
2.3.1. Choosing Default Supply Profiles
MoPi has two default supply profiles built-in:
- Non-rechargeable or non-battery supplies.
- Eight NiMH AA rechargeable batteries.
The default is #1, so that any supply can power the MoPi. To choose #2, you need to remove the small jumper on the screw terminal side of the MoPi, either completely or replaced on only one of the pins.
Note: when we supply MoPi with batteries we fit the jumper to choose profile #2, that is so it matches NiMh the batteries we shipped!
You can see the jumper in this picture: the little black component sticking up and overlapping with the right hand end of the white sticker on the GPIO connector (labelled 0014):
Here’s a closer view:
Now here’s what it looks like when you remove the top to select profile #2:
And here’s the top of the jumper replaced on only one pin, again selecting profile #2: This is useful to avoid losing the tiny little thing!
2.3.2. Using the Configuration Tool on the Pi
If you’re using a supply that doesn’t match MoPi’s two built-in profiles you need to run a configuration utility on the Pi itself. This will prompt you to enter details of the supply, then calculate appropriate values to send to the board over I2C. It will also store the config data and resend it to the board after reboots as necessary.
For more detail: MoPi is mobile, hot-swap and 24/7 power for the Raspberry Pi.