Want to use a device that HomeKit doesn’t support? Get Raspberry Pi running with Homebridge using Resin OS and change you home forever.

Things used in this project
Hardware components
Raspberry Pi Zero Wireless
Pimoroni Red/White Raspberry Pi Zero Case
AC/DC Micro-B USB Adapter 2A
Software apps and online services
Story
I’ve been nerding out. It’s something I just can’t stop sometimes. This time, it’s about the connected home.
One of the coolest and easiest things to do is to bridge the gap between devices that work with Apple’s HomeKit and ones that don’t. We had purchased some WeMo light switches a while back but we desired a little more functionality. (Plus, it makes me cringe to think every WeMo is running DDWRT as an operating system.)
I’m talking about things like, turning off lights when we leave or turning lights on at night when we get back home. These few things make a world of difference and, if you have the internet connected light switches, why not make it happen?
The Problem:
Connect and use non-HomeKit devices like the Nest Thermostat and Wemo light switches with HomeKit.
The Concern:
Make it as easy as possible to deploy and maintain in the future.
The Result:
It definitely works and is minimal maintenance. Don’t take my word for it though. Follow along and learn how to set it up the way you want it!
Research
So, I got to researching and found the Homebridge project. Homebridge emulates a device that operates on the HAP protocol that Apple supports for Homekit. Within Homebridge, you can configure as many devices via as many different interfaces you could imagine. Deploying it to a Raspberry Pi, or similar, can be troublesome and wraught with errors. I’m talking about scary scripts, installing things with NPM. (Oh, and if you don’t have NODE installed? Gotta do that too!)
So why not take a different approach?
Enter Resin OS.
Some advantages of Resin OS are:
- Deploying a pre-optimized image for the Yocto platform
- No configuring of any Linux anything (except for the config.json)
- Get up and running in a few minutes (mostly flashing and container initialization)
I originally played around with Resin’s online platform which shows some promise. For those developers who don’t want to spend time writing code for OTA updates and building Yocto images manually, you should definitely take a look at Resin.io. (By the way, I have no affilliation with Resin, I think they’ve done a great job and they’ve contributed to the community significantly with their open source tools: http://resinos.io, https://etcher.io, https://www.balena.io)
Install HomeBridge
Resin themselves have some fantastic documentation. I barely had to look anywhere when error messages came up while developing the Dockerfile.
Note: I was orginally using the slim image which does not have all the needed utilites that Homebridge requires, easier to just use the latest image instead.
The instructions are as follows:
Install Dependencies
On Mac, Node is the only thing you may need to install. Homebrew works best here.
brew install node
2.Download and install the resin-cli:
npm install –global –production resin-cli
3. Download your image from the download link if you haven’t already.
4. Modify the image to your liking by using the cli.
$ sudo resin local configure ~/Downloads/resin.img
? Network SSID Wolff Den
? Network Key This is not our password.
? Do you want to set advanced settings? Yes
? Device Hostname resin
? Do you want to enable persistent logging? no
Done!
5. “Flash” the image to an SD card or USB storage. Make sure you have a free device to write to!
$ sudo resin local flash ~/Downloads/resin.img
Password:
? Select drive (Use arrow keys)
❯ /dev/disk1 (32 GB) – RESIN
6. Wait for the process to complete and then eject the card. Pop it into the device you’ve configured the image for.
7. Once booted, you should be able to ping the device. Note: you may need to remove the USB media if you’re device has built in eMMC storage. Otherwise it will continue booting into the ResinOS setup.
ping resin.local
PING resin.local (192.168.7.45): 56 data bytes
64 bytes from 192.168.7.45: icmp_seq=0 ttl=64 time=9.004 ms
64 bytes from 192.168.7.45: icmp_seq=1 ttl=64 time=6.411 ms
64 bytes from 192.168.7.45: icmp_seq=2 ttl=64 time=4.337 ms
64 bytes from 192.168.7.45: icmp_seq=3 ttl=64 time=4.374 ms
8. Download the repository that I created here. You can use this repo as a jumping off point for more complex Homebridge installs.
9. Modify the config.json file to your liking. Highly suggest changing the pin number inside the config.json to something different as this is the one that Homebridge uses in their examples.
10. Also, feel free to modify the Dockerfile to match your needs. In this example the only thing that you may want to change is the image name. By default I have resin/raspberrypi-node:latest as the main image. More info about what’s available go here.
11. You can now push the included Homebridge Docker file and associated files directly to your embedded device.
sudo resin local push resin.local –source .
Note: this will take several minutes as it will be building the docker image on the embedded device. This takes much less time using the Resin.io platoform as it builds on your local machine and then sent to the embedded device as a complete image
12. Wait to see the output from Homebridge indicating it’s running.
rdt push completed successfully!
* Streaming application logs..
*** WARNING *** The program ‘node’ uses the Apple Bonjour compatibility layer of Avahi.
*** WARNING *** Please fix your application to use the native API of Avahi!
*** WARNING *** For more information see <http://0pointer.de/avahi-compat?s=libdns_sd&e=node>
*** WARNING *** The program ‘node’ called ‘DNSServiceRegister()’ which is not supported (or only supported partially) in the Apple Bonjour compatibility layer of Avahi.
*** WARNING *** Please fix your application to use the native API of Avahi!
*** WARNING *** For more information see <http://0pointer.de/avahi-compat?s=libdns_sd&e=node&f=DNSServiceRegister>
[2017-11-2 02:09:43] Loaded plugin: homebridge-platform-wemo
[2017-11-2 02:09:43] Registering platform ‘homebridge-platform-wemo.BelkinWeMo’
[2017-11-2 02:09:43] —
[2017-11-2 02:09:43] Loaded config.json with 0 accessories and 1 platforms.
[2017-11-2 02:09:43] —
[2017-11-2 02:09:43] Loading 1 platforms…
[2017-11-2 02:09:43] [WeMo Platform] Initializing BelkinWeMo platform…
Scan this code with your HomeKit App on your iOS device to pair with Homebridge:
┌────────────┐
│ 031-45-154 │
└────────────┘
[2017-11-2 02:09:43] Homebridge is running on port 51826.
[2017-11-2 02:09:43] [WeMo Platform] Found: Master Den [123456789ABC]
[2017-11-2 02:09:43] [WeMo Platform] Found: Jarchel Den [123456789BAC]
[2017-11-2 02:09:43] [WeMo Platform] Found: Front Door Light [123456789CBA]
[2017-11-2 02:09:44] [WeMo Platform] Jarchel Den – Get state: On
For some reason my initial setup did not show a QR code. Since then, this screen has always displayed a QR code that can then be scanned at the next step. (See below!)
13. Pop open your phone and look for an available accessory in Homekit. If you do not have a QR code you will have to tap on “Don’t Have a Code or Can’t Scan?” and enter the number manually.
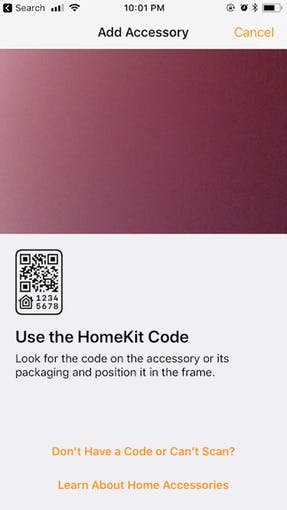
My finger in the front of the camera. But this is definitely the screen you should be in!
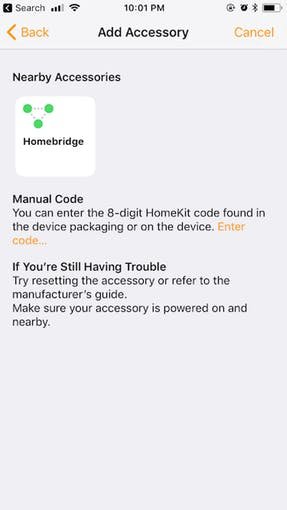
If you can’t scan for some reason,you can also select nearby accessories.At the very least your Homebridge install should show up here
14. Add your accessory by entering the passcode displayed earlier.
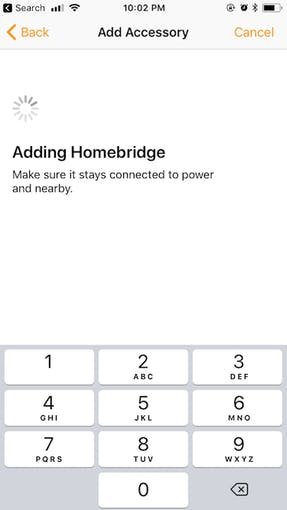
Entering the password
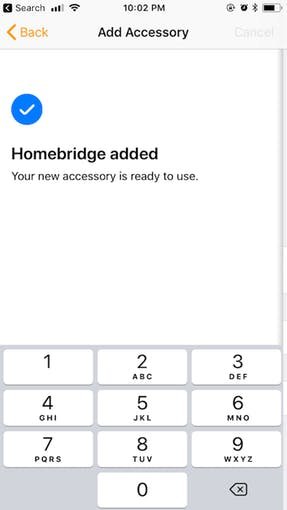
Success

screenshot of added device
Congrats! All your devices should show up in the screen. In my case on the latest iOS, HomeKit will walk you through adding the new devices to the rooms in your “house.” Then you go move onto adding automations to your HomeKit and make life a ton easier!
Thank you for making it this far with me through this quick tutorial. You can download the code from Github using the link below. Also, stay up to date with my latest projects by subscribing to my newsletter here.