Collects data and uploads it to Dropbox! Controllable through the Sense HAT joystick.
Story
Note: Feel free to use my code, but remember to credit me. (brendan-lewis@hackster)
I have read a lot about weather stations, so I decided to make my own. The code and setup is designed to be in a remote area.
This code runs on Python 2.7 and requires an internet connection throughout the setup and after. It assumes your OS is Raspbian.
Read through the instructions before you begin, to make sure you can do this. That way, you won’t get stuck halfway through setup.
Step 1: Install the Dropbox library
The Dropbox library is installed through pip. If you do not have pip, open the terminal and run this:
sudo apt-get python-pip python3-pip
Run this to install the dropbox library:
sudo pip install dropbox
It will probably take about 15-30 seconds.
Step 2: Set up Dropbox
To successfully upload to Dropbox, you need to create a free account at https://www.dropbox.com/, or if you already have an account, you can use that.
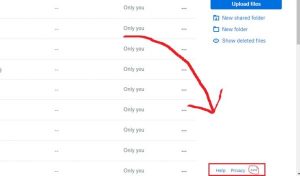
On your Dropbox homepage, click on “…” at the bottom right and click on “Developers”.
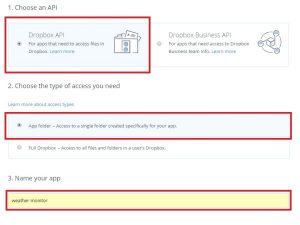
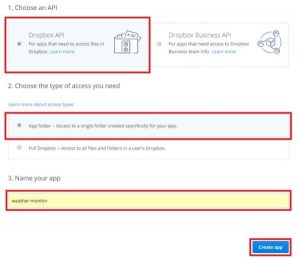
On the developers page, click “My Apps” on the left, then click the “Create app” button. Click “Dropbox API”, then click “App folder”, then type “weather monitor” under “Name your app”. (See the below picture if that was really confusing.)
Once you create your app, you will be automatically redirected to a settings page. You will need to scroll down to “Generated access token” and click the “Generate” button.
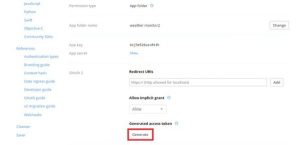
Save the access token that appears – it will only generate on this page visit.
Step 3: Set up the Pi
The Raspberry Pi needs to be connected to the Sense HAT before it is turned on. Once the Pi is on, put the program at the bottom of the page on it as “weather.py” in the Documents folder.
Replace “MY_ACCESS_TOKEN” on line 7 with your access token. Make sure your Pi has an Internet connection and the Sense HAT is functional. Also, check that the weather program works. The data should be in “Apps/weather monitor/” on your Dropbox homepage.
Step 4: Run weather.py on boot
On your Pi, open a terminal and type:
sudo crontab -e
If you have never used crontab before, it will ask which text editor you prefer. Select nano by typing the number next to it, then press Enter.
Go down to the end of the file using the arrow keys, and type the following on a new line:
@reboot python /home/pi/Documents/weather.py &
Then, press Ctrl+O (to save) and then Ctrl+X (to exit).
Congratulations! You are done with setup… almost.
Now, the only thing you have to do is put your new Weather Monitor in the location you want, with something waterproof around it / covering it completely. Make sure there is airflow so the sensors are accurate. Feel free to add anything you want, such as a battery, radio communication instead of WiFi, or even make it tweet something whenever some weather event happens. If you are setting up a surveillance system, you can follow this project.
Source: Weather Monitor