
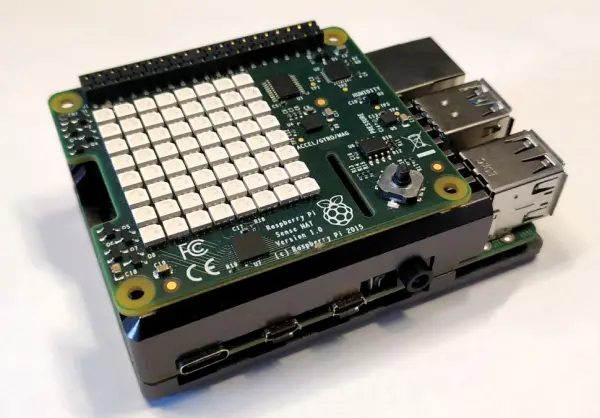
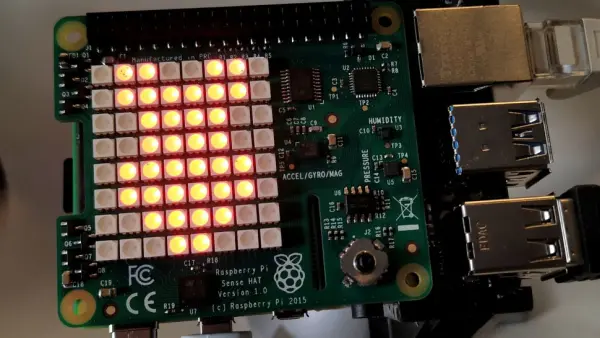
The Raspberry Pi offers a wide range of HATs (Hardware Attached on Top) that can be connected to its GPIO pins, providing additional functionality such as lights, sensors, and motors. One notable HAT is the Raspberry Pi Sense HAT, which presents an excellent opportunity for both kids and adults to engage in programming while working on fun and educational projects.

As the name suggests, the Raspberry Pi Sense HAT comes equipped with various sensors for measuring temperature, humidity, pressure, magnetic forces, orientation, and acceleration. It also features an attractive 8 x 8 grid of multicolor LEDs that can be used to scroll text and display pixelated images. Additionally, the HAT includes a joystick for basic input in project development. The Sense HAT is compatible with all Raspberry Pi models, from the original B+ to the latest Raspberry Pi 4, and it can be programmed using various languages, including Scratch 3—a user-friendly block-based language designed for kids.
In the following sections, we will guide you on how to use Scratch 3 to program three different projects using the Raspberry Pi Sense HAT. These projects involve scrolling your name using LEDs, utilizing the joystick for input, and reading sensor data for temperature and orientation. These examples will demonstrate the versatility and creative potential of the Sense HAT for engaging programming experiences.
What You’ll Need for Raspberry Pi Sense HAT Projects
For this project, it is recommended to use a Raspberry Pi 4, preferably one with at least 2GB of RAM. While a Raspberry Pi 3B+ can be used, it may result in slow performance when running Scratch 3.
In addition to the Raspberry Pi board, you will need the Raspberry Pi Sense HAT, which can typically be purchased for around $30 U.S. or even less.
Apart from the specific components mentioned above, you will also require the standard Raspberry Pi gear. If you are setting up a Raspberry Pi for the first time, you will need a microSD card for storage and a power adapter. For the Raspberry Pi 4, a power adapter with 3 amps and 5 volts is recommended. Alternatively, you can opt for a headless setup that allows you to control the Pi from your PC, in which case a keyboard, mouse, and monitor are not necessary.
Setting Up the Raspberry Pi Sense HAT and Scratch 3
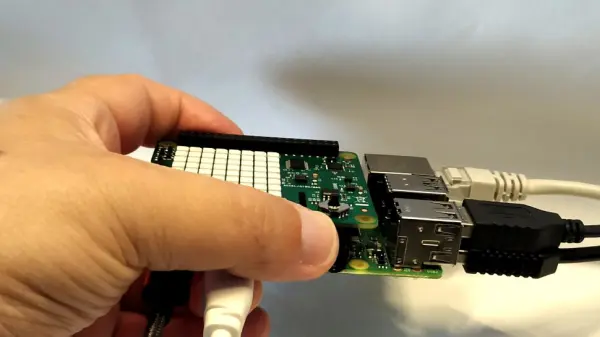
- Begin by connecting the Sense HAT to your Raspberry Pi. Make sure the power is turned off before proceeding. Attach the Sense HAT to all 40 pins of the GPIO header, ensuring a secure and snug fit. You can use the provided brass standoff to firmly fix the board in place, ensuring stability.
- Access the raspi-config utility to enable I2C communication. You can do this by entering “sudo raspi-config” in the command prompt and then navigating to Interfacing Options -> I2C. Once enabled, remember to reboot the system for the changes to take effect.
- Check if Scratch 3 is already installed on your Raspberry Pi. If not, proceed with its installation. The simplest way to install Scratch 3 is by entering the appropriate commands or following the instructions provided by your operating system.
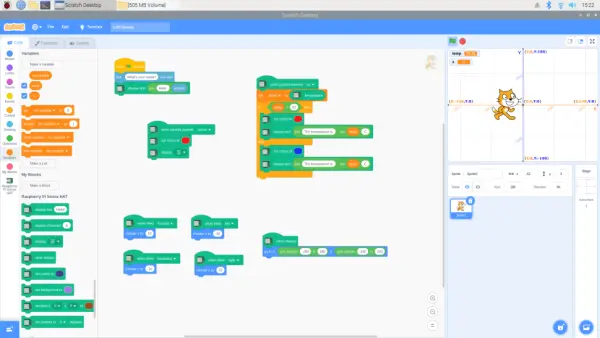
sudo apt-get install scratch3In Scratch 3, the interface is divided into three main sections, which are arranged from left to right:
- The left section contains blocks that can be used to code a project. These blocks are grouped by their functions and are color-coded for easier identification. You can also filter the blocks based on their specific functions. Additionally, there are tabs available for managing costumes (changing the appearance of a sprite) and sounds associated with a game.
- The central area is the coding area where you can drag and arrange the blocks to create your project. This is where the programming logic is constructed by connecting the blocks together.
- The right section is the stage, which serves as the visual representation of your project. It is where your sprite (character or object) reacts to inputs and produces outputs. Below the stage, you will find a section for managing sprites (characters or objects) and backgrounds.
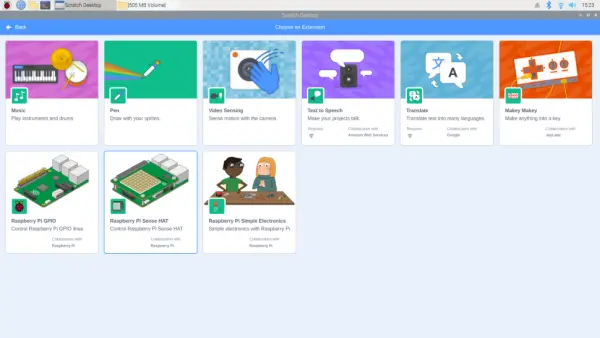
To utilize the Sense HAT in Scratch 3, you will need to install the Sense HAT Scratch 3 extension. Follow these steps:
- Click on the icon located at the bottom left corner of the screen. This will bring up a menu of available extensions.
- Look for the “Raspberry Pi Sense HAT” extension and click on it to initiate the installation process.
- After a short moment, a new section of blocks specific to the Sense HAT will appear. Now, you are ready to create your first project using the Sense HAT functionality.
Scrolling “Hello World” App with Raspberry Pi Sense HAT
To familiarize yourself with the Sense HAT extension, let's create a basic project that involves scrolling a name. Follow these steps:
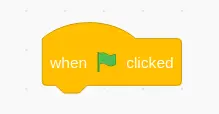
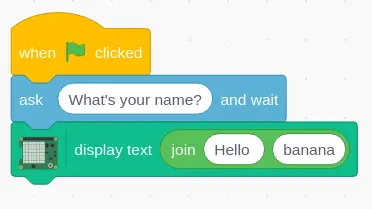
- In the coding area of Scratch 3, locate the “Events” section and drag the “When Green Flag is clicked” block into the coding area.
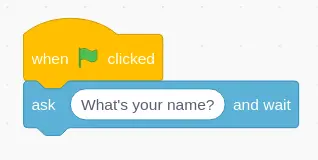
- From the “Sensing” section, select the “What is your Name” block and drag it to the coding area. Connect it below the previously placed “When Green Flag is clicked” block.
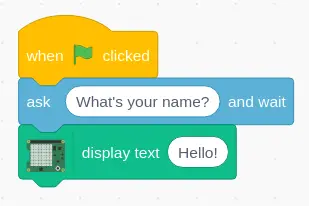
- Grab the “Display Text” block from the Sense HAT section and connect it to the “What is your Name” block. This will allow us to both greet the user and address them by their name.
- Locate the “join apple banana” block in the “Operators” section and replace the word “hello” in the “Display Text” block with this new block.
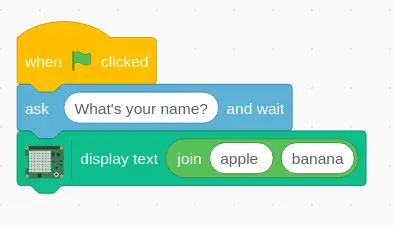
5. Change “apple” to “Hello ” (the space after Hello is important!).
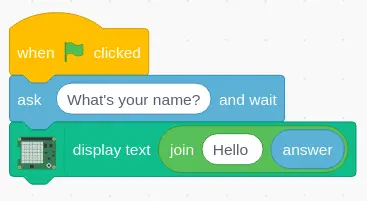
- Take the “answer” block from the “Sensing” section and place it on top of the “banana” section within the join block. This action will store the response to the question “Who are you?” as a variable named “answer,” which will then be utilized to greet the user by their name.
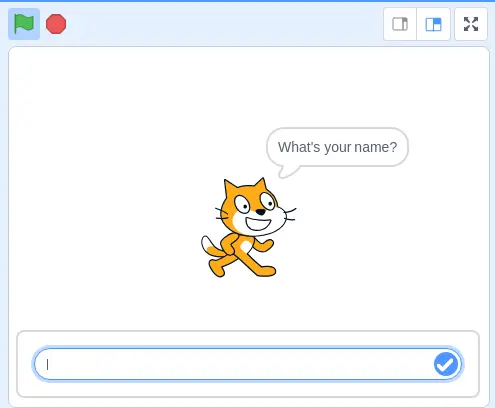
7. Click on the Green Flag icon, just above the stage and the sprite will ask your name.
8. Enter your name and watch as your Sense HAT greets you by name.
Joystick Input, Temperature Reading with Raspberry Pi Sense HAT
The Sense HAT is equipped with a basic joystick that can be utilized for input. To ensure that it functions correctly, we will create a simple test project along with a more complex one. Let's start with the test project:
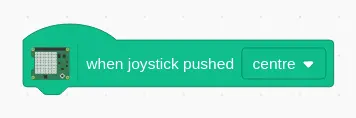
The test project involves using the “When joystick pressed up” block, located in the “Sense HAT” section.
- Take the “When joystick pressed up” block from the “Sense HAT” section and place it in the coding area. Then, modify the direction to indicate pressing the joystick from the up position to the center position.
2. Add the “set color to” block, also from the “Sense HAT” section. Then change the color to something interesting.
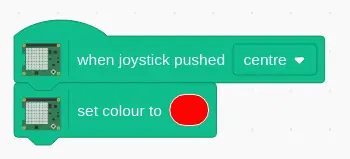
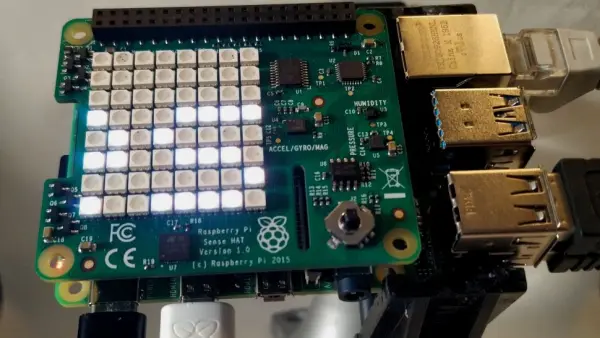
3. Connect the “Display..” block to the previous block. The default image is some pixel art of the Pi logo.

Once the code is ready, test it by pressing the center of the joystick, similar to how you would press the analog stick on a PS4 or Xbox One controller. As a result, you should observe the Raspberry Pi logo displayed on the LED matrix, with the option to choose your preferred color.
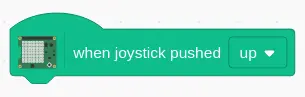
Now, let's proceed to a more complex project within the same coding area. This project involves checking the temperature using the onboard temperature sensor of the Sense HAT. It will store the temperature in a variable and compare it to determine if it is above or below 20 degrees Celsius. Depending on the result, the text scrolling across the Sense HAT will be displayed in either red or blue.
- Drag the “When joystick pressed up” block into the coding area.
- Click on “Make a variable” located in the variables section. Assign the variable the name “temp” and keep the default settings.
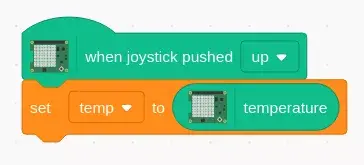
- Take the “Set my variable to 0” block and position it beneath the previous block.
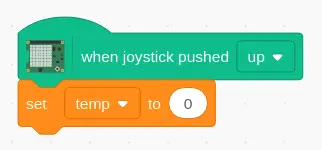
- Utilize the dropdown menu to replace “my variable” with “temp”.
- Move the “temperature” block and position it over the “0” value within the “set variable” block. This action will update the “temp” variable with the current temperature obtained from the Sense HAT.
- Insert the “If, then, else” block and connect it to the preceding block.
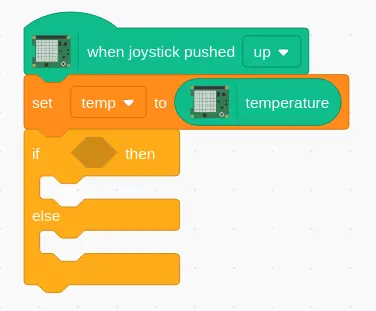
7. Drag “_ > 50” and place it inside the blank shape between “if and then,”
![]()
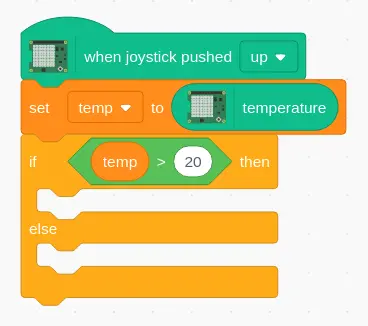
- Take the “temp” variable block and position it over the first empty space in the “_ > 50” condition. Then modify the value “50” to “20”. This indicates that if the temperature exceeds 20 degrees Celsius, a certain action will occur.
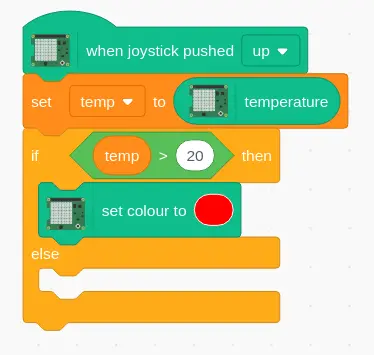
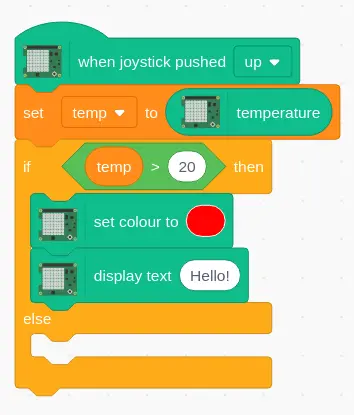
- Attach the “Set color to” block from the Sense HAT section to the “IF” section of the block and adjust the selection to red.
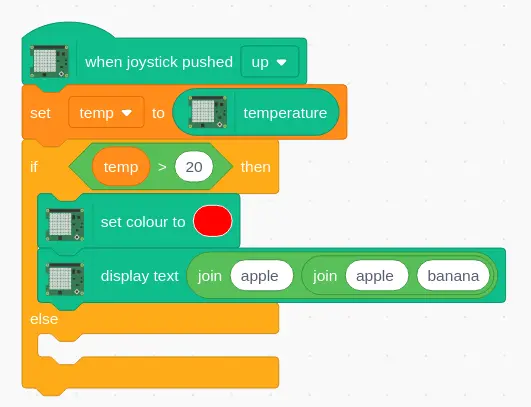
- Link a “Display text” block from the Sense HAT section, and drag a “join” block from the Operators section and position it over the “Hello!” part of that block.
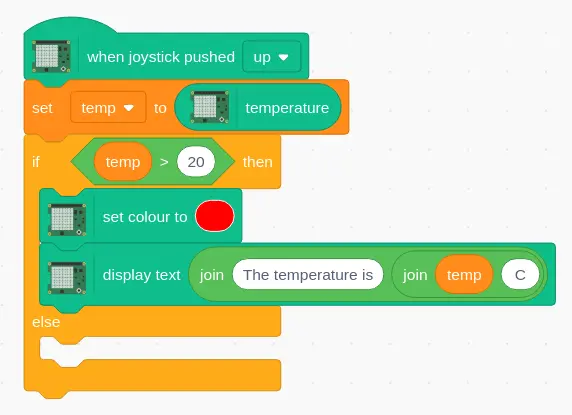
- Modify the initial part of the text to say “The temperature is,” and in the second slot, drag another “join” block.
- Move the “temp” variable and position it in the following slot, and in the final slot, enter “C.”
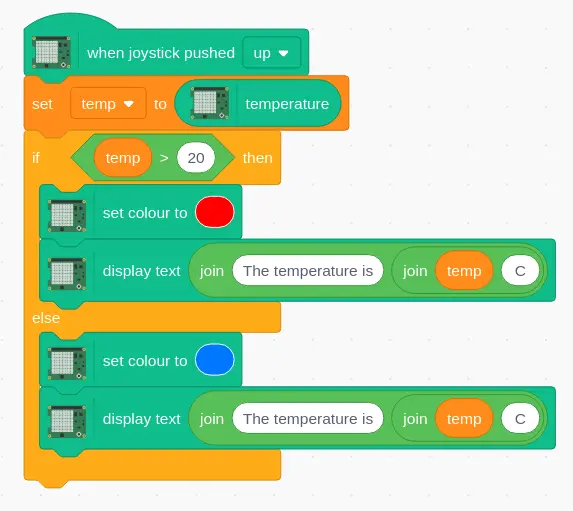
- In the else condition, which is triggered when the temperature is below 20°C, make a duplicate of the color and text blocks (you can right-click on them) and position them within the Else portion. Just ensure to modify the color accordingly!
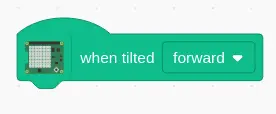
Accelerometer Detection on the Raspberry Pi Sense HAT
2. Connect “Change Y by 10” from the “Motion” blocks area.
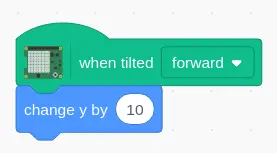
3. Tilt the Pi so the HDMI lead points to the ceiling and the sprite moves once.
4. Duplicate these blocks (right click), change the tilt to backward, and the 10 to -10.
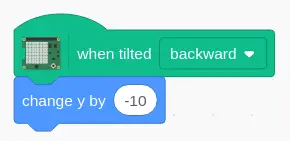
5. Move the Pi so the HDMI lead points to the floor and the cat moves down.
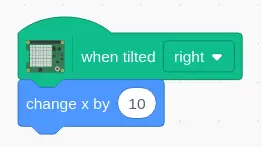
6. To move right we need to use another “When tilted forward” and change it to “right” and then from Motion use “Change X by 10”. Tilt the Pi right and the cat moves.
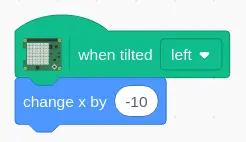
7. Duplicate and alter the code to go left in a similar manner to going Backward. Test the code by moving the Pi around.
So there we have it, three quick projects to work with Sense HAT via Scratch 3.