In this instructable we show how to use a 433 Mhz transmitter to control your home’s RF devices though Sensorflare using a RaspberryPi.
Components Required :
- 433Mhz transmitter module
- RaspberryPi (any model)
- Jumper Wires
- any RF controlled device
- active account on sensorflare.com
Step 1: Setup Sensorflare to communicate with you RaspberryPi
First you need to connect to Sensorflare and visit the Connected Accounts page to enable communication between Sensorflare and your Raspberry Pi.
Click the “Add new account” button and select Raspberry Pi 433MHz RF option.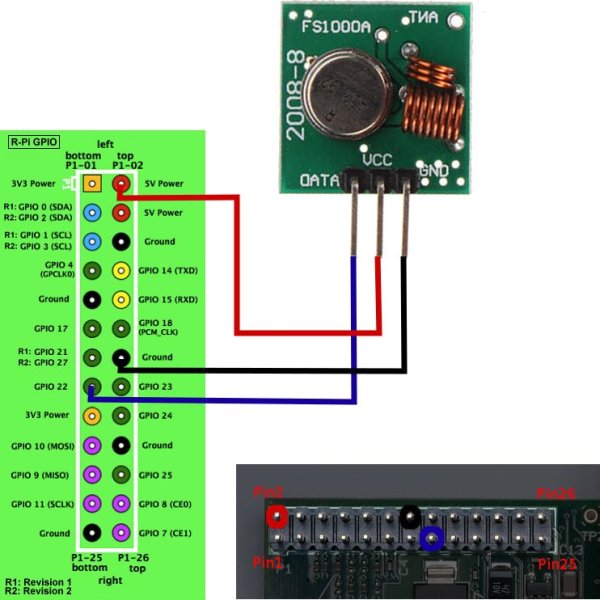
Step 2: Securing your connection to Sensorflare
At this point you will need to set a password so that the communication between your Raspberry Pi and Sensorflare is protected.
Keep this password in mind as you will need to set it later on your Raspberry Pi.
Step 3: Copying the property file
After you have successfully set the password the contents of the property file to be added to your Raspberry Pi are available. Copy the contents to a local file and replace ‘****’ with the password you entered in the previous step.
Step 4: Connecting the RF transmitter
First we need to connect the RF transmitter to our Raspberry Pi as displayed in the image above.
Step 5: Installing the Software on the Raspberry PI
The next step is to install the libraries that are needed send RF commands using the Raspberry Pi itself.
- We need to install WiringPi following the instructions available here.The commands usually needed are:
sudo apt-get update
sudo apt-get upgrade
sudo apt-get install git-core
git clone git://git.drogon.net/wiringPi
cd wiringPi
git pull origin
cd wiringPi
./build - Next we need to install codesend. Detailed instructions and information is available here. The commands usually needed are:
git clone git://github.com/ninjablocks/433Utils.git
cd 433Kit/RPi_utils
make
For more detail: 433MHz Smart Home Controller with Sensorflare and a RaspberryPi