
Remote Access Your Raspberry Pi from Anywhere with Ngrok (Easy Guide)
Tired of being stuck with local access? Learn how to break free with Ngrok! This simple guide takes you through the steps of remote access your raspberry pi from any computer or mobile device. Say goodbye to network limitations and hello to limitless Raspberry Pi possibilities!
Accessing your Raspberry Pi from outside your home or local network can be quite challenging. Obtaining data from your Raspberry Pi while on the go, or while at work or school, can feel nearly unattainable. While there are methods to reach the internet, they often come with complications: ISP restrictions, the necessity of port forwarding setup, potential violations of ISP terms of service, and router customization requirements.
This tutorial will illustrate the process of accessing your Raspberry Pi from beyond your home or local network using the Ngrok Tool.
ngrok requires very little setup, just a few commands in the terminal, and works very reliably.
In this guide, we'll outline the steps to remotely access the Raspberry Pi through a different network using the PuTTY terminal. Additionally, for Raspbian for Robots users, we'll provide instructions on utilizing noVNC to remotely access your Raspberry Pi's desktop and Shellinabox from locations beyond your home network.
Steps for Remote Access Your Raspberry Pi using Ngrok
Ngrok is a secure tunneling service designed to make your device accessible online from anywhere. Tunneling involves establishing a private connection between two computers over a public network, such as the internet. When setting up a tunnel between computers, it should ensure security, privacy, and the ability to bypass network barriers like routers with port blocking and firewalls. This service proves helpful by enabling tunneling of requests from the expansive internet to your local machine, even when it's secured behind a firewall or within a protected Wi-Fi network. Using this platform, you can easily access your Raspberry Pi from beyond your home or local network.
To explore more about ngrok and its functionalities, visit this link.
Installing Ngrok
To utilize Ngrok, you'll need to download the Ngrok application onto your Raspberry Pi. To achieve this, input the following command into your Raspberry Pi terminal:
sudo wget https://dl.ngrok.com/ngrok_2.0.19_linux_arm.zip
and then unzip it using:
sudo unzip ngrok_2.0.19_linux_arm.zip
This completes the installation process.
Sign Up
To establish a secure connection with your Pi, registration is required. The free version of ngrok permits access to one terminal concurrently and generates a random web address each time ngrok is initiated. Utilizing the free version necessitates generating a host address from your Pi each time you desire to establish a remote connection, subsequently sharing this address with the remote user for access.
To create a ngrok account, visit this link and proceed by clicking ‘signup' to obtain an authtoken key. This token is vital if you seek to use your custom domain for online SSH.
Upon logging in to the ngrok site, you'll receive an authtoken key, consisting of numerous characters. It's crucial to keep this token secure, as anyone possessing this token gains access to your Raspberry Pi.
To integrate this token into your Raspberry Pi's command line, use the following:
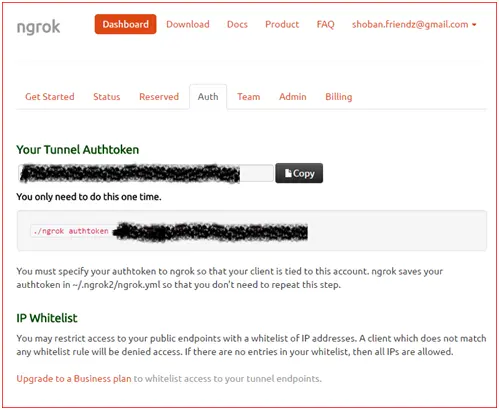
./ngrok authtoken yourauthtoken
Replace ‘yourauthtoken' with your unique token obtained from the ngrok website. This action is a one-time requirement for your Raspberry Pi, and the token will be stored in the configuration file.
You're prepared to establish a connection using ngrok.
The paid version provides features for multiple simultaneous connections, the ability to access your terminal through a customized URL, and the option to password-protect it. This can be utilized to remotely access the Raspberry Pi during boot from locations outside your local network. Detailed examples and instructions for these functionalities can be found here.
Accessing the Pi using Putty From a Remote Network
Type the following command in your Raspberry Pi terminal to enable access Putty Terminal from remote.
./ngrok tcp 22
If your tunnel status is “online” you can open your Raspberry Pi terminal using Putty anywhere. Note the Host Address and the Port Number shown in the picture below; you’ll use these to access the Raspberry Pi.
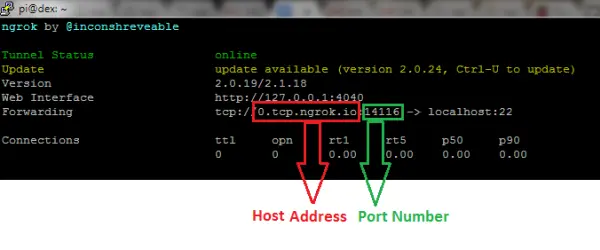
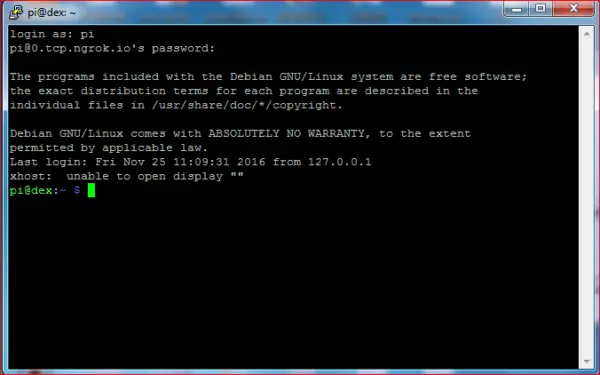
To initiate SSH online, begin by launching a new PuTTY session on any computer connected to the internet. Enter your ngrok host address and port number similar to the configuration depicted in the image below, then click ‘Open.'

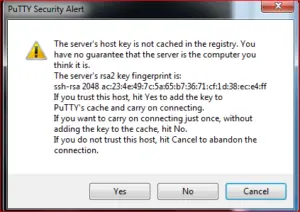
When attempting to access your Pi remotely for the first time, a Putty Security Alert window will appear. It will ask for your consent to store the rsa2 key in its cache for future reference. Click ‘Yes' to proceed.
Now you have your computer connected to your Pi away from your home/local network.
Accessing The Pi Desktop Using noVNC Remotely
Enter the command below into your Pi terminal to remotely access your Pi Desktop using the noVNC terminal:
./ngrok tcp 8001
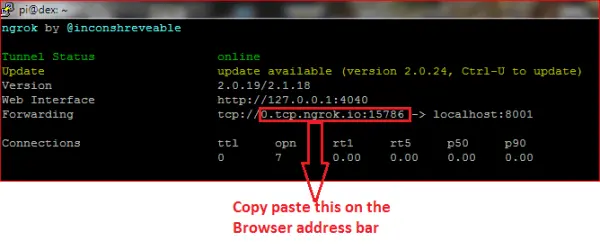
You will see a window prompting to enter the password for the Raspbian for Robots image. The default password is robots1234. Type the password and press Enter.
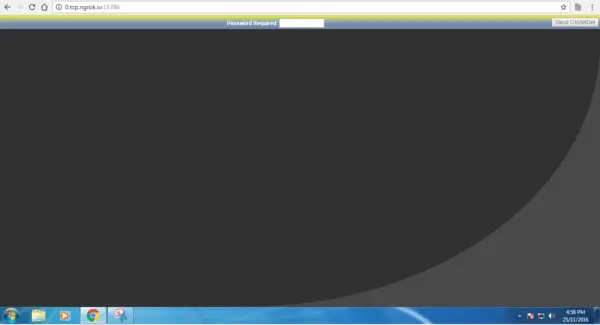
Now your computer is connected to your Pi away from your home/local network and you can access the files using the noVNC.

Accessing the Pi using Shellinabox From a Remote Network
Type the following command to access Shellinabox terminal remotely:
./ngrok tcp 4200
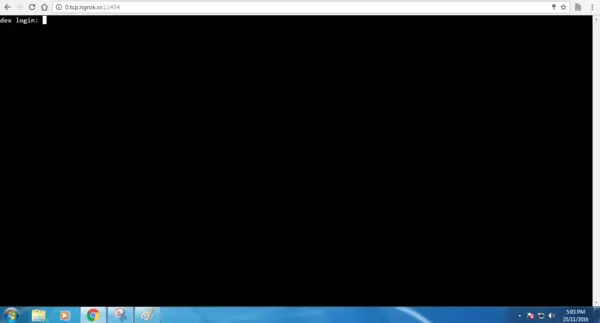
If your tunnel status is online, you can access your Raspberry Pi terminal via Shellinabox using a browser from any location. Simply open a browser on any computer or mobile phone connected to the internet and enter the address highlighted in the image into the browser's address bar.
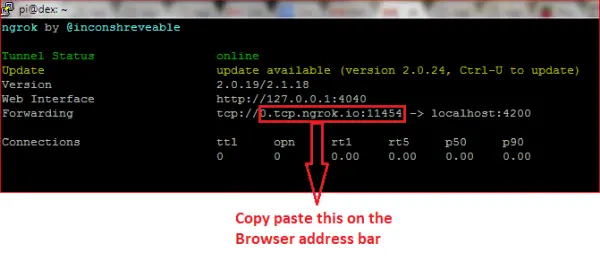
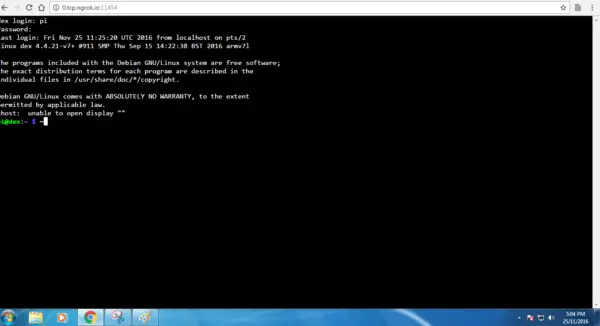
Upon opening the window, you'll be prompted to enter the login ID and password for the Raspbian for Robots image. The default login ID is ‘Pi,' and the password is ‘robots1234.'
Now your computer is connected to your Pi away from your home/local network and you can access the files using Shellinabox!
Conclusion
With ngrok all set up, you can now remotely access your Pi from a different network. The capability to access your Raspberry Pi from locations beyond your home or local network is essential for home automation and Internet of Things (IoT) projects. Whether you're accessing it from a mobile phone while away, connecting from a computer, or granting others access to your Pi from outside your network, you're all set to explore and experiment with various Internet of Things projects using the Pi!