
While the Raspberry Pi stands as a remarkable and adaptable computer, it does possess a notable drawback: the absence of a built-in power button. This deficiency in a standard on/off switch can potentially cause issues. Fortunately, users have the option to integrate their own power button for the Raspberry Pi.
You have two options: either create your own do-it-yourself power button or purchase one. Now, let's explore the process of incorporating a power button into your Raspberry Pi setup to ensure a secure and systematic shutdown.
Why You Need a Raspberry Pi Power Button
Utilizing a Raspberry Pi is generally straightforward, but issues may arise when powering it on or shutting it down, as outlined below.
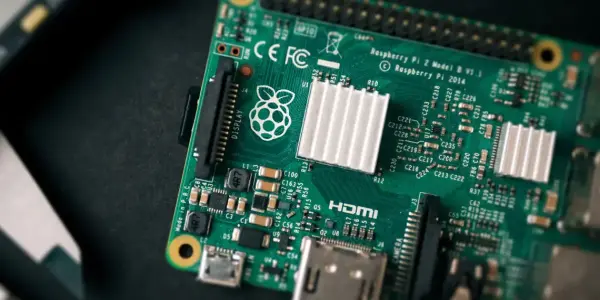
Upon initially unboxing the Raspberry Pi, one immediately notices the lack of a power button—a feature commonplace in devices spanning from desktops and tablets to wireless mice. Conversely, the Raspberry Pi operates without this conventional component.
The standard procedure involves connecting the USB power cable and allowing the chosen Raspberry Pi-compatible operating system (OS) to boot. While powering up proves relatively simple, the process of shutting down presents a distinct challenge. The solution typically involves executing a typed command or utilizing a mouse click to initiate the Pi's shutdown—however, this method isn't always optimal.
The Importance of Safely Powering Down
In cases where the Raspberry Pi experiences a crash or becomes inaccessible through remote access or direct input via keyboard, mouse, or display, abruptly shutting it down becomes a challenge. Resorting to pulling the power cable remains the only available solution.
However, this action poses potential problems.
When the power is abruptly cut while data is being written to the SD card, it can result in card corruption. This often leads to an inoperable operating system that fails to boot. Although modern SD cards typically feature robust error correction capabilities, re-flashing a new OS might become necessary.
Moreover, such an incident can result in the loss of a significant amount of data. This loss can be particularly undesirable if the Raspberry Pi was being utilized for a specific project or for learning coding with platforms like Scratch.
The consequence of abruptly pulling the power and corrupting the card includes the potential loss of this valuable data. While cloning the SD card presents a viable solution to mitigate data loss, taking preventive measures remains superior to finding a remedy.
Safely shutting down the Raspberry Pi allows the operating system to conclude ongoing write processes to the SD card. This method facilitates a proper shutdown, preventing data loss and averting the risk of SD card corruption.
Mount a Raspberry Pi Off Switch on the GPIO
A method to ensure a secure shutdown for the Raspberry Pi involves utilizing a self-made switch connected to the computer's GPIO. Constructing your own switch can be achieved with a Python script and a single momentary switch. These components are typically affordable and often available for purchase in multiple quantities.
In instances where these components are unavailable or if immediate access to a switch is necessary, consider inspecting any outdated PC components you may have on hand. The type of switch required is akin to the power button found on your PC.
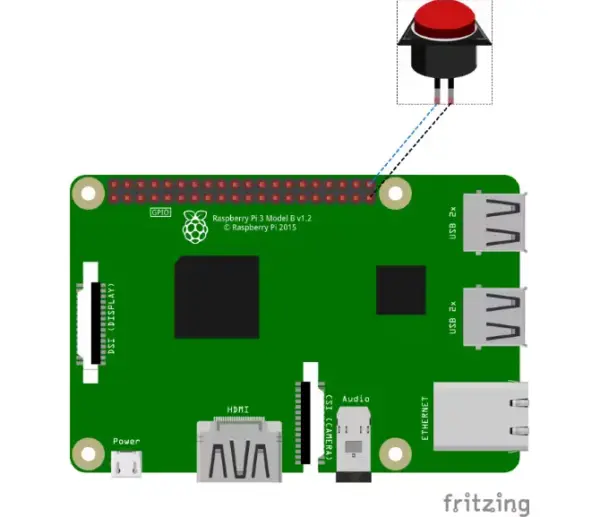
The recommended configuration involves connecting the momentary switch to GPIO pins 39 and 40 of a powered-off Raspberry Pi.
Upon restarting, the next step involves crafting the Python script and configuring the GPIO.
The GitHub project for the Raspberry Pi Safe Off Switch details the process of utilizing the GPIO Zero library to establish an off switch for the Raspberry Pi. While GPIO Zero comes preinstalled in complete editions of Raspbian Stretch, its manual installation becomes necessary if you are working with the Raspbian Lite version.
sudo apt update
sudo apt install python3-gpiozero
Next, create the script in your text editor. We're using nano:
sudo nano shutdown-press-simple.pyIn the text editor, enter or copy and paste the following script:
#!/usr/bin/env python3

from gpiozero import Button

import os

Button(21).wait_for_press()

os.system("sudo poweroff")
As evident, this pertains to the gpiozero library, designates GPIO pin 21 (mapped to physical pin 40 in the internal numbering system), and triggers the “poweroff” command upon detecting a button press. Save the script by pressing Ctrl + X, followed by Y to confirm.
Returning to the primary terminal window, proceed to grant execution permission to the script:
chmod a+x shutdown-press-simple.pyTo ensure this works following a reboot, append /etc/rc.local:
sudo nano /etc/rc.localIn the final line before the exit statement, add:
echo '~pi/shutdown-press-simple.py'Save and exit as before, then try the button out.
Safely Mounting the Power Button
It's quite common to inadvertently press the button due to its accessibility. Various solutions exist to address this issue, ranging from cautious mounting to placing it in a spot less prone to accidental contact. (Refer to the GitHub page for detailed insights on these solutions.)
Once installed, regardless of your preferred resolution, it's advisable to mount the button sensibly. Adjustments to your case might be necessary to accommodate the button, depending on factors like your Raspberry Pi model and the case type.
If feasible, opting for a recessed mounting of the button is recommended. This setup mitigates the possibility of accidental presses, akin to how a desktop computer's power switch is recessed for added protection against unintended activation.
Two Raspberry Pi Power Buttons You Can Buy
Seeking a unique solution? Various Raspberry Pi power buttons are available for purchase on the internet. Here, we highlight two well-known choices.
1. Pi Supply Power Switch
Crafted to function as an intermediary device positioned between the Raspberry Pi and the main power outlet, this power switch arrives in a kit form. The initial setup involves soldering the components onto the PCB (Printed Circuit Board) and incorporating a code obtained from GitHub before establishing connections. Equipped with three buttons, this device allows for switching on, switching off (akin to pulling a cable), and initiating a controlled, graceful shutdown. Additionally, the third button facilitates a reboot through a more extended press.
2. iUniker Raspberry Pi Switch
Different from the Pi Supply device, the iUniker Raspberry Pi Switch is a preassembled product encompassing cables and a switch. However, it lacks a feature to prevent an abrupt shutdown, rendering it suitable solely for powering on your Raspberry Pi.
Conversely, the iUniker switch serves the purpose of mitigating wear on your Raspberry Pi's power connector.
Add More Buttons to Your Raspberry Pi
Despite its initial release in 2012, the Raspberry Pi continues to be shipped without an incorporated power button—a deliberate decision. This absence is primarily influenced by cost considerations and the diverse spectrum of Pi projects available, ranging from media centers to embedded IoT projects, where the inclusion of a power button or switch remains an optional accessory.
If the need arises, one can install a power button; otherwise, operations can proceed without it.
However, it's not only shutting down that may present challenges for the Raspberry Pi. Consider a scenario where a simple reboot is required. Here's a guide on incorporating a reset switch into your Raspberry Pi setup.