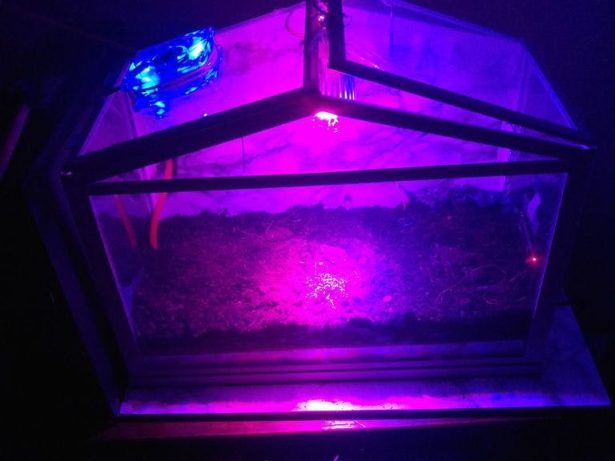
This is the second project using my automated garden, but this time everything will be controlled by Cayenne so it will be a lot easier. Also I added a Raspberry Pi in order to do a time-lapse video.
Setting up the Arduino
In order to monitor our garden I used a few devices which can be helpful. Before starting, remember to connect the Ethernet shield to the Arduino.
Connections
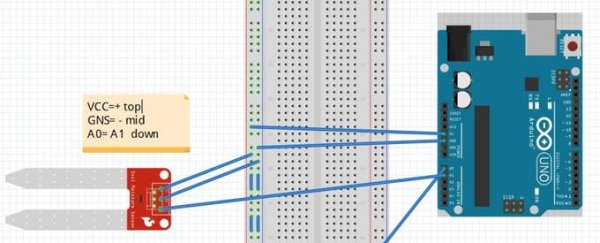
Soil moisture: To check if the plants need water.
- VCC: 5v
- GND:GND
- A0: A1
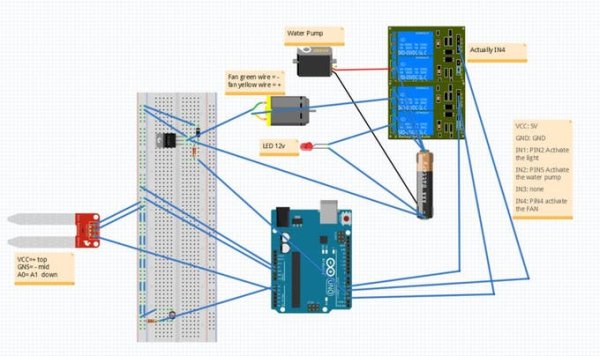
The Fan: If it’s get to hot it will activate or just to give some fresh air.
- One wire goes from the resistor to pin 3-The GND of the fan goes on the middle pin of the transistor.
- The + of the fan goes to the relay (middle pin) The last pin of the transistor goes to GND.
- The diode goes to the middle pin of the transistor and to the GND.
The water pump: It will activate with the soil moisture.
- The + goes to middle on the relay and GND to GND of the power source.
Photoresistor (optional): This part will allow us to measure if there is enough light in the room.
- One part is connected to A0 with the resistor connected to the ground.
- The other one to the 5V.
- The anode (+) goes to the relay. The other to the GND of the power supply.
Light:
- The anode (+) goes to the relay. The other to the GND of the power supply.
Humidity /temperature sensor: Some code is required for this device in order to work properly with Cayenne.
- VCC: 3.3V
- GND:GND
- DAT: digital pin 8
Water level sensor:
- VCC:5V
- GND:GND
- SIG:A2
Final mounting
I used 2 relay in the graphic because Fritzing does not have a 4-channel relay yet. For the relay I used only one 12v power supply. I separated the positive and negative wires, and then soldered 3 wire from the positive and connect each part on the relay. One is enough as everything does not turn on at the same time.
I used a 5V power supply for the Arduino RELAY:
- VCC: 5V
- GND: GND
- IN1: PIN2 Activate the light
- IN2: PIN5 Activate the water pump
- IN3: none IN4
- PiN4: activate the FAN
Cayenne Setup
Here we gonna see how to configure Cayenne which is very easy.
- First create an account Here.
- Then you should have your Ethernet shield with Rj45 cable connected.
- Here is the code to connect to Cayenne and also to configure the hum/temp sensor.
This code work for the w5100 shield the code is available on cayenne for other Ethernet/WiFi shield. Also don’t forget to add your token you get it after creating your account.
Read More: Automated Garden


