Pwnagotchi is an advanced AI-driven tool empowered by bettercap, utilizing machine learning to efficiently capture valuable WPA key data from surrounding WiFi environments. This is achieved through silent monitoring or by conducting targeted deauthentication and association attacks. Collected data is stored as PCAP files, featuring a range of crackable handshake formats compatible with hashcat, encompassing full and half WPA handshakes as well as PMKIDs.
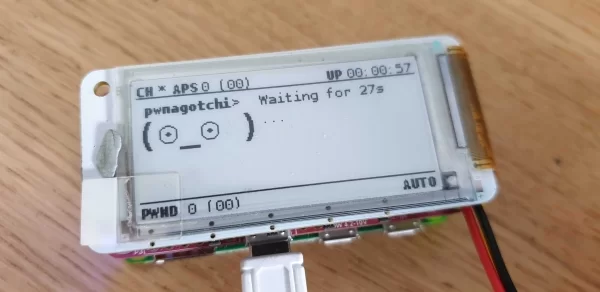
By integrating Pwnagotchi with the PaPiRus pHAT display, you’ll get a handy companion for examining local Wi-Fi networks. Furthermore, let’s empower mobility – we’ve also joined the PiJuice pHAT to the Pi Zero, coupled with a replaceable LiPo battery that allows us to transport this amazingly compact device wherever we go.
Note: This tool is to be used for wireless penetration testing and must not be used for anything malicious.
What you need
Getting Started
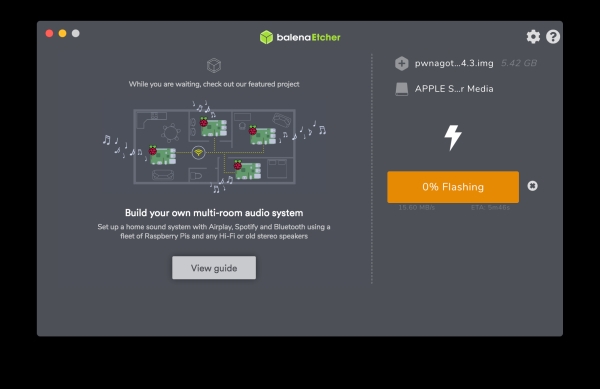
Step 1 – Prior to commencing with Pwnagotchi, please navigate to the official GitHub repository – https://github.com/evilsocket/pwnagotchi/releases. Obtain the latest pre-built image and transfer it to your microSD card using Balena Etcher for successful flash initialization.
Step 2 – Please prepare your SD card for the Raspberry Pi by creating a vital configuration file that will be loaded on boot. You may need to carefully remove the SD card and reinsert it into your computer. Next, create a new file named “config.yml” within the boot partition of the SD card and add the following:
main:
  name: 'pwnagotchi'
  whitelist:
    - 'YourHomeNetworkMaybe'
  plugins:
    grid:
      enabled: true
      report: true
      exclude:
        - 'YourHomeNetworkMaybe'

ui:
    display:
      enabled: true
      type: 'papirus'
      color: 'black'
Change “YourHomeNetworkMaybe” to your Wi-Fi SSID if you wish to exclude your Wi-Fi from the search.
Step 3 – Before we insert the SD card we need to assemble the hardware. Connect a stacking header to the Pi Zero:
Source: Build a Pwnagotchi WiFi penetration tester with Pi Zero and a PaPiRus display