This tutorial combines various online instructions required to connect the latest version of RaspbianOS to UVA's Eduroam WiFi network. You will need to follow four sets of instructions:
- My own instructions, which may be outdated.
- Prof. Luther A. Tychonievich's instructions for setting up Linux on Eduroam.
- A Reddit guide for setting up Linux on Eduroam.
- A guide for installing NetworkManager.
By following these instructions collectively, you will be able to successfully connect your Raspberry Pi running RaspbianOS to UVA's Eduroam network.
Preparing the Pi
Before getting your Pi up and running on Eduroam, some preparatory steps need to be taken. The primary task is to change the default network management software, but the good news is that the software we'll be installing simplifies network management greatly. However, it's important to note that you must already have a network connection on your Raspberry Pi to install this software.
While this requirement might seem like a challenge, it can be overcome, and completing this step might be all you need for a swift network connection.
RaspbianOS setup
If you're beginning with a fresh installation of RaspbianOS, it's important to follow the Welcome to Raspberry Pi setup instructions. One crucial step is to set a password, ensuring the security of your device. However, you can skip the network setup and OS upgrading steps for now, focusing on other aspects of the setup process.
Quick connect the Pi to the Internets
Here are a few alternatives to temporarily connect the Pi to the internet. These options might be all you need:
- Ethernet: If possible, connect the Pi directly to an Ethernet port to establish an internet connection and proceed with the installation.
- Hotspot: The simplest method is to turn your phone into a hotspot while it's connected to Eduroam or another network. You can typically find this option in your phone's settings.
- Visit a location with Ethernet or easily accessible WiFi: Consider going to places like coffee shops, fast-food restaurants, or public libraries that offer Ethernet or open WiFi connections for public use.
By utilizing one of these options, you can establish a temporary internet connection for your Pi, allowing you to continue with the necessary installations and setup.
Register your Pi
To add your Pi to UVA's list of approved devices, please follow these steps:
- Obtain the Pi's MAC address: In the terminal, type the following command:
ip address
This will display the network information, including the MAC address of your Pi.
- Using any computer or phone connected to the internet, visit the ITS Registration page by following this link: https://netreg.itc.virginia.edu/cgi-bin/mac_registration.cgi?alien=1.
- Log in with NetBadge credentials when prompted.
- Fill out the registration form:
- Physical/Hardware Address: Enter the MAC address of your Pi. You can also register the Ethernet MAC if applicable.
- This is a wireless device: Select “Yes”.
- Asset Tag (optional): You can leave this field blank.
- Serial Number (optional): You can leave this field blank.
- Identifying Notes (optional): You can leave this field blank.
- Click the submit button to complete the registration process.
Once you have submitted the form, your Pi will be added to UVA's list of approved devices, allowing it to connect to the Eduroam network successfully.
Install NetworkManager
To proceed with this step, ensure that your Raspberry Pi has an internet connection through methods like a hotspot or Ethernet.
To simplify the process, we will install NetworkManager, which offers a user-friendly GUI for network management. Follow the instructions below for installing NetworkManager from JJSanderson:
- Open a Terminal on your Raspberry Pi.
- Type the following commands one at a time, pressing Enter after each command:
sudo apt-get update
sudo apt-get upgradesudo apt-get install network-manager network-manager-gnome
By executing these commands, you will update the package list, upgrade the existing packages, and install NetworkManager along with its GNOME user interface component.
Once the installation process is complete, you will have NetworkManager installed on your Raspberry Pi, which will provide a convenient graphical interface for managing your network connections.
sudo apt update
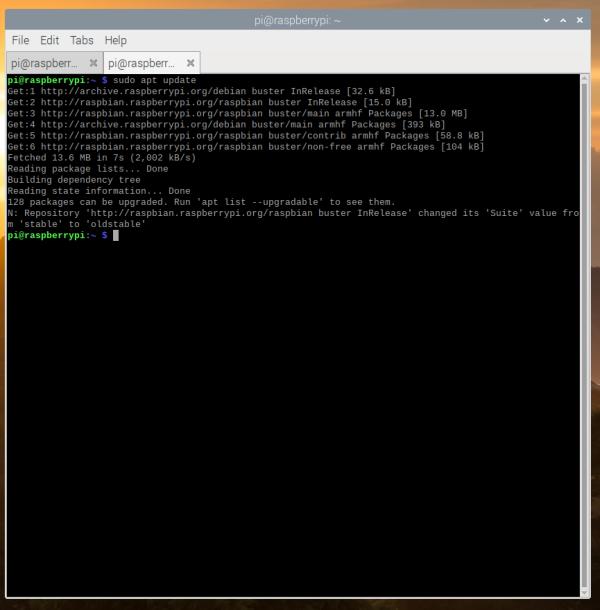
Once the previous process is complete, follow these steps:
- Wait for the ongoing process to finish.
- Open a Terminal on your Raspberry Pi.
- Type the following command and press Enter:
sudo apt install network-manager network-manager-gnome
By executing this command, the system will install NetworkManager and its GNOME interface component.
Allow the installation process to complete, and once finished, NetworkManager will be successfully installed on your Raspberry Pi.
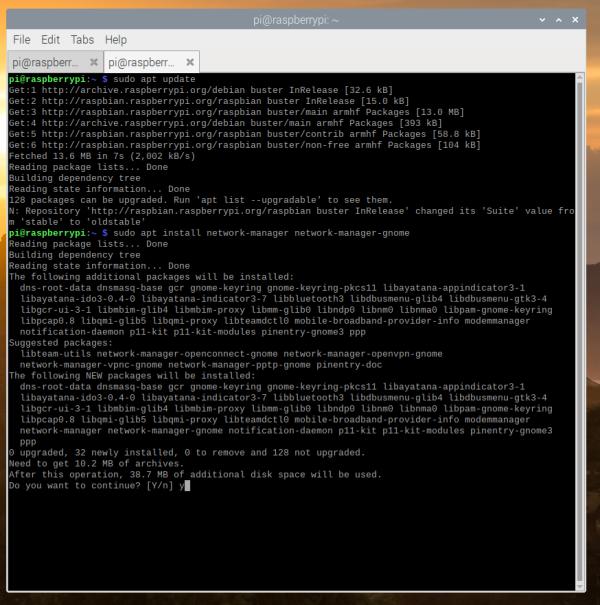
After installing the packages, you may be prompted to confirm the installation of multiple packages. Simply type ‘y' and press Enter to proceed.
Disable dhcpcd
Next, we need to disable the dhcpcd program from handling the wireless network card, which is referred to as wlan0. Follow the steps below:
- Open the terminal.
- To open the
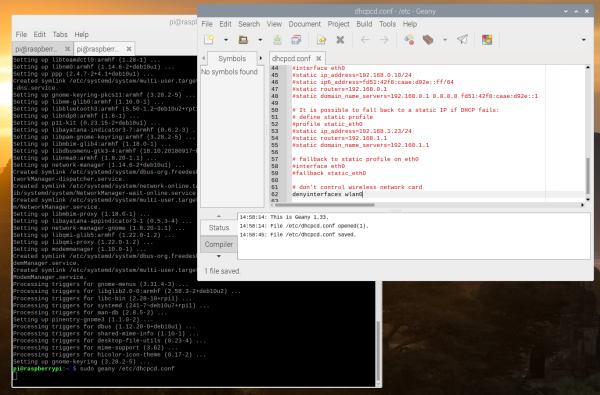
/etc/dhcpcd.conffile for editing, enter the following command:
sudo nano /etc/dhcpcd.conf
This will open the dhcpcd.conf file in the Nano text editor.
- Make the necessary changes to the file as per your requirements.
- Once you have made the desired modifications, save the changes by pressing
Ctrl + Oand then press Enter to confirm. To exit the editor, pressCtrl + X.
By following these steps, you will have disabled the dhcpcd program for the wlan0 wireless network card, as specified in the /etc/dhcpcd.conf file.
Alternatively, if you prefer a different text editor, such as Nano or Vim (which may require installation), you can use those as well. Geany and Nano are typically installed by default on Raspberry Pi.
To add the required line to the bottom of the file and save it, follow these steps:
- Open the
/etc/dhcpcd.conffile using your preferred text editor. For example, to use Nano, enter the following command:
- Scroll to the bottom of the file.
- Add the following line at the end:
- Save the changes by pressing
Ctrl + Oand then press Enter. To exit the editor, pressCtrl + X.
By adding the line “denyinterfaces wlan0” to the bottom of the file and saving it, you will effectively disable the dhcpcd program for the wlan0 wireless network card in the /etc/dhcpcd.conf file.
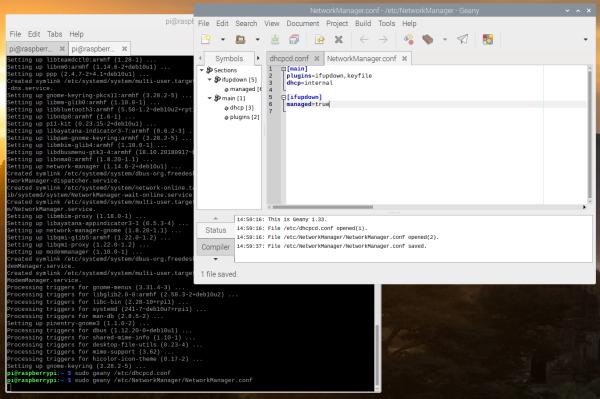
Edit NetworkManager.conf
sudo geany /etc/NetworkManager/NetworkManger.conf
Add dchp=internal to the file and change managed to true, then save and close the file.
It should look like this
[main]
plugins=ifupdown,keyfile
dhcp=internal

[ifupdown]
managed=true
With NetworkManager successfully installed, you can now manage WiFi connections and perform various internet-related tasks using its user-friendly interface.
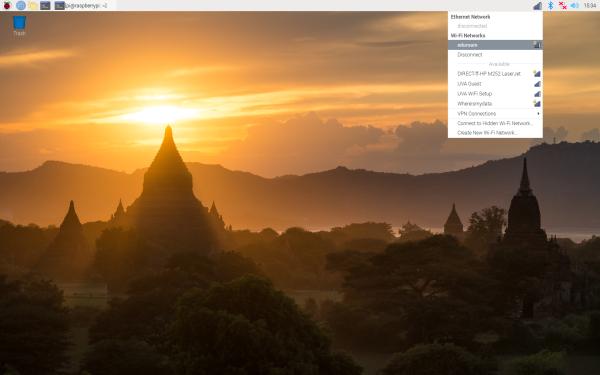
To utilize NetworkManager for WiFi management and other internet-related tasks, follow these steps:
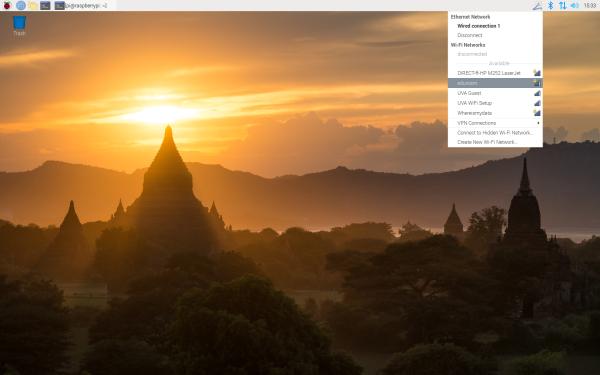
- Open the NetworkManager interface. The method may vary depending on your Raspberry Pi's desktop environment or operating system. Look for the NetworkManager icon in the system tray or menu bar and click on it to access the network settings.
- From the NetworkManager interface, you can:
- View available WiFi networks: NetworkManager will scan for nearby WiFi networks, and you can select and connect to the desired network.
- Add and manage WiFi connections: You can add new WiFi connections, edit existing ones, and specify network authentication details.
- Manage other network-related settings: NetworkManager also provides options to configure network proxies, VPN connections, and other network-related tasks.
By leveraging the NetworkManager interface, you can conveniently manage WiFi connections and perform various internet-related tasks on your Raspberry Pi.
Generate a personal certificate
Now, let's proceed with step 2 of Prof. Tychonievich's tutorial. For this step, ensure that you are still on the Raspberry Pi and disconnect it from any Ethernet or other WiFi network.
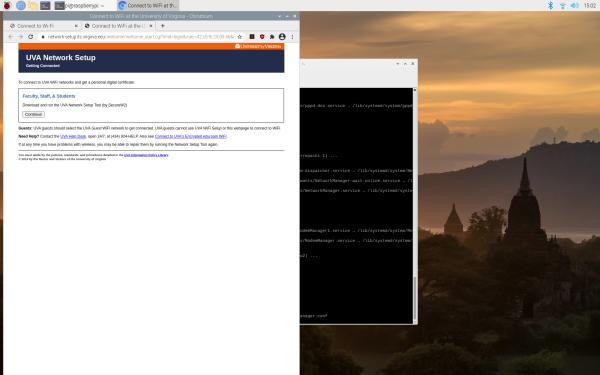
If you are currently on the UVA Grounds, follow these instructions:
- Connect to the “UVA WiFi Setup” network. This network is specifically designed to assist with the initial setup process.
- Once connected to the “UVA WiFi Setup” network, proceed to the next step provided by Prof. Tychonievich's tutorial.
If you are off the UVA Grounds, refer to the instructions provided on Prof. Tychonievich's website for the appropriate steps to follow.
By following these instructions, you will ensure that your Raspberry Pi is disconnected from any existing Ethernet or WiFi networks and ready for the subsequent steps outlined in Prof. Tychonievich's tutorial.
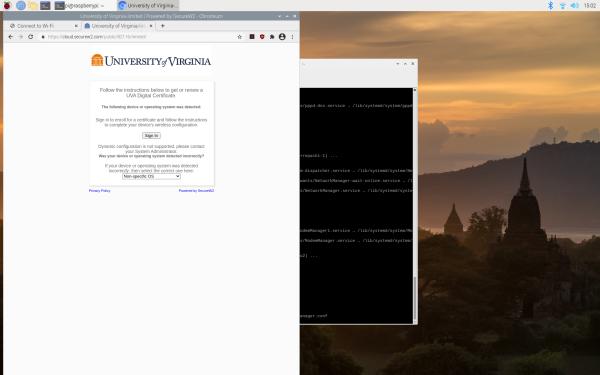
Once on the site, follow the provided steps to generate and download a personal certificate for your device. The exact steps may vary, but generally, you will need to:
- Fill out any necessary information required for the certificate generation process.
- Click on the button or link to continue.
By following these steps, you will generate and download a personal certificate for your Raspberry Pi, which is an important requirement for the subsequent steps in the setup process.
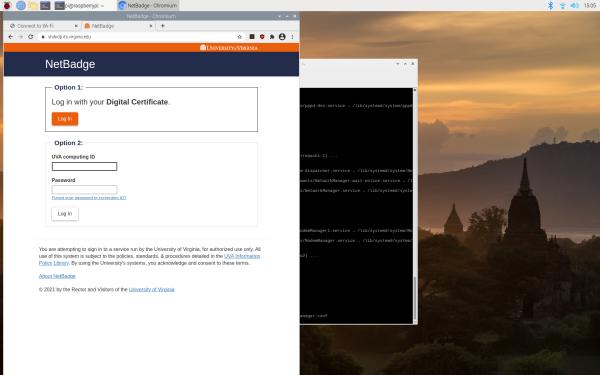
Click the Sign In button
Sign in with computing ID and password
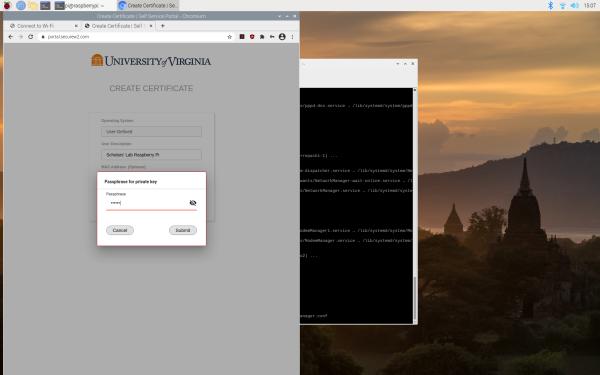
In the provided form, add a User Description for your Raspberry Pi, such as “Your Name Raspberry Pi.” You can leave the MAC Address field blank for now. Finally, click the “Create” button.
By completing this step, you will provide a user description for your Raspberry Pi and proceed with the certificate creation process without needing to fill in the MAC Address field. Once you click the “Create” button, the necessary actions will be taken to generate the certificate for your device.

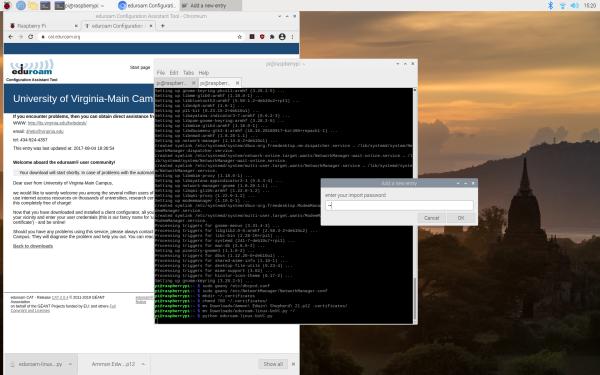
Enter a passphrase. You’ll need to remember this! Then hit the Submit button
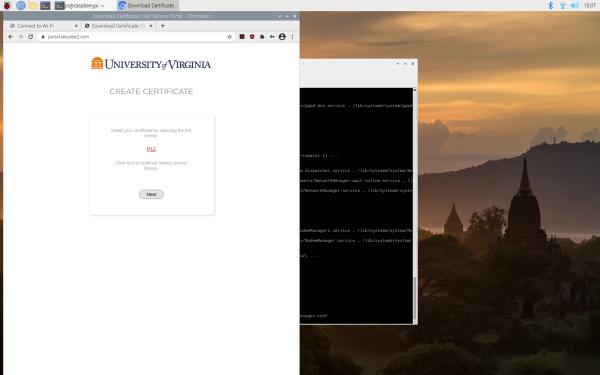
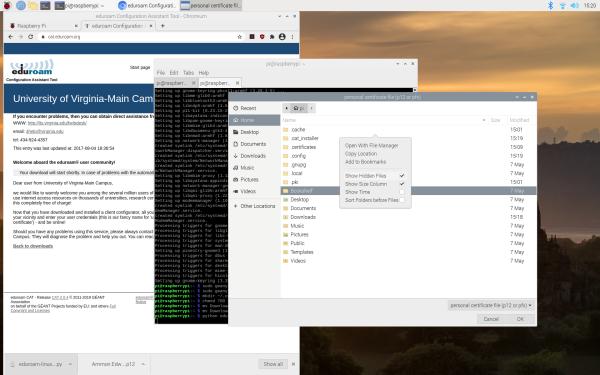
Click the P12 link to download the certificate to your Downloads directory.
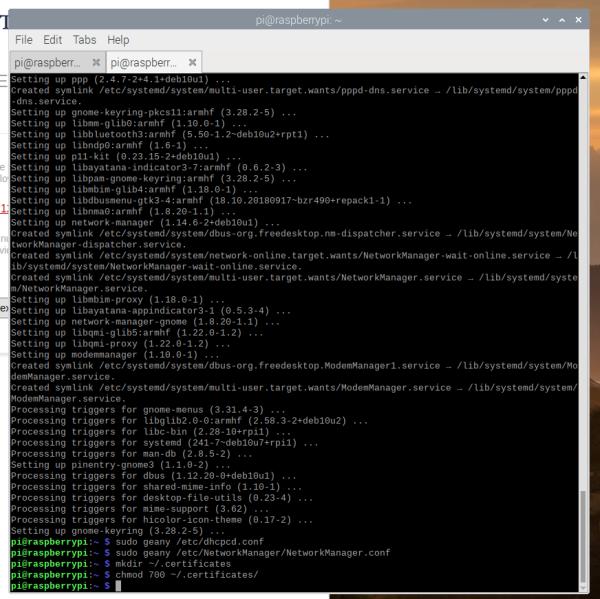
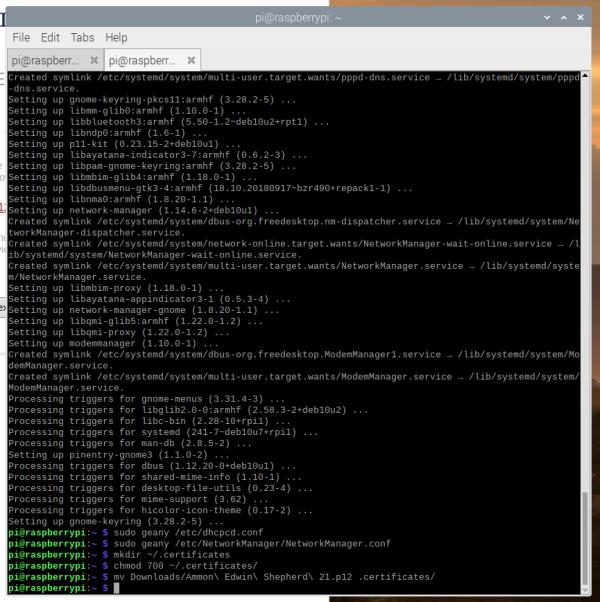
To ensure the security of your certificate, it is recommended to keep it confidential. Follow the advice provided to save the certificate in a hidden directory and adjust the permissions to restrict access to only your user.
In the terminal, enter the following commands:
By executing these commands, you will create a hidden folder named “.certificates” in your home directory and set the permissions for it to allow only your user to access its contents.
This approach safeguards your certificate by keeping it in a restricted and hidden location, ensuring that only the authorized user can access and manage it.
To move the downloaded certificate from the “Downloads” folder to the “.certificates” folder, follow these steps:
- Open the terminal.
- Enter the following command to move the certificate:
Make sure to replace “certificate_file.pem” with the actual filename of the downloaded certificate.
- Press Enter to execute the command.
By executing this command, the certificate file will be moved from the “Downloads” folder to the “.certificates” folder, ensuring that it is stored in the secure and hidden location you previously created.
Note: If the downloaded certificate has a different file extension, replace “.pem” with the appropriate extension in the command.
Run the eduroam set up tool
For this step, ensure that your Raspberry Pi is reconnected to the hotspot or any other available option for internet connectivity.
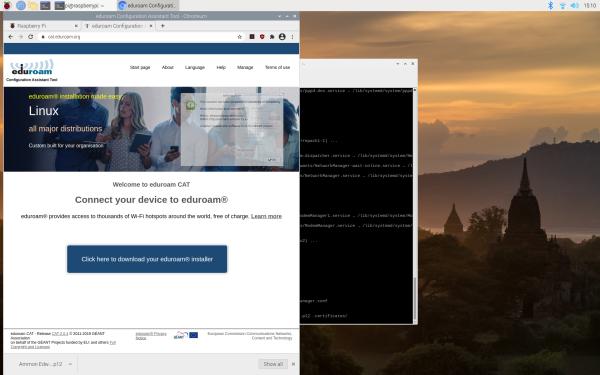
Next, follow this reddit guide, which provides instructions for installing the necessary files to connect to UVA's eduroam network. The tool you'll be using is specifically designed by Eduroam for connecting to UVA's eduroam network on the main campus in Charlottesville.
To begin, download the tool by opening a browser on your Raspberry Pi and visiting the following URL: https://cat.eduroam.org/.
Once on the website, locate and click the button to download the eduroam installer.
By following these instructions, you will be able to download the eduroam installer tool from the provided URL, which is essential for the successful connection to UVA's eduroam network.
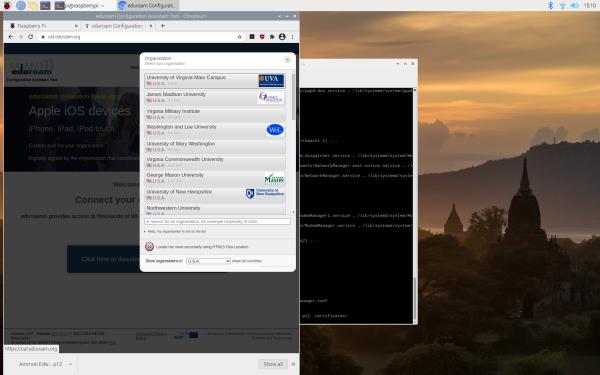
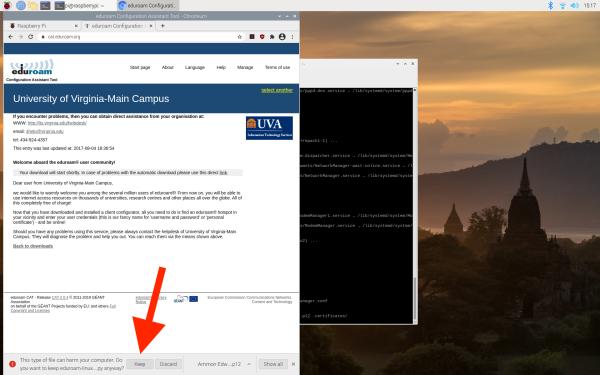
Select the option of “University of Virginia-Main Campus”.
Click the link to “Choose another installer to download”.
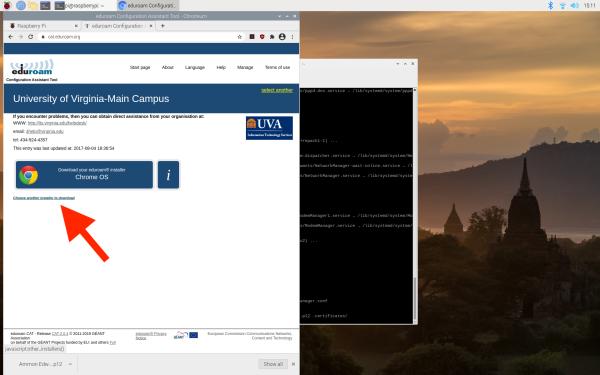
On this next screen, click the Linux button.

The browser will prompt you to Keep or Discard the file. Click Keep.
After downloading the file, take note of its location. By default, the file is usually downloaded to the “Downloads” folder in your home directory.
To proceed, move the downloaded file to your home directory. You can accomplish this using either the file explorer GUI or the terminal. Follow the steps below:
Using the Terminal:
- Open the terminal.
- To navigate to your home directory, enter the following command:
- Once you are in the home directory in the terminal, execute the following command to move the downloaded file:
Using the File Explorer GUI:
- Open the file explorer on your Raspberry Pi.
- Navigate to the “Downloads” folder.
- Locate the “eduroam-linux-UoVC.py” file.
- Click and drag the file to your home directory.
By following these steps, you will move the downloaded file to your home directory, whether you choose to use the terminal or the file explorer GUI.
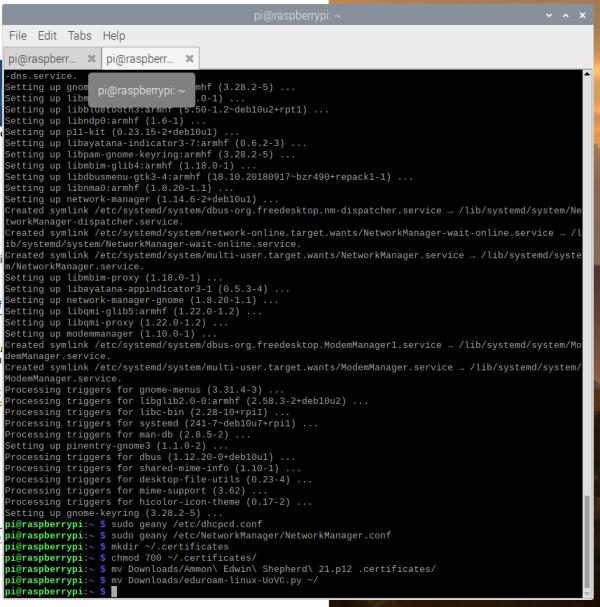
Now, in the terminal, you can run the script
python eduroam-linux-UoVC.py
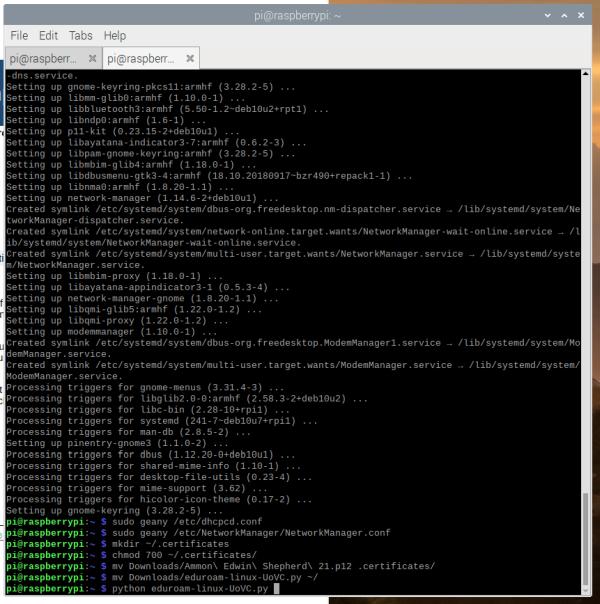
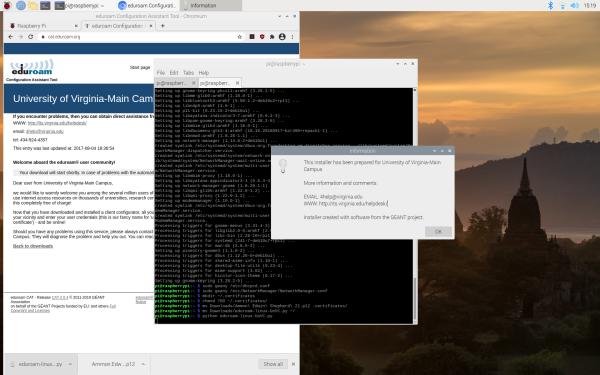
Accept all of the prompts.
To enable the display of hidden files in the file explorer, follow these steps:
- Open the file explorer on your Raspberry Pi.
- Right-click anywhere on the screen to open a context menu.
- From the context menu, select the option “Show Hidden Files” to enable the visibility of hidden files.
Once hidden files are visible, you can easily browse to the downloaded certificate file and move it to the “.certificates” folder. Here's how:
- Navigate to the location where the downloaded certificate file is saved.
- Locate the certificate file and select it.
- Click and drag the certificate file to the “.certificates” folder in your home directory.
By following these steps, you will allow the file explorer to display hidden files, enabling you to locate and move the downloaded certificate file into the “.certificates” folder.
Enter your passphrase you used to create the certificate.
During this process, a folder named “.cat_installer” will be created, containing two files: “ca.pem” and “user.p12”.
In the next step, we will utilize the “ca.pem” file, while the “user.p12” file will not be used.
Focus on the “ca.pem” file as it will be relevant for the upcoming step, while you can disregard the “user.p12” file.
By keeping this in mind, you can proceed confidently to the next step, utilizing the “ca.pem” file for the required actions.
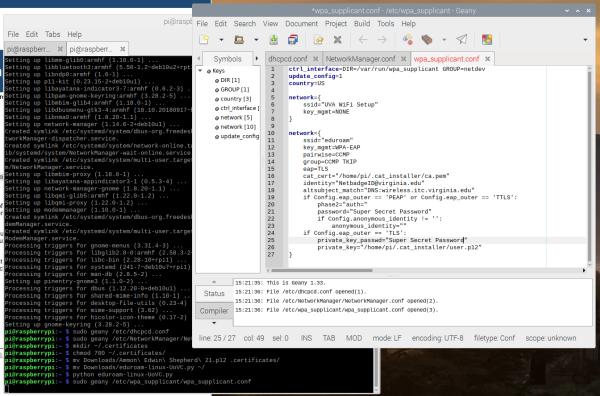
Edit the wpa_supplicant file
To edit the “wpa_supplicant” file, follow these steps:
- Open the terminal on your Raspberry Pi.
- Enter the following command to open the “wpa_supplicant.conf” file using the Geany text editor (you can also use nano, vim, or any other text editor of your choice):
- The text editor will open the “wpa_supplicant.conf” file. Scroll to the bottom of the file and add the content provided below:
Make sure to replace “your_UVA_username” with your UVA username and “your_UVA_password” with your UVA password. Additionally, ensure that “/home/your_username/.certificates/ca.pem” points to the correct path where the “ca.pem” file is located, considering your username.
- Save the changes made to the file and close the text editor.
By following these steps, you will open and edit the “wpa_supplicant.conf” file using the Geany text editor, adding the provided content to the bottom of the file. This configuration will include the necessary details for connecting to the eduroam network using your UVA credentials and the specified certificate file.
network={
  ssid="eduroam"
  key_mgmt=WPA-EAP
  pairwise=CCMP
  group=CCMP TKIP
  eap=TLS
  cat_cert="/home/pi/.cat_installer/ca.pem"
  identity="[email protected]"
  altsubject_match="DNS:wireless.itc.virginia.edu"
  if Config.eap_outer == 'PEAP' or Config.eap_outer == 'TTLS':
    phase2="auth="
    password="Your passphrase here"
    if Config.anonymous_identity != '':
      anonymous_identity=""
  if Config.eap_outer == 'TLS':
    private_key_passwd="Your passphrase here"
    private_key="/home/pi/.cat_installer/user.p12"
}
After editing this file, reboot the Pi.
Run NetworkManager tool
Next we’ll go back to the tutorial from Prof. Tychonievich.
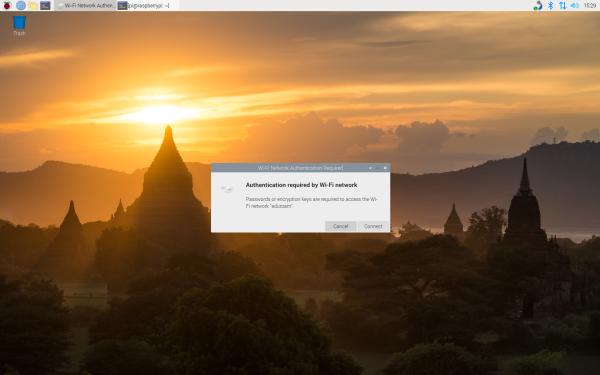
Once the Pi reboots, it will pop up a window about authentication to the eduroam network. You can click the Cancel button.
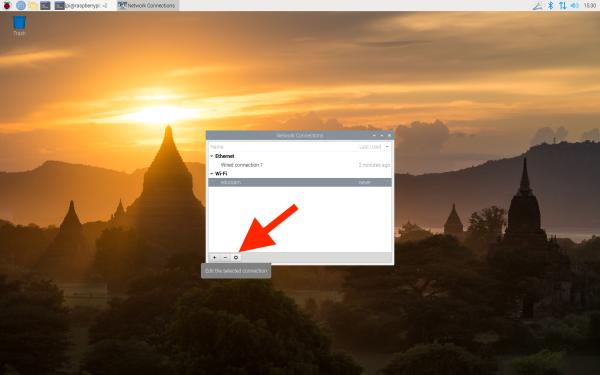
Hover the mouse over the NetworkManager icon, alternate mouse button click (right-click) and select Edit Connections.

In the new window, select the eduroam WiFi option, then click the gear icon on the bottom.
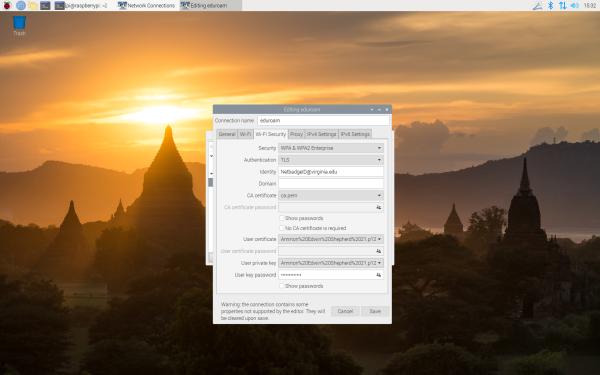
Follow the instructions provided in Step 1 of the tutorial to enter the necessary information:
- Security: Select “WPA & WPA2 Enterprise.”
- Authentication: Choose “TLS.”
- Identity: Enter your email address in all lowercase, such as “[email protected].”
- Domain: Leave this field blank.
- CA certificate: Select the “ca.pem” file.
- CA Certificate Password: Disable or leave this field blank.
- User certificate: Click the down arrow and browse to the file located in the “.certificates” folder.
- User certificate password: Disable or leave this field blank.
- User private key: Select the same file as the user certificate.
- User key password: Enter the password you set when you downloaded your personal digital certificate.
By providing the required information as outlined above, you will configure the settings accordingly in the eduroam setup to establish a secure connection.
Final step
Connect to the eduroam network, and enjoy!
It works!