
Introduction
Are you a Raspberry Pi owner interested in hosting a web server from your own home? Perhaps you're wondering what comes next after getting your Raspberry Pi web server up and running. In this blog post, we'll provide a detailed, step-by-step guide on how to establish a home web server using a Raspberry Pi in just a few minutes. Additionally, we'll walk you through the basics of HTML coding, culminating in the creation of your very own website on the internet!
What is a web server?
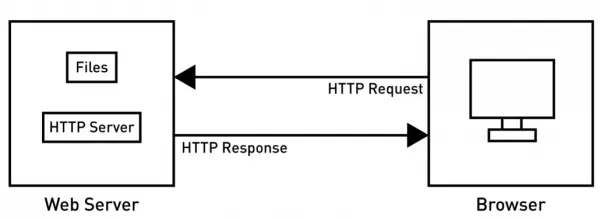
In straightforward terms, a web server is essentially a computer equipped with software for storing various files, including HTML documents, images, videos, and essential data required to operate a website. This web server is continuously connected to the internet, as websites are intended for public access around the clock. Should the web server experience an outage or shutdown, the corresponding website will also become unavailable.
How are you able to visit websites through the browser?
Upon entering a URL in your browser, the URL undergoes a conversion into an IP address. Subsequently, the browser transmits this as an HTTP request across the internet until it connects with the web server linked to the requested IP address. Upon reaching the web server, an HTTP server acknowledges this request and locates the document corresponding to the user's request. Following this, the HTTP server sends the requested webpage back to the browser through the HTTP protocol.
Advantages of building a web server on a Raspberry Pi
Utilizing a Raspberry Pi for constructing a web server offers numerous benefits:
1. Economical Choice: Hosting expenses can be steep, making Raspberry Pi a cost-effective alternative.
2. Energy-Efficiency: Raspberry Pi operates on minimal power, resulting in significant electricity savings.
3. Portability: Its configuration allows for portability, making it a versatile choice.
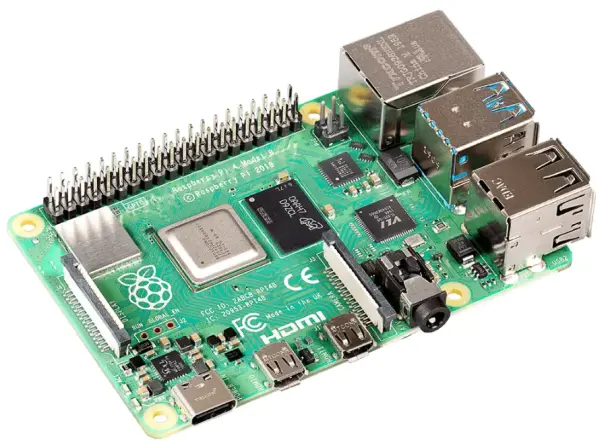
Furthermore, the flexibility extends to your choice of Raspberry Pi model for web hosting. Surprisingly, even a Raspberry Pi Zero is capable of serving as a web server!
Building an Apache Web Server on a Raspberry Pi
Various web server options are available, but for this guide, we'll focus on the Apache web server, known as one of the most renowned choices for Raspberry Pi. Apache excels at serving HTML files through both HTTP and HTTPS protocols, and it's also compatible with various modules like PHP, enabling the delivery of dynamic content. However, in this tutorial, we'll configure Apache to serve static HTML pages, a simpler starting point for beginners.
Material required
Establishing an Apache Web Server on a Raspberry Pi is a straightforward procedure. To get started, let's outline the components required for this setup:
1. One Raspberry Pi
2. One USB Type-C Cable with a power adapter
3. One Argon ONE Raspberry Pi 4 Aluminum Case (Optional)
4. One Micro-SD card with a card reader
It's worth noting that we've suggested the use of the Argon ONE Raspberry Pi 4 Aluminum Case because, once you've configured an Apache Web Server on your Raspberry Pi, it's likely to remain operational continuously. This case serves the dual purpose of improving cooling for the Raspberry Pi, which tends to heat up with prolonged use, and adding a touch of style with its sleek aluminum design.

Configuring the Raspberry Pi for initial boot
Upon acquiring a Raspberry Pi, it's important to note that it does not come pre-loaded with an operating system. Consequently, you are required to write an operating system onto a micro-SD card and subsequently initiate the Raspberry Pi's boot process from this card.
Step 1
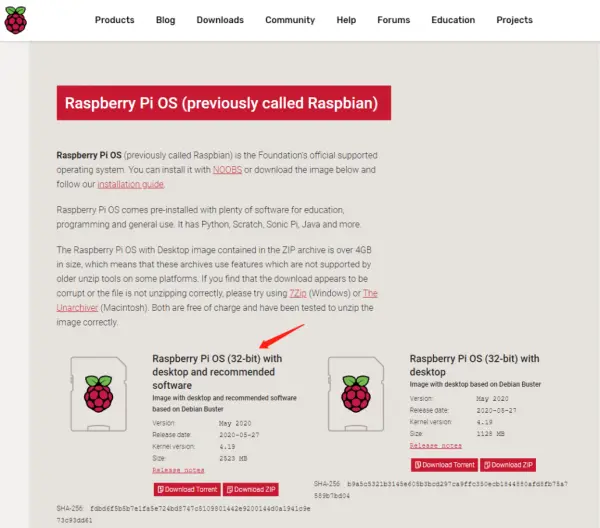
Initially, the initial step involves obtaining a Linux-based operating system. Raspberry Pi provides compatibility with a range of Linux distributions, including Ubuntu. However, for the purposes of this tutorial, we will opt for the official operating system provided by the Raspberry Pi Foundation, known as the Raspberry Pi OS. You can acquire it by visiting the download link and selecting the “with desktop and recommended software” version.
Step 2
Initially, the initial step involves obtaining a Linux-based operating system. Raspberry Pi provides compatibility with a range of Linux distributions, including Ubuntu. However, for the purposes of this tutorial, we will opt for the official operating system provided by the Raspberry Pi Foundation, known as the Raspberry Pi OS. You can acquire it by visiting the download link and selecting the “with desktop and recommended software” version.
Step 3
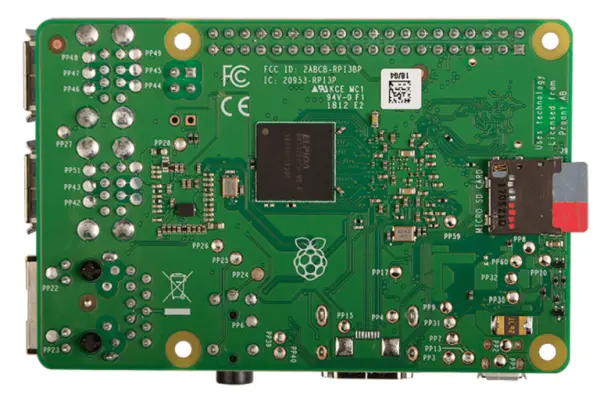
Next, insert a micro-SD card into the micro-SD card slot of a computer, either with a micro-SD to SD card adapter or a USB micro-SD card reader.
Step 4
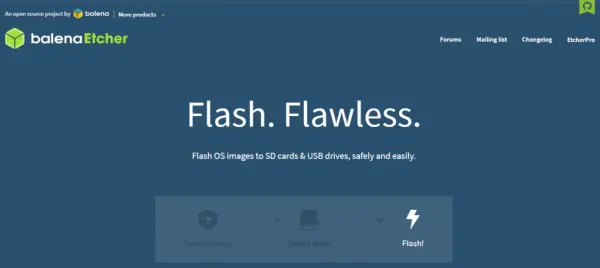
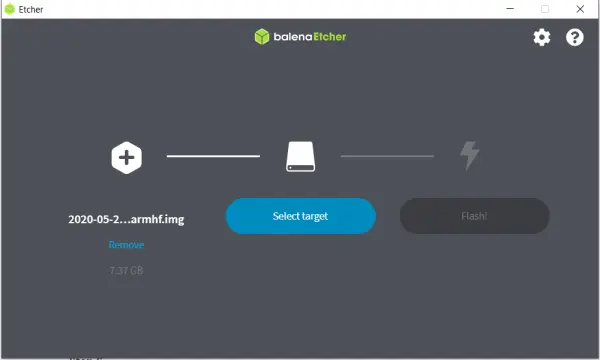
Subsequently, launch the “balenaEtcher” application. Next, specify the path to the downloaded image file, choose the connected micro-SD card, and click on the “flash” button. Please be patient as this procedure will require a few minutes to finish.
Step 5
Next, we will configure the Raspberry Pi for automatic connection to the wireless network, facilitating communication with it.
Nonetheless, if you possess an HDMI display, a keyboard, and a mouse, you have the option to bypass this step. Simply connect these peripherals to the Raspberry Pi and proceed directly to the section on “Installing the Apache Web Server.”
Moreover, if you own a Seeeduino XIAO, you can refer to the provided guide for establishing communication between the Raspberry Pi and your PC. Following this, you can proceed with the instructions for “Installing the Apache Web Server.”
Step 6
Access your Raspberry Pi root directory from your computer and proceed to generate a file named “wpa_supplicant.conf.” Next, insert the provided code into this file, and make sure to insert your home Wi-Fi credentials in the designated “WiFi-name” and “WiFi-password” fields.
country=US
ctrl_interface=DIR=/var/run/wpa_supplicant GROUP=netdev
update_config=1
network={
ssid=”WiFi-name”
psk=”WiFi-password”
key_mgmt=WPA-PSK
priority=1
}
Step 7
Generate an empty file named “ssh” within this location.
Step 8
Subsequently, remove the micro-SD card from your PC and insert it into the Raspberry Pi.
Step 9
Initiate the Raspberry Pi by connecting it to a power source using a Type-C USB cable and a suitable power adapter.
Step 10
Next, we'll acquire Putty, an SSH client that enables communication with the Raspberry Pi. You can download it by clicking on this link.
Step 11
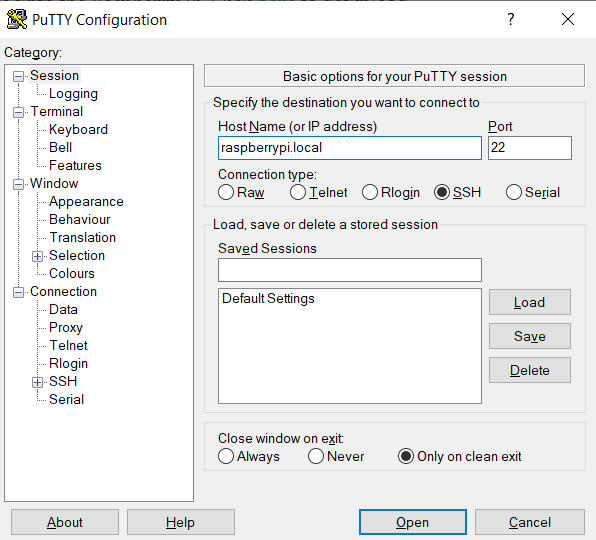
Launch Putty and configure the hostname as “raspberrypi.local” and the port as “22.” Then, click the “Open” button to proceed.
Installing Apache Web Server
Step 1
To begin, ensure that you update the package list on your Raspberry Pi by executing the provided commands.
sudo apt-get update
sudo apt-get upgrade
Step 2
Next, you can install the Apache2 package by executing the following command.
sudo apt install apache2 -y
And there you have it! With just two simple steps, your Raspberry Pi now hosts an operational Apache Web Server.
To verify the status of this web server, execute the following command.
sudo service apache2 status
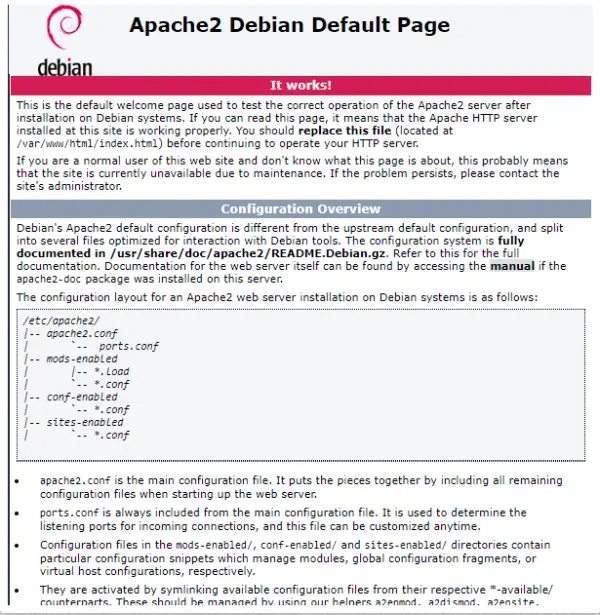
To verify the status of Apache, you can open a web browser and enter your Raspberry Pi's IP address. Doing so will display a basic web page like this.
Yet, if you're unsure about the IP address of your Raspberry Pi, you can easily locate it by executing the following command within the Raspberry Pi's terminal:
“`bash
hostname -I
“`
It's important to note that the server you've configured can only be accessed within your home network and is not accessible over the internet. To make this server available from anywhere, you'll need to establish port forwarding on your router. However, this particular topic is beyond the scope of this blog post, and we won't delve into it here.
Setting up HTML page for editing
The web page displayed above, in its default form, is essentially an HTML file stored on the Raspberry Pi's file system. We'll now proceed to generate our custom HTML file and establish our webpage.
Step 1
To begin, we'll need to locate the HTML file on the Raspberry Pi. Please execute the following command in the terminal:
cd /var/www/html Step 2
Next, enter the following command to display a list of all the files in this directory.
ls -al
All the files in this directory will be displayed, and the index.html file is controlled by the root user.
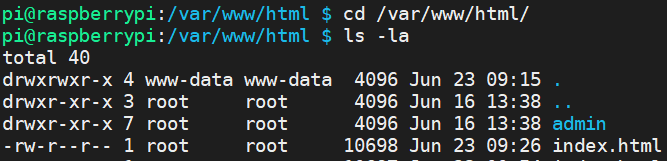
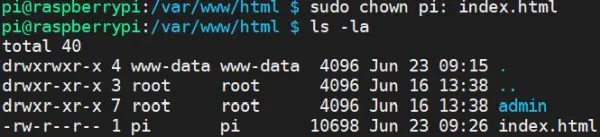
Consequently, to make modifications to this file, you must adjust its ownership to your personal username. In this case, we'll select the Raspberry Pi's default username, which is “pi.”
sudo chown pi: index.htmlYou now have the capability to modify this file, and after making your edits, simply refresh your web browser to view the updates.
Building your first HTML page
We will now direct our attention to providing you with fundamental knowledge about HTML.
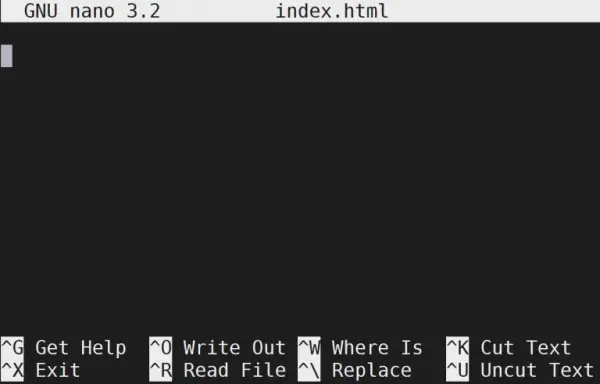
To begin, open the index.html file by executing the following command and clear the existing content to commence with a clean slate.
Enter the following command to access the file: sudo nano index.html
HTML Tags
First and foremost, it's essential to familiarize yourself with HTML tags, a fundamental aspect of HTML. Tags serve the purpose of identifying distinct segments of a web page and applying specific formatting to the content.
In most cases, you enclose your content within two tags: an opening tag and a closing tag. The content within these tags adheres to the instructions provided by the tags themselves.
For instance, the <b> tag is used to render text in bold. Consequently, if you have your content:
This is my <b>new</b> website
The term “new” will appear in bold. It's important to observe that the opening tag is denoted by <> while the closing tag is represented as </>.
Basic format of an HTML document
A standard HTML document adheres to the subsequent structure.
<!DOCTYPE html>
<html>
<head>
</head>
<body>
</body>
</html>
<!DOCTYPE html>: This tag serves to declare the document as an HTML file and doesn't require a closing tag.
<html>: This tag ensures that the content within adheres to the HTML structure. It is paired with the closing </html> tag.
</head>: This tag contains information about your website that doesn't become visible when you open it in a web browser. For instance, you can include a meta tag within the head tag to specify the character encoding for your website. It is matched with the closing </head> tag.
For instance:
“`html
<head>
<meta charset=”utf-8″>
</head>
“`
You can also embed a title tag within the head tag, which establishes the title of your web page. It is completed with the closing </title> tag.
For example:
“`html
<head>
<meta charset=”utf-8″>
<title> My website </title>
</head>
“`
<body>: This tag encloses the primary content of your web page. When you open a web page, everything that is visible typically resides within the body tags. It is paired with the closing </body> tag. Within this body tag, numerous other tags can be used, but we will focus on the most essential ones required to construct your initial basic web page.
Source: Creating Your Own Raspberry Pi Web Server and HTML Page