
In recent times, the popularity of smart home lights has increased due to the growing IoT market. However, these lights are primarily controlled through mobile apps or other devices. More recently, there has been a trend of controlling smart lights using voice commands through AI assistants on phones, speakers, and computers. Despite their convenience, smart lights are still relatively expensive compared to conventional lights, requiring a significant investment.
If you happen to have a Raspberry Pi available, we will guide you on how to create your own smart light using a regular light bulb that can be controlled using Google Assistant. This project involves utilizing IFTTT and Particle services, so here is some background information about them.
IFTTT (if this then that) is a free platform that facilitates the coordination of apps and devices to perform various tasks. It supports a wide range of services such as social media sites, online tools, and email platforms like Twitter, Gmail, and Facebook. Through the use of applets, which connect multiple apps, you can automate tasks. You can enable or disable applets using IFTTT's website or widgets. It is also possible to create your own applets or modify existing ones. Once you start exploring IFTTT, you will find it quite straightforward.
Particle is an IoT company that manufactures internet-connected microcontroller boards. They offer a cloud service called Particle Cloud, which simplifies the process of connecting Particle devices to the internet. With features like robust security, reliable infrastructure, and flexible integration system, Particle Cloud provides all the necessary components for successful IoT projects and quick development. Recently, Particle Cloud added support for Raspberry Pi, allowing users to connect their Raspberry Pi to the Particle Cloud for free. While this integration is currently in beta, it is highly functional for most use cases.
- Prerequisites:
To create the smart light using a Raspberry Pi, you will need the following components:
– Raspberry Pi (with Raspbian OS)
– Relay module
– Jumper wires
– Lamp or bulb with bulb holder
– 1mm or higher gauge wires
– 5V power supply for the Raspberry Pi
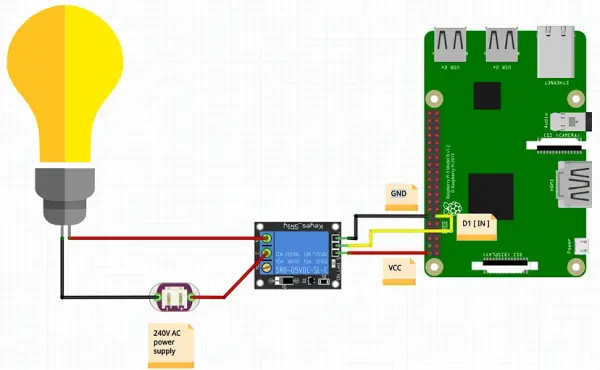
2. Circuit Diagram and Wiring:
The Particle Agent utilizes its own GPIO labeling system, which differs from the conventional Raspberry Pi labeling. Below is the GPIO labeling used by Particle:
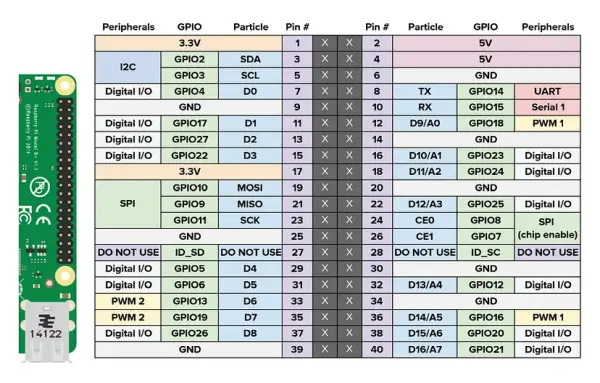
In the Particle firmware, pins are designated from D0 to D15. Additionally, the Broadcom pin numbers, referred to as BCM or GPIO pin numbers, are also assigned from GPIO0 to GPIO27.
For our project, we will utilize GPIO17, which corresponds to D1 in Particle's labeling system, to control the relay module. The circuit diagram below demonstrates the connection:
3. Particle agent Setup:
Firstly, you need to sign up for a Particle Cloud account by visiting the provided link. During the sign-up process, you will be prompted to give your Raspberry Pi a name. If you ever wish to revert back to the sign-in stage, you can simply type “particle-agent setup” to restore the Particle package to its default values. To check the status of your Raspberry Pi's connection to the Particle Cloud, use the command “particle-agent status”.
Next, proceed to install the Particle agent by typing or copying the following command into a terminal window on your Raspberry Pi.
bash <( curl -sL https://particle.io/install-pi )
Once the download and installation process is finished, you will be prompted to sign in to your Particle account on the Raspberry Pi.
4. Create a Particle App:
On your web browser, navigate to the Particle website at build.particle.io. Here, you will perform all the coding tasks using Particle's online Integrated Development Environment (IDE) and remotely flash the code onto your Raspberry Pi that is connected to the Particle Cloud.
The Particle IDE is divided into three main sections:
1. The coding environment: This is where you write your code for the smart light project.
2. Examples app: In addition to pre-existing examples, you can create your own applications.
3. The menu section: This section provides various options, such as checking connected devices, viewing activities, and more.
Using the Particle IDE, you will have a comprehensive platform to develop and manage your smart light project.
Create a “New App” by typing or pasting the following code.
int relay = D1; //pin to which relay is connected
int boardLed = D7;
bool vin = LOW; //a virtual boolean variable

// setup() is run only once, it's where we set up GPIO and //initialise peripheralsvoid setup() {

  // Setup GPIO  pinMode(relay,OUTPUT); // relay pin is set as output
  digitalWrite(relay,HIGH); // Subscribe to events published by IFTTT using  Particle.subscribe  Particle.subscribe("Name_of_The_Event-1", myHandler);       //turning off function declarationParticle.subscribe("Name_of_The_Event-2", thisHandler);       //turning on function declaration
}

// loop() runs continuously, it's our infinite loop.
void loop() {
     if (vin==HIGH){         digitalWrite(relay,LOW);
     }
else if (vin==LOW){         digitalWrite(relay,HIGH);
     }

}

//our events are called when IFTTT applets are triggered
void myHandler(const char *event, const char *data){    vin=LOW;
}
void thisHandler(const char *event, const char *data){     vin=HIGH;
}
Inside the declaration of the Particle.subscribe functions, ensure that you enter your own unique names for the event names. These names will be utilized later when setting up the IFTTT events. For instance, you can use names like “mylight_assistant_on” and “mylight_assistant_off”. To flash the code onto your Raspberry Pi, click on the flash icon. It is important to verify that there are no compilation errors displayed at the bottom of the screen before proceeding.
5. IFTTT Setup
Download the IFTTT app from either the App Store or Play Store, or alternatively, you can visit ifttt.com. When you open the app for the first time, you will need to sign up for a new account. After completing the signup process, tap on the icon located at the bottom right corner of the screen, which will navigate you to the “My Applet” section.
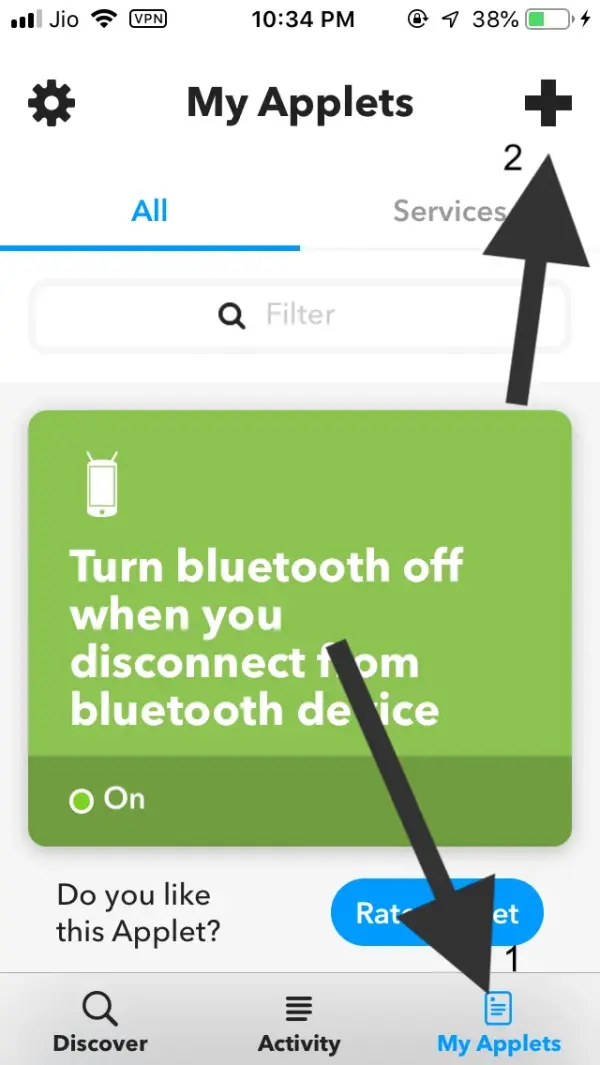
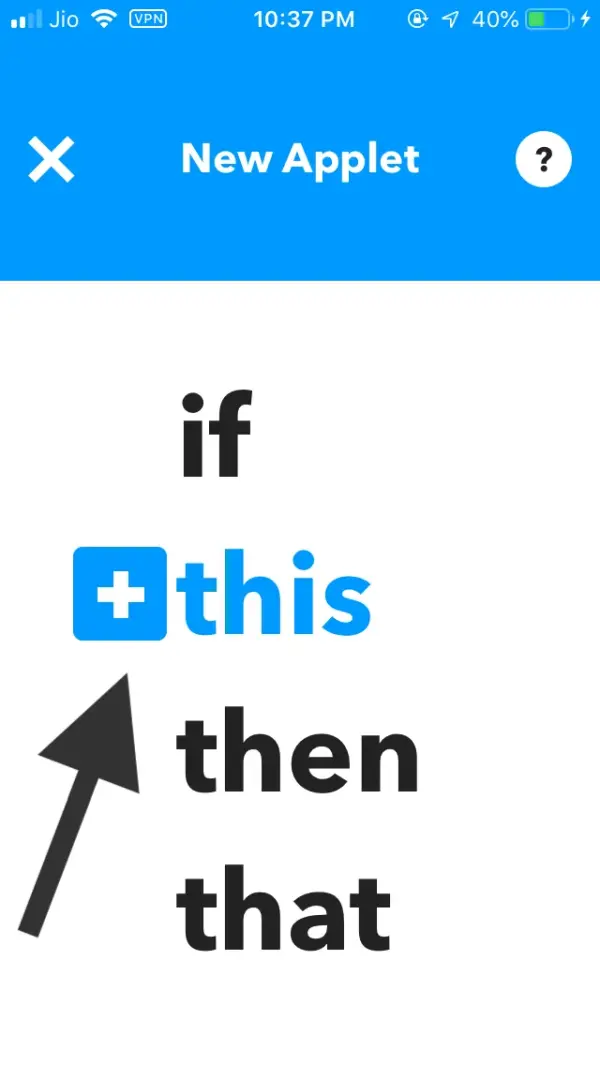
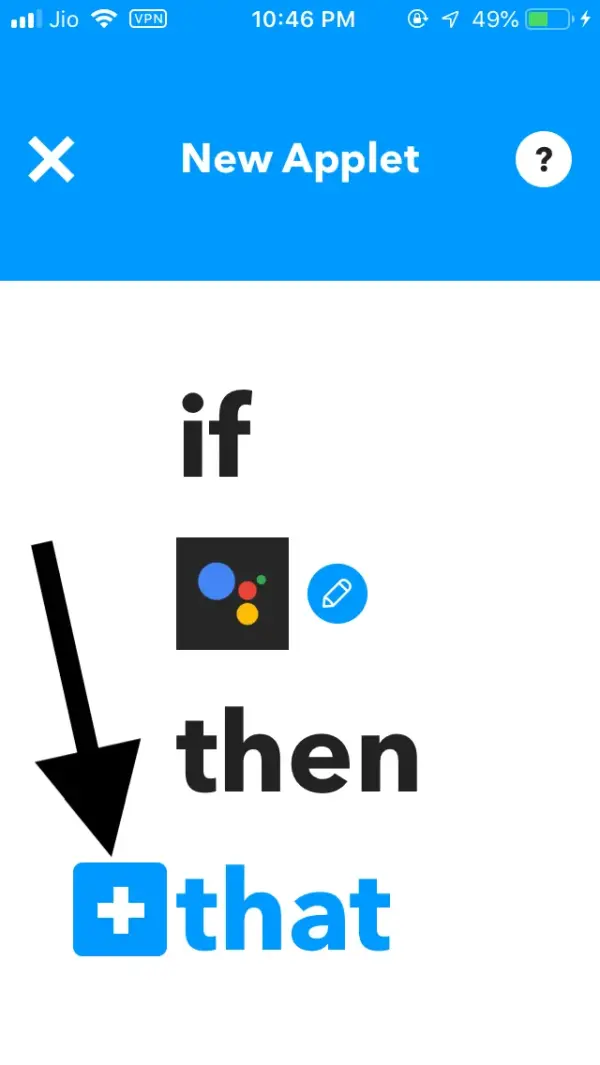
To create a new applet, tap on the “+” icon located at the top of the screen. This action will lead you to a new screen. Next, tap on the blue “+this” text, which will open a search field. Search for “Google Assistant” and select the first result that appears. If this is your first time using IFTTT with Google Assistant, the platform will request you to log in to your Google account associated with Google Assistant and seek permission to access the service.
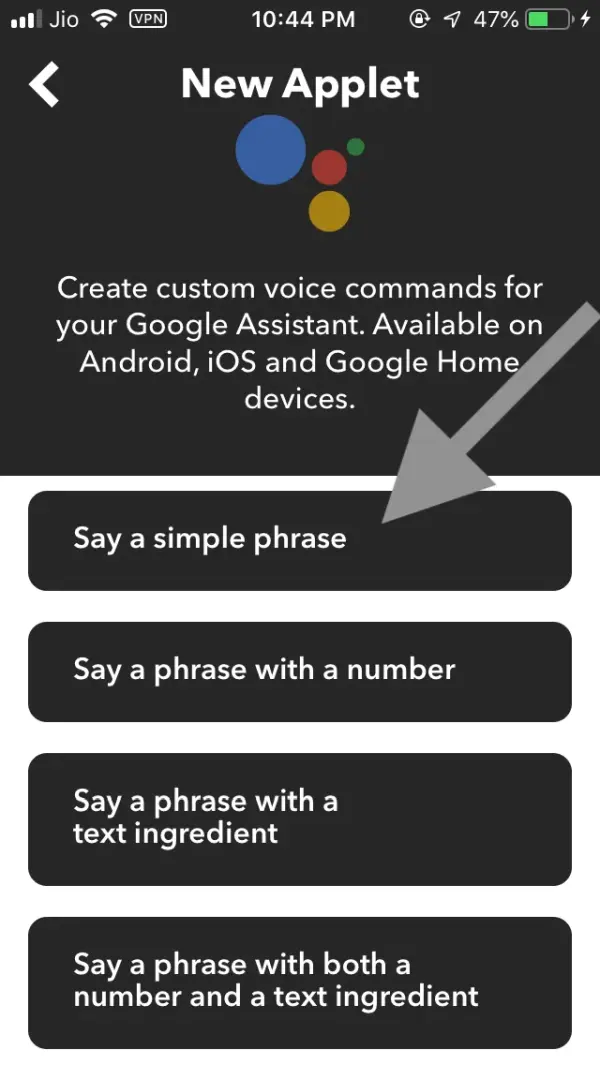
After selecting “Google Assistant,” choose the option “Say a simple phrase.” Enter the specific phrase that you would like to trigger your Google Assistant and turn on the light. Additionally, you can include two alternative phrases that can also activate the same event. Furthermore, specify the desired response from the Google Assistant when you give this command.
You have now configured the “this” part of your IFTTT applet. To proceed to the “that” part, tap on “+that” and search for “Particle,” selecting the first result that appears. From there, choose “Publish an event.” IFTTT will then prompt you to connect your Particle account and authorize access to it.
Next, enter the unique event name that you assigned earlier in the Particle Build IDE for the function that controls the turning on process. Ensure that you set it as a Public event. After entering the event name, tap on the checkmark located at the top-right corner of the screen, and then proceed to tap on “Finish” on the subsequent screen.
Similarly, create another applet for the turning off process by setting up the “this” and “that” parts using Google Assistant and Particle, respectively. Follow the same steps as before, ensuring to use the appropriate event name (Name_of_The_Event-2) that you designated in the Particle Build IDE.
Congratulations! You have successfully completed the setup. Now, you can use your Google Assistant to control your Raspberry Pi-based smart home light. Enjoy the convenience and control of your self-made smart lighting system!