
Software part..
Let's begin with the software aspect.
To start, you need to download the Kali Linux image file. Click on the provided link to initiate the download of the image file. Make sure to select the appropriate file based on the version of Raspberry Pi you are using.

Once you have downloaded the image file, you need to flash it onto the SD card. Follow these steps:
- Connect the SD card to your laptop or PC using an SD card reader.
- Format the SD card using any SD card formatting tool.
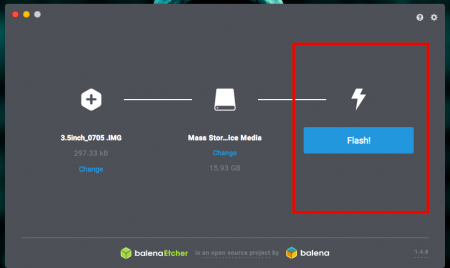
- Proceed to download a software called Etcher, which is used to flash the image file onto the SD card.
Flashing the SDcard with Etcher
So first you have to open the Etcher software and select the image file
To begin, launch the Etcher software on your computer. Once the software is open, you need to select the image file that you downloaded earlier. Locate and choose the Kali Linux image file within the Etcher software interface.
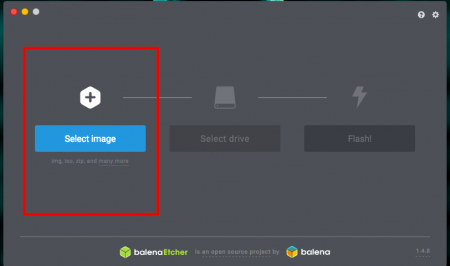
you should select the image file from the download folder while clicking the highlighted button
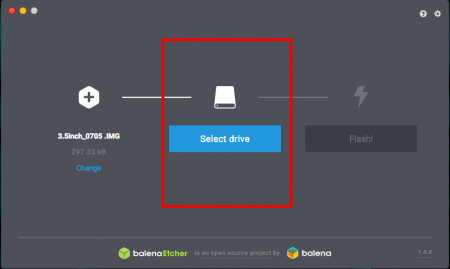
connect the SDcard to your system and select the drive
Hardware part..
Now, let's begin assembling the parts.
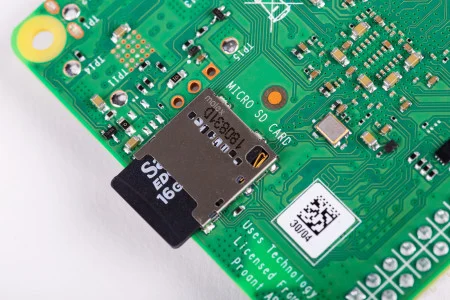
Start by removing the SD card from your PC or laptop and inserting it into the Raspberry Pi. This will ensure that the Raspberry Pi has the necessary storage for the operating system and other software.
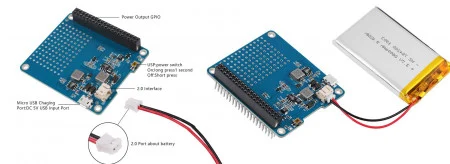
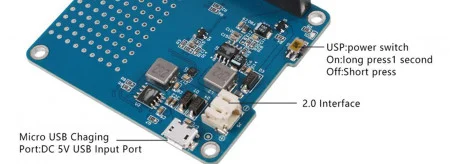
Now connect the Battery to the UPS HAT Board
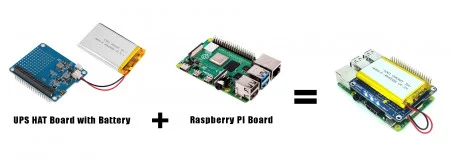
Now, let's proceed to the main assembly.
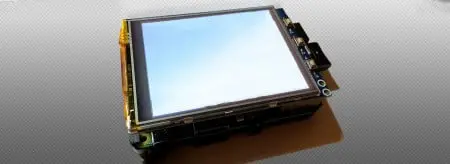
Take the Raspberry Pi 3.5, TFT Display, and UPS HAT Board, and connect them together following the GPIO pins. Connecting these components is as straightforward as connecting LEGO bricks, so there's no need to worry or feel confused.
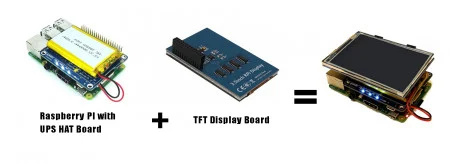
Next, connect the TFT Display to the Raspberry Pi, and that concludes the hardware assembly.
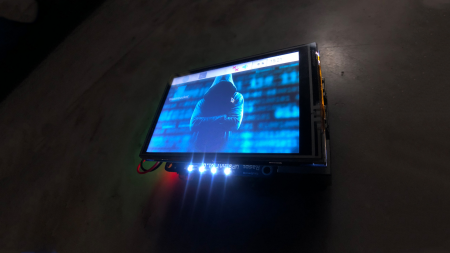
Connect the Raspberry Pi to the network using an Ethernet cable. Then, turn on the Raspberry Pi by pressing and holding the USB power switch for approximately one second.
and you will be seeing a white screen …
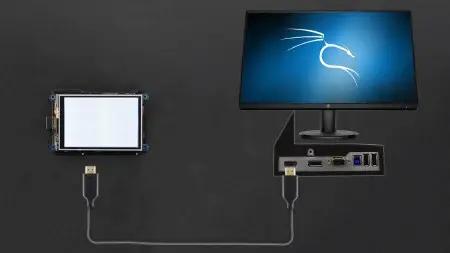
Now, it's time to configure the display.
You have two options for this step. Firstly, you can connect your Raspberry Pi to a monitor using an HDMI cable. Alternatively, you can establish a connection to the Raspberry Pi using a SSH client like PuTTY. Choose the method that is most convenient for you.
Connecting PI via Putty shh client
To retrieve the IP address of your Raspberry Pi, you need to access your router's page. Follow these steps:
- Open a web browser on your computer.
- In the address bar, type the IP address of your router. This IP address is typically provided in the user manual or can be found on the router itself.
- Press Enter to access the router's page.
By browsing the router's page, you can locate the connected devices section where you will find the IP address associated with your Raspberry Pi.
Once you have identified the IP address of your Raspberry Pi, proceed to open the PuTTY SSH client.
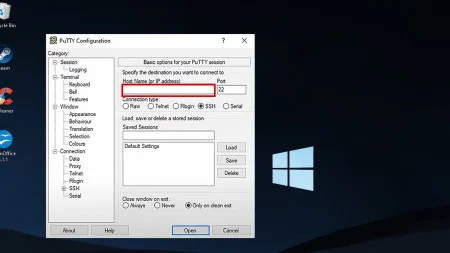
This will establish an SSH connection to your Raspberry Pi.
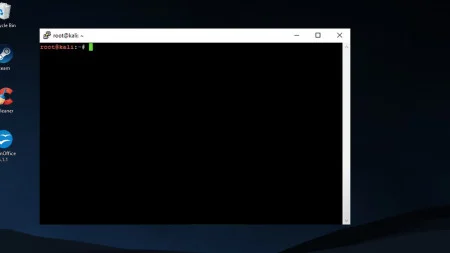
Now, you need to enter the username and password for authentication.
This will open the shh connection to your Raspberry PI
Now you have to enter the username and password.
|
Username :
|
root
|
|---|---|
|
Password :
|
toor
|
so now we are inside the kali linux terminal.
Now, we can begin configuring the TFT display. To do this, we need to access the Kali-Pi Touchscreen Setup tool. Type the following command in the terminal to initiate the setup:
kalipi-tft-configExecuting this command will launch the Kali-Pi Touchscreen Setup tool, allowing you to configure the TFT display settings.
This will take you to the kali-pi touchscreen setup tool..
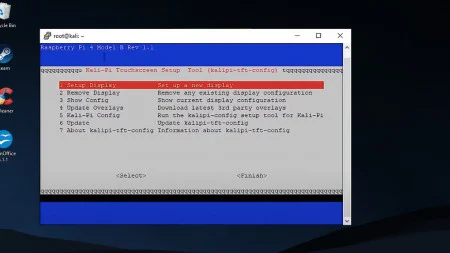
Choose the first option, “Setup Display,” from the displayed menu. On the subsequent page, select the appropriate display manufacturer, size, and location (you can leave the location as default). Click “OK” to proceed, which will take you back to the main menu.
Next, select the sixth option, “Update,” from the menu to initiate the update process.
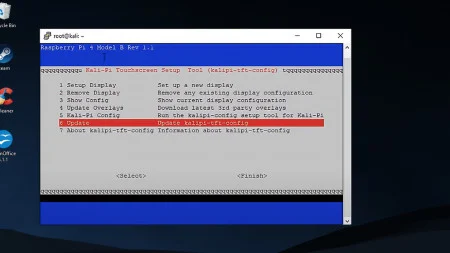
This will update the configuration settings. After the update is complete, click “Finish” to exit the setup tool and return to the Kali Terminal.
Now, you need to edit some configuration files to enable auto-login. To do this, type the following command in the terminal and press Enter:
nano /etc/lightdm/lightdm.conf|
autologin-user =
|
root
|
|---|---|
|
autologin-user-timeout =
|
0
|
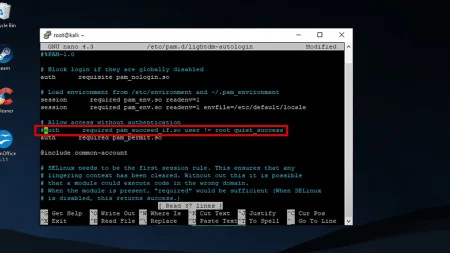
now let move on to next file..so type the command given below and hit enter
nano /etc/pam.d/lightdm-autologinnow we have to comment out an authentication ..
Now reboot the PI by typing..
sudo rebootAfter the reboot you will be able to see the display working…… and thats all..
Raspberry Pi does have built-in Wi-Fi functionality, but it is primarily intended for command-and-control purposes. It is not ideal for performing hacking activities. Therefore, I recommend using an external Wi-Fi card for such tasks. Some recommended options for external Wi-Fi adapters are:
- Alfa AWUS036NHA 150Mbps Wireless USB Adapter
- Alfa Long-Range Dual-Band AC1200 Wireless USB 3.0 Wi-Fi Adapter
These external adapters provide better capabilities and performance for tasks related to hacking and network exploration.