
Adding a power button to the Raspberry Pi is a practical solution to address its lack of a standard on/off switch. You have two options: creating a DIY power button or purchasing one. In either case, the goal is to have a functional power button that ensures a safe and proper shutdown of the Raspberry Pi. Let's explore the steps involved in adding a power button to your Raspberry Pi.

Why You Need a Raspberry Pi Power Button
While using a Raspberry Pi is generally straightforward, powering it up and shutting it down can sometimes pose challenges and potential issues.
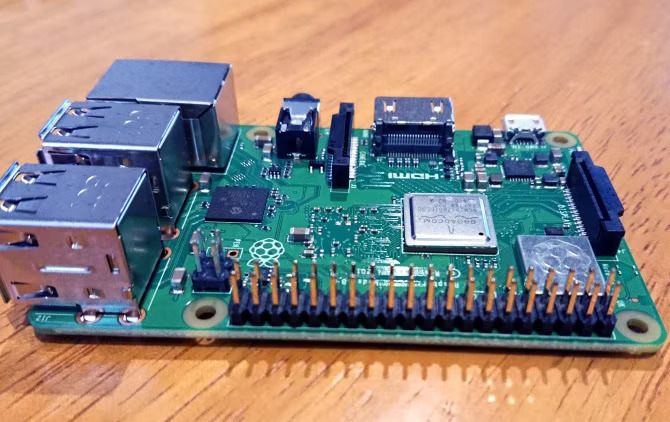
Upon unboxing the Raspberry Pi, it becomes apparent that there is no built-in power button, which is a common feature in most other devices. Instead, the process involves connecting the USB power cable and allowing the Raspberry Pi to boot up with the chosen operating system. While powering up is relatively simple, shutting down the device poses a different challenge. To turn off the Raspberry Pi, you need to use a command or mouse click to initiate the shutdown process, which may not always be the most convenient or ideal method.
The Importance of Safely Powering Down
If the Raspberry Pi experiences a crash or becomes inaccessible through remote access or input devices, the process of shutting it down becomes problematic. In such cases, the only solution is to abruptly disconnect the power cable, which can lead to various issues.
One significant concern is the potential corruption of the SD card if data is being written to it at the time of power loss. This can result in an operating system that fails to boot properly. Although modern SD cards often have error correction mechanisms, it may still require flashing a new operating system to recover from the corruption. Moreover, important data can be lost in the process, which is especially troublesome if you have been working on a specific project or using the Raspberry Pi to learn programming with tools like Scratch.
To mitigate these risks, it is crucial to power down the Raspberry Pi safely. This allows the operating system to complete any active write processes to the SD card before shutting down, reducing the chances of data loss and SD card corruption. Taking preventive measures is always preferable to dealing with the consequences afterward.
Mount a Raspberry Pi Off Switch on the GPIO
A safe way to shut down a Raspberry Pi is by utilizing a homemade switch connected to the computer's GPIO (General Purpose Input/Output) interface. This can be accomplished by creating a DIY switch using a single momentary switch and a Python script. These components are typically inexpensive and can be purchased in multiples.
If you are unable to obtain these components or require a switch immediately, you can check your collection of old PC components. The type of switch you need is similar to the power button found on a typical PC.
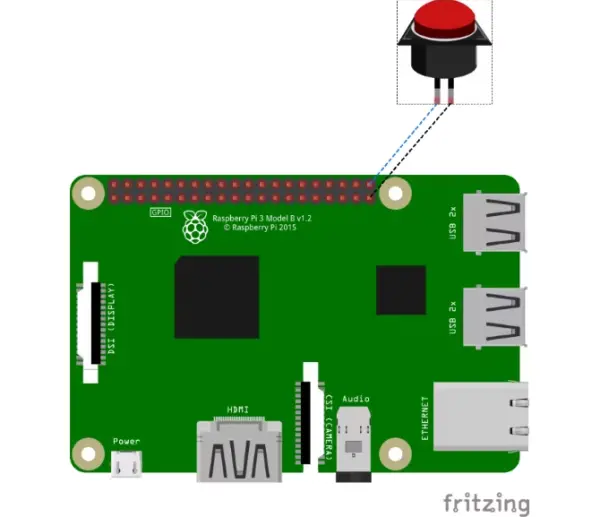
To connect the momentary switch, ensure that the Raspberry Pi is powered off, and then attach it to GPIO pins 39 and 40.
After restarting your Raspberry Pi, the next step is to create the Python script and configure the GPIO (General Purpose Input/Output).
To achieve this, you can refer to the Raspberry Pi Safe Off Switch project on GitHub, which provides detailed instructions on utilizing the GPIO Zero library to create a power-off switch for the Raspberry Pi. If you are using a full version of Raspbian Stretch, GPIO Zero should already be installed. However, if you are using the Lite version of Raspbian, you will need to install GPIO Zero manually.
sudo apt update
sudo apt install python3-gpiozero
Next, open your preferred text editor and create the script. In this example, we will use the nano text editor.
sudo nano shutdown-press-simple.pyWithin the text editor, input or copy and paste the following script into the file:
#!/usr/bin/env python3
from gpiozero import Button
import os
Button(21).wait_for_press()
os.system(“sudo poweroff”)
As depicted, the script imports the gpiozero library, designates GPIO pin 21 (which corresponds to physical pin 40 in the internal numbering system), and triggers the “poweroff” command upon detecting a button press. Save the script using Ctrl + X, followed by Y to confirm.
Returning to the primary terminal window, set the script as executable by executing the following command:
chmod a+x shutdown-press-simple.pyTo ensure this works following a reboot, append /etc/rc.local:
sudo nano /etc/rc.localIn the final line before the exit statement, add:
echo '~pi/shutdown-press-simple.py'Save and exit as before, then try the button out.
Safely Mounting the Power Button
There are various solutions to address the issue of accidental button presses. These range from mounting the button in a location less prone to accidental knocks to implementing a longer press requirement (more details can be found on the GitHub page mentioned earlier).
Once the button is installed, it is advisable to mount it securely. Depending on factors such as your Raspberry Pi model and case type, you may need to make some adjustments to accommodate the button. If feasible, consider recessing the button to minimize the risk of accidental activation, similar to the power switch on a desktop computer.
Two Raspberry Pi Power Buttons You Can Buy
If you're looking for an alternative to the DIY approach, there are several Raspberry Pi power buttons available for purchase online. Here are two popular options to consider:
1. Pi Supply Power Switch
Designed to sit between the Raspberry Pi and the mains outlet, this power switch comes as a kit. You'll need to solder the components to the PCB to get started and install this code from GitHub before connecting. Three buttons on the device let you switch on, switch off (the equivalent of a cable pull), and initiate a graceful shutdown. The third button also enables a reboot with a longer press.
2. iUniker Raspberry Pi Switch
The iUniker Raspberry Pi Switch is another option available as a pre-built product. Unlike the Pi Supply device, the iUniker switch does not provide a feature to prevent a sudden shutdown. This means it is only suitable for turning your Raspberry Pi on. However, the iUniker switch can be helpful in preventing wear on your Raspberry Pi's power connector.
Add More Buttons to Your Raspberry Pi
Although the Raspberry Pi was initially released in 2012, it still doesn't come with a built-in power button. This is intentional, considering factors like cost and the diverse range of Raspberry Pi projects, where a power button may not be necessary.
If you require a power button, you can install one; otherwise, you can proceed without it.
In addition to the challenge of shutting down, rebooting can also be problematic for the Raspberry Pi. However, you can address this issue by adding a reset switch to your Raspberry Pi.