In a recent tutorial, a Raspberry Pi enthusiast and tech-savvy YouTuber ETA Prime demonstrated how to transform an Arcade1UP cabinet into a Raspberry Pi arcade cabinet. This innovative process involves installing a Raspberry Pi, compact computer, inside the arcade cabinet. The project has used affordable USB encoders and buttons to keep the overall cost low, making this a budget-friendly project for arcade enthusiasts although you can upgrade any components to suit your budget as required.
The necessary items for this process include a Raspberry Pi, an SD card, a power supply, and an LCD controller board to convert the stock monitor to HDMI. ETA Prime also recommends purchasing a full arcade button kit, which includes all the necessary buttons and two joysticks. A small amp, which can be found on Amazon or eBay, is also required for this project.
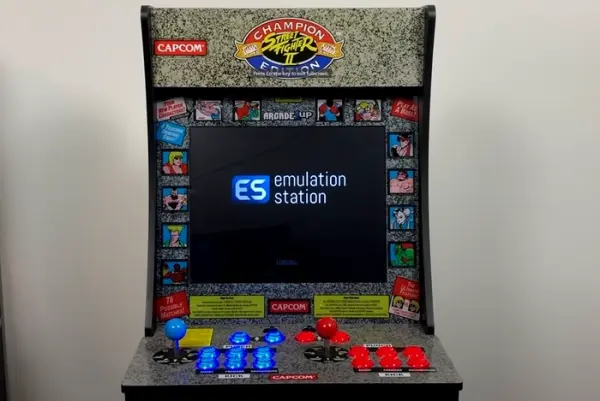
Adding a Raspberry Pi to a Arcade1UP
In addition to these items, ETA Prime used a power strip, zip ties, a screwdriver, a knife, and a drill for creating extra holes for the buttons. Before starting the process, the presenter advises ensuring the LCD monitor is working properly.
The original buttons and joysticks were replaced with new ones from the arcade button kit. ETA Prime added two extra buttons to the control panel by drilling two 30mm holes. These buttons were then connected to USB encoder boards, which were subsequently plugged into the Raspberry Pi.
Raspberry Pi arcade cabinet extra buttons
To avoid confusion between player one and player two, ETA Prime advises wiring each button to each encoder in the exact same spot. An amp was also installed and connected to the speaker and the controller board.
Before finalizing the setup, don’t forget to test everything to ensure it works properly. For those who are not comfortable with setting up a Raspberry Pi, a Pandora’s box can be used as an alternative. RetroPie emulation software using this project and available to download for free and install on your Raspberry Pi mini PC allows the Pi to emulate retro video games. This adds a nostalgic touch to the modern Raspberry Pi arcade cabinet together with a really easy-to-use menu system allowing you to access all your favorite retro games.
All the items used in the tutorial can be found on Amazon or eBay, with links provided by ETA Prime. This project is a great way for arcade enthusiasts to add a personal touch to their gaming experience, combining the charm of retro gaming with the versatility of the Raspberry Pi.
I am an experienced technical writer holding a Master's degree in computer science from BZU Multan, Pakistan University. With a background spanning various industries, particularly in home automation and engineering, I have honed my skills in crafting clear and concise content. Proficient in leveraging infographics and diagrams, I strive to simplify complex concepts for readers. My strength lies in thorough research and presenting information in a structured and logical format.
This website uses cookies to improve your experience. We'll assume you're ok with this, but you can opt out if you wish.ACCEPTCheck Privacy Policy
Manage consent
Privacy Overview
This website uses cookies to improve your experience while you navigate through the website. Out of these, the cookies that are categorized as necessary are stored on your browser as they are essential for the working of basic functionalities of the website. We also use third-party cookies that help us analyze and understand how you use this website. These cookies will be stored in your browser only with your consent. You also have the option to opt-out of these cookies. But opting out of some of these cookies may affect your browsing experience.
Necessary cookies are absolutely essential for the website to function properly. This category only includes cookies that ensures basic functionalities and security features of the website. These cookies do not store any personal information.
Any cookies that may not be particularly necessary for the website to function and is used specifically to collect user personal data via analytics, ads, other embedded contents are termed as non-necessary cookies. It is mandatory to procure user consent prior to running these cookies on your website.