
Starting with the Raspberry Pi opens up a world of possibilities for various projects. To begin, you need to gather the necessary supplies and acquire a basic understanding. Here's a guide on how to get started.
In the world of tinkering and DIY projects, the Raspberry Pi, a single-board computer that emerged six years ago, has revolutionized the game. It serves as a dream machine for a wide range of projects, including gaming consoles, home streaming setups, VPN servers, and more. However, before diving into your Pi project, it's important to gather the necessary supplies and grasp the fundamentals. If you're embarking on a journey with the Raspberry Pi, let's begin here.
What Is the Raspberry Pi?
The Raspberry Pi is a compact computer that is comparable in size to a deck of cards. It utilizes a system-on-a-chip design, where the CPU and GPU are integrated into a single circuit. The board itself includes soldered components such as RAM, USB ports, and more, providing an all-in-one solution.
Although it doesn't come with built-in storage, the Raspberry Pi offers an SD card slot that allows you to store your operating system and files. This tiny computer is power-efficient, affordable, and priced at just $35.
Initially designed as an affordable computer for programming education, the Raspberry Pi Foundation's Raspberry Pi gained popularity among DIY enthusiasts seeking a more capable computing solution for their electronic projects.
Over time, the Raspberry Pi line has seen the release of multiple models, including various revisions. For instance, the Raspberry Pi 3 Model B+ improved upon the networking capabilities of its predecessor, the Model B.
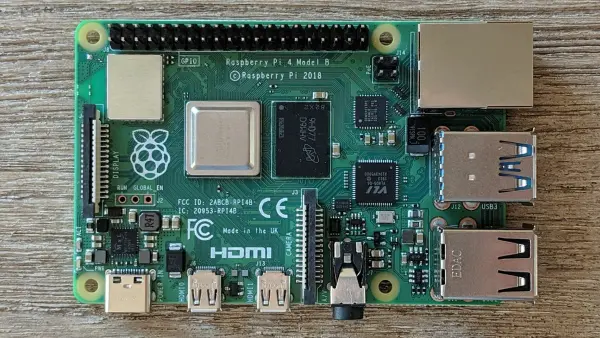
The most recent model, as of now, is the Raspberry Pi 4, boasting a 1.5GHz quad-core ARM CPU, a 500MHz VideoCore VI GPU, and 1GB of RAM. However, there are options available to upgrade to 4GB of RAM by paying a little extra.
Earlier models are still available for the standard price of $35, but you may also find used models at a slightly lower cost. These older models generate less heat, which can be advantageous if your project doesn't require substantial processing power.
What You Need to Get Started
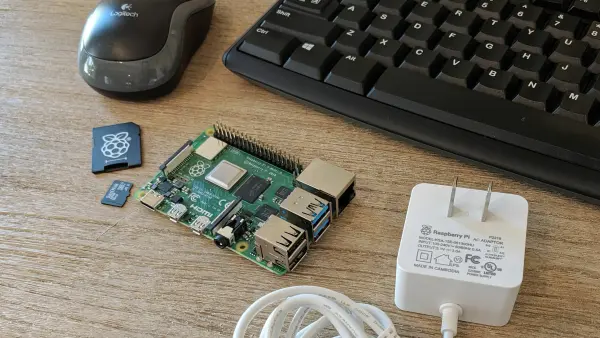
While the Raspberry Pi serves as the central component of your project, a single circuit board alone is not sufficient without a power supply and storage. To ensure your project is operational, you will require a few essential components:
The Raspberry Pi
Due to its high demand, the latest model of Raspberry Pi may be somewhat challenging to find. However, you can refer to the approved list of resellers to explore potential availability. Amazon offers earlier models such as the Raspberry Pi 3 B+ and Raspberry Pi 2. Additionally, the smaller and less powerful Raspberry Pi Zero is also available, offering a compact form factor.
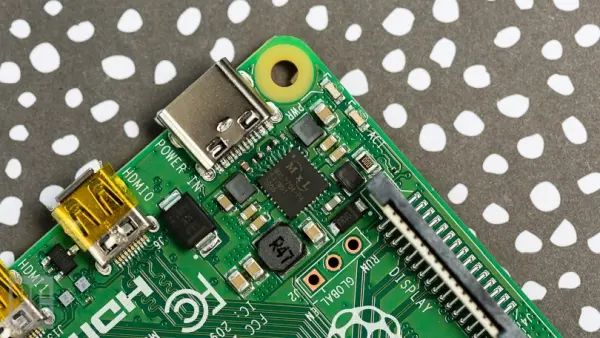
A Power Supply
Earlier versions of the Raspberry Pi relied on microUSB for power supply, but the Raspberry Pi 4 introduces USB-C (although it uses a non-standard version). While some phone chargers may work adequately for powering the Pi, it is advisable to invest in a power adapter specifically designed for the Pi, such as the one offered by CanaKit or the official models from the Raspberry Pi Foundation. Using dedicated power adapters ensures a consistent power supply to the board and minimizes troubleshooting efforts.
A microSD Card
Most recent Raspberry Pi models utilize microSD cards for storage, while the original Pi models A and B used standard SD cards. However, not all SD cards are fully compatible, so it is recommended to either purchase the official Raspberry Pi microSD card (which comes preloaded with an operating system) or choose a tested compatible option from the provided list, such as the SanDisk 32GB Ultra. Additionally, you will require a suitable SD card reader, such as a USB adapter, to connect the SD card to your computer.
A Case
Technically, this is optional but we recommend it. Instead of having your bare board out in the open, it's probably a good idea to protect it with a case. Pi 4 cases are still coming to market, but for earlier models, the FLIRC case(Opens in a new window) is a particularly great option thanks to its built-in heatsink.
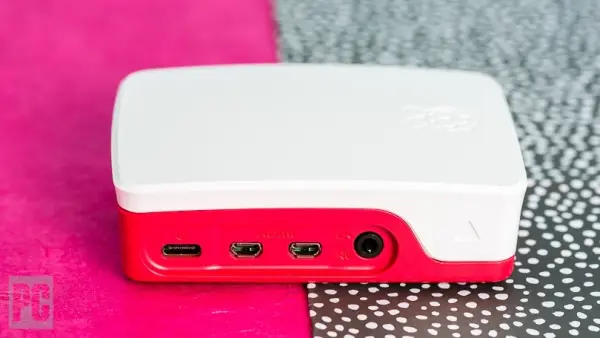
Certainly, there are various appealing cases available, such as retro gaming cases and transparent cases that showcase the internal hardware. Additionally, several cases offer the option of including separate heatsinks and/or fans, which help in maintaining optimal cooling for the system-on-a-chip.
Mouse, Keyboard, and HDMI Cable
For the initial setup of your Pi, it's recommended to have a mouse and keyboard available, even though they may not be necessary for your project in the long run. If it's inconvenient to disconnect these peripherals from your main computer, consider purchasing an affordable set from Amazon. Similarly, obtain an HDMI cable or micro-HDMI cable (for Pi 4) to connect to a display. You have the option of purchasing all these accessories together in an official Pi 4 kit or a Pi 3 kit from CanaKit. Alternatively, if you already have some of these accessories on hand, buying them individually might save you some money. Additionally, depending on your project, you may require other components such as USB gamepads for a retro gaming machine.
How to Install an Operating System on an SD Card
Each project necessitates an operating system to be installed on the Pi, commonly a version of Raspbian, the official OS for the Pi developed by the Raspberry Pi Foundation and based on Debian Linux. The Foundation also provides an automated installer called NOOBS (New Out of the Box Software), but for the purpose of this guide, we will omit it.
As numerous projects may require manually “flashing” an image onto the SD card, it is advisable to learn how to do it yourself. Despite NOOBS being designed for beginners, I personally find the process of manually flashing an image simpler..
To install an operating system, you'll require an image file and a program to write it onto the SD card. In this tutorial, we'll be using Raspbian as our operating system, but you can choose any other OS such as LibreELEC for a media box or RetroPie for retro gaming.
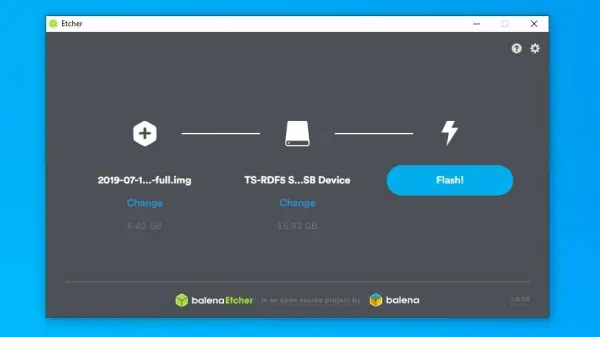
For writing the image to the SD card, I suggest using Etcher. It is available for Windows, macOS, and Linux. Please note that if you have previously used the SD card in a Pi, there may be hidden partitions in Windows that can be cleaned out using diskpart before proceeding.
To begin, download the appropriate image file for your specific Pi model. In my case, I've chosen the full Raspbian image that includes recommended software. The file may be in IMG format or a ZIP file containing the IMG (no need to unzip if using Etcher).
Next, launch Etcher and click on the ‘Select Image' button to choose the downloaded file. Select your SD card as the destination, and click on ‘Flash'. Take care when selecting the target drive, as the process will erase its contents.
The flashing process may take some time. Once completed, eject the SD card and insert it into your Pi. Connect the Pi to a monitor or TV using an HDMI cable, and power it on by plugging it into an electrical outlet. You'll be greeted with the Raspbian desktop, where you can configure Wi-Fi, install software using the apt command in the terminal, and start exploring and experimenting with your Pi.