
1. Introduction
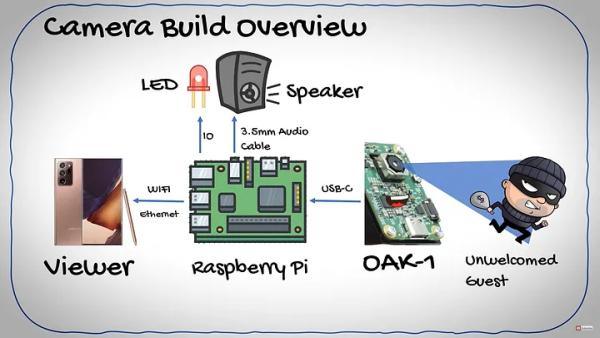
Today, we will guide you on how to build your very own Real-Time AI Surveillance Camera using a Raspberry Pi!
The problem we aim to address is the lack of readily available real-time Raspberry Pi CCTV camera solutions. Most existing solutions either lack real-time capabilities, relying on external servers or cloud processing, or require bulky devices like the Neural Compute Stick or Google Coral, which are not ideal for compact security camera setups.
Instead, we will utilize the OpenCV AI Kit (OAK) with almost any Raspberry Pi model, including the Raspberry Pi Zero, to create a surveillance camera with a small footprint. So, let's dive right in!
2. What you will need
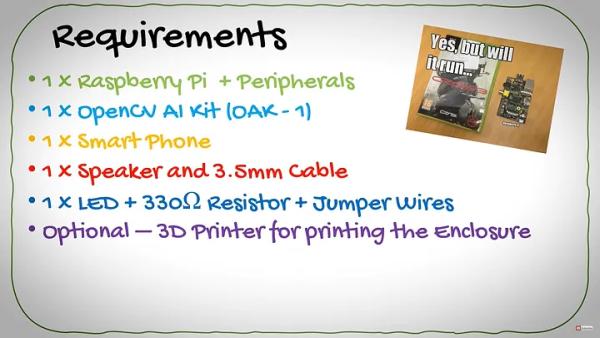
To successfully complete this project, you will need the following requirements:
- Raspberry Pi: You will need a Raspberry Pi board, preferably version 3 or higher. Ensure you have all the necessary peripherals, such as cables, a monitor, keyboard, and optionally an enclosure and heatsink.
- OpenCV AI Kit (OAK): This kit is essential for enabling AI capabilities in your surveillance camera. It comes with a USB C cable for connecting to the Raspberry Pi.
- Smart Device with TeamViewer: You will require a smart device, such as a smartphone or tablet, capable of running TeamViewer. This will allow you to remotely access and monitor your surveillance camera. For example, you can use a Samsung Galaxy Note 20 Ultra.
- Speaker and 3.5mm Aux Cable: You will need a speaker to play sound notifications from your surveillance camera. Make sure you have a matching 3.5mm aux cable for connecting the speaker to the Raspberry Pi.
- LED and Jumper Wires: For additional visual notifications, you can include an LED that flashes when an intruder is detected. Ensure you have jumper wires and a 330Ohm limiting resistor to connect the LED to the Raspberry Pi.
- Optional: 3D Printer for Enclosures: If desired, you can use a 3D printer to create custom enclosures for your smart camera setup. This step is optional but can provide a neat and professional finish to your project.
3. How it works
4. Schematic
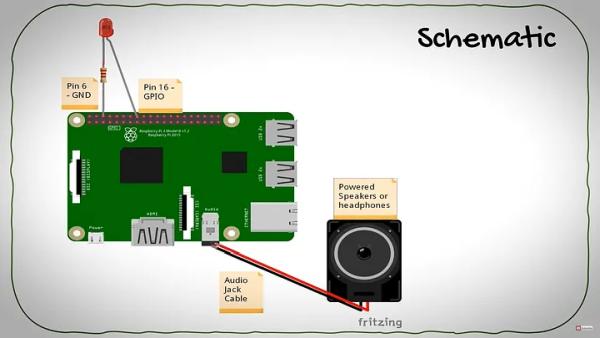
Here is the schematic I quickly drew in Fritzing.
To begin, we need to connect the Anode of our LED to GPIO pin 16, and the Cathode should be connected to a limiting resistor, which is then connected to ground at Pin 6. Next, we can easily connect either our powered speakers or headphones to the audio jack port on the Pi. As you can see from the schematic, it's a straightforward process.
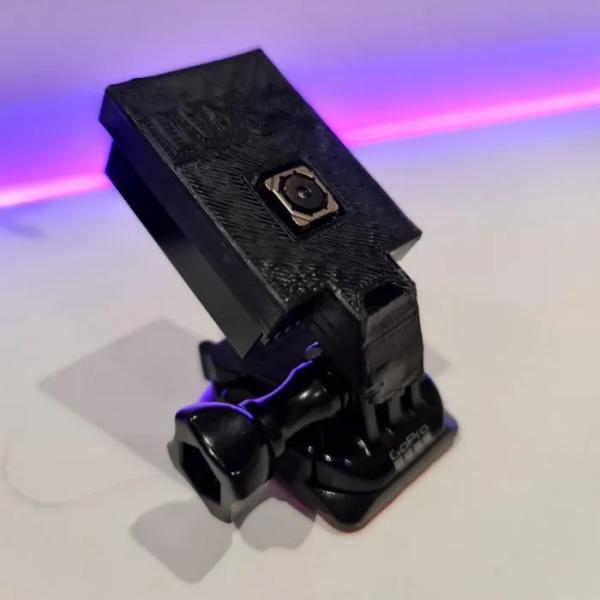
5. 3D Printing
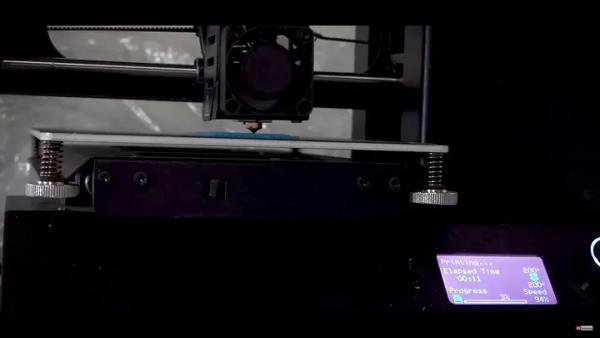
We require an enclosure for our camera, and there are two options to consider. The first option is to design a single box that accommodates both the Pi and OAK device. Alternatively, we can create a case specifically for the OAK-1 and run a USB C cable to a concealed Raspberry Pi.
In this project, I'll choose the second option as it allows for discreet camera placement and is also simpler to implement.
To find a suitable case for your needs, you can visit this GitHub link where you'll discover a variety of cases available for both the OAK-1 and OAK-D that can be 3D printed.
Personally, I'll select the case with a GoPro mount, although there's another option with a lens mount that's quite intriguing!
Once you've chosen a case, the remaining steps are straightforward. Import the design into your preferred slicing software (such as Cura), adjust the resolution to 0.2, set the infill to 80%, and consider using a brim or raft for stability during printing.
Now, copy the file to an SD card, and let's begin the printing process!
Afterward, spray paint the printed case with inconspicuous black paint to give it a stealthy appearance.
6. Code
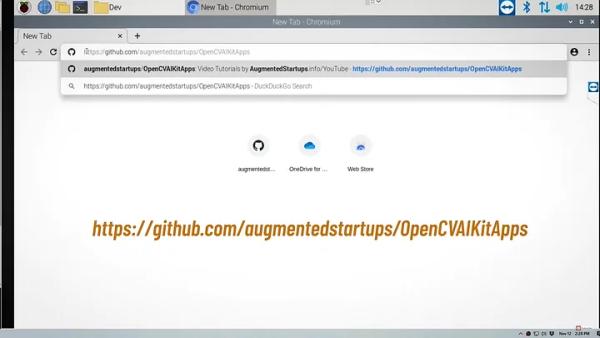
To begin, please navigate to the following GitHub repository:
Next, I would like you to use the command “git clone” to make a copy of this repository. Inside, you will discover the initial and final versions of the application's code.
git clone https://github.com/augmentedstartups/OpenCVAIKitApps
To explore Apps 1-5, you can refer to this series of tutorial videos available in a playlist.
The “base” represents the code template we will utilize, while the “final” version serves as a convenient option for copy-pasting. If you prefer to skip ahead to the integration section of the video, you can directly access the final code.
Once the file has finished downloading, we can proceed to extract all the files contained within.
If DepthAI is not currently installed on your system:
python3 -m pip install -r requirements.txtpython3 run_app1_base.py
7. Summary
Testing it out, we can see that when a person is detected we are successfully able to sound an alarm and light up an LED which could later be upgraded to a flood light.
To Learn more Computer Vision, Raspberry Pi, OpenCV tutorials, please visit www.augmentedstartups.com/