
The Internet of Things (IoT) has gained widespread popularity among technology and hobbyist communities alike. An important consideration for IoT applications is enabling secure remote access.
End-users often need to control IoT devices via apps or browsers. Service providers require access to devices installed off-site. And product support teams need to remotely log in to customer-deployed systems.
In this article, we'll explore how web applications combine seamlessly with IoT technologies. We'll cover remotely connecting over the internet to:
NodeJS web apps
Python Flask web apps
File server web apps
Node-RED server dashboards
Whether you're a coder, DIY enthusiast, or simply curious about building web-faced IoT systems, we'll provide step-by-step instructions. You'll learn how to configure remote connectivity so applications running on IoT devices are accessible from anywhere via the internet.
Through this guide, coding beginners to experts alike can gain skills useful for IoT projects involving remote monitoring, control or access via the web. Let's get started exploring this intersection of IoT and web technologies.
Remotely Connect to a NodeJS Web Application in IoT
Let’s assume you have a nodejs webserver application(as shown below), running in your IoT device. Let’s say, the nodejs webserver app listens on localhost port 3000.
$ cat myapp.js
var http = require('http');
//create a server object:
http.createServer(function (req, res) {
 res.writeHead(200, {'Content-Type': 'text/html'});
 res.write("<h2>Hello World!</h2>"); //write a response to the client
 res.end(); //end the response
}).listen(3000); //the server object listens on port 3000
$
We’ll use the above web app to explain how to remote access IoT webserver from the internet.
Now run the myapp.js on your IoT, as shown below.
$ node myapp.js
Open up a browser in your IoT and point to http://localhost:3000 to connect to the local web application.
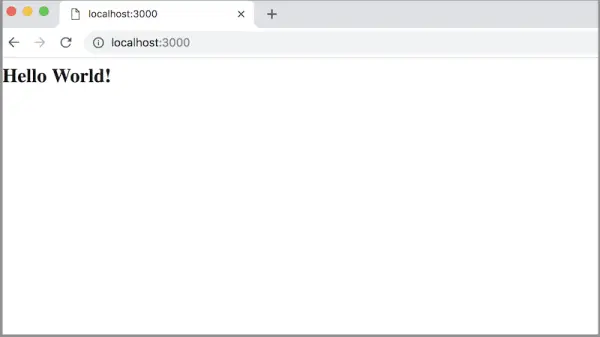
At present, the web app can only be reached on the local network as it is running internally on our IoT device.
This device no doubt sits behind a home or organization's NAT router/firewall, separating it from external internet access.
In order to remotely access the Node.js web server from the wider internet, we'll need to configure port forwarding through this network infrastructure barrier.
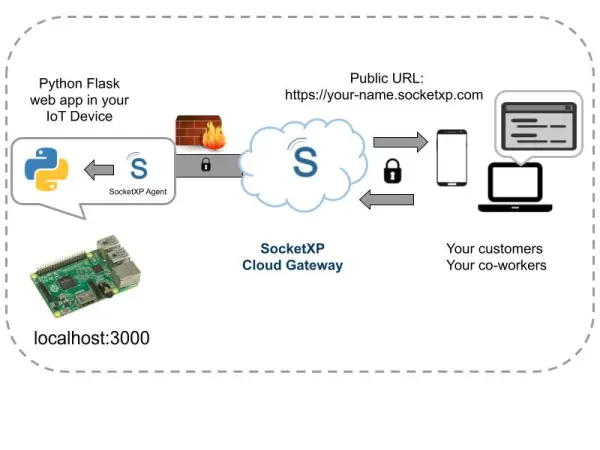
Specifically, we will use a tool called SocketXP to establish an HTTPS tunnel. This will bridge the gap between our local server ports and the global internet address space.
SocketXP will generate both a tunnel and a public URL. The tunnel allows port forwarding to reach our internal ports. And the URL provides a web-accessible endpoint to route traffic into our private network to the waiting web app.
By following the SocketXP instructions, we'll learn how to create this connection tunnel. This will grant remote access to our sample Node.js server from any internet connection outside the local network.
Step 1: Download and Install
Download and install SocketXP IoT agent on your IoT or IoT device.
Step 2: Get your Authentication Token
Sign up at https://portal.socketxp.com and get your authentication token.
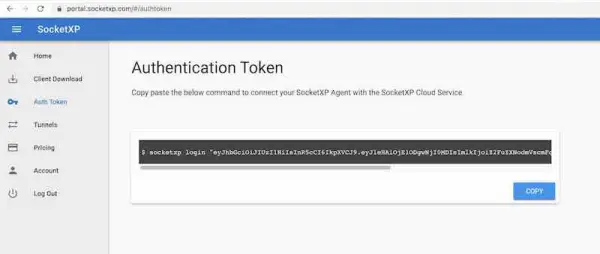
Click the copy button to copy the command string and paste in the terminal window in your laptop or server.
$ socketxp login "eyJhbGciOiJIUzI1NiIsInR5cCI..."
After registering the SocketXP Client with the SocketXP Cloud Service, use the following command to create a secure HTTP proxy tunnel between the nodejs webserver application and the SocketXP Cloud Gateway.
$socketxp connect http://localhost:3000
Public URL -> https://test-user-59129dd68b58.socketxp.com
Let’s access the nodejs webserver application from the internet using the SocketXP Public URL provided in the above output.
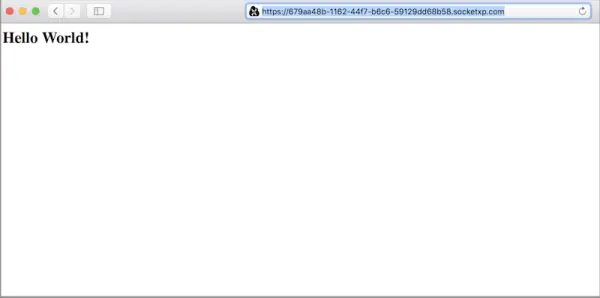
It's important to note that the SocketXP public URL generated for our web server application represents a persistent internet endpoint.
This address will reliably route outside web traffic through the secure tunnel and into our internal network to reach the target server, without change.
The SocketXP portal will not automatically renew or refresh the assigned public URL. It will remain fixed as the linking point between the global internet and our private network port until we manually remove it from their system.
Having a static, permanent public URL is ideal for providing reliable remote access over the long term. Whether we're accessing the server ourselves or wish to give this address to other users, it can always be counted on to connect through the tunnel as configured.
This underscores the benefit of SocketXP’s port forwarding setup – it grants stable remote internet availability to services otherwise only accessible locally on private networks behind firewalls or routers.
Remotely access Python Flask Web App in IoT from Internet
Let’s use the following simple Python flask web application for the demo.
$ cat myapp.py
from flask import Flask
app = Flask(__name__)

@app.route('/')
def hello_world():
    return '<h2>Hello, World!</h2>'

if __name__ == '__main__':
    app.run(host='127.0.0.1', port=3000, debug=True)
Run the myapp.py on a local server or laptop.
$ python myapp.py
Using a browser, let’s point to http://localhost:3000 to connect to the flask web application.