
There are now various infrared (IR) camera sensors available for electronics enthusiasts, which enable the measurement of thermal radiation. By incorporating a microprocessor, these off-the-shelf sensors can be transformed into fully functional thermal cameras.
It is important to note that the resolution provided by these sensors is lower compared to commercially available thermal cameras. However, they are still suitable for applications such as person or animal detection, automatic door sensors, or contactless thermometers.
The Raspberry Pi, with its GPIO (General Purpose Input/Output) pins and ample processing power, provides an ideal platform for connecting and utilizing these sensors. Additionally, scripting languages like Python can be used on the Raspberry Pi to interface with the sensor. This combination offers a flexible testbed for exploring various creative applications.
What else you'll need
This guide has been specifically written with a Raspberry Pi 3 in mind. However, it is worth noting that any Raspberry Pi model newer than the first generation should have the same GPIO pinout, allowing for consistent sensor connections. The operating system utilized throughout this guide is the latest version of Raspberry Pi OS, with Python 3 and Git installed as well.
Selecting a Sensor
When selecting a sensor for this guide, the focus was primarily on cost-effectiveness and ease of use. To avoid the need for creating your own breakout circuitry and developing custom libraries, it is recommended to utilize readily available resources.
Companies such as Adafruit and Sparkfun offer breakout boards and corresponding libraries for sensors like the AMG8833 and the MLX90640.
The AMG8833, manufactured by Panasonic, is capable of capturing temperature readings from an 8×8 grid, totaling 64 individual temperature measurements, at a rate of up to 10 times per second. It can detect temperatures ranging from 0 to 80 degrees Celsius.
On the other hand, the MLX90640, developed by Melexis, offers superior performance compared to the AMG8833, albeit at a higher cost. It features a higher resolution of 32×24 and can sample 768 temperature readings up to 64 times per second. Furthermore, it can detect temperatures as low as -40 degrees Celsius and as high as 300 degrees Celsius.
Please note that at the time of writing, the MLX90640 breakout board is currently sold out without an option for backordering. Consequently, in this guide, we will demonstrate the use of the AMG8833 breakout board provided by Adafruit, along with the corresponding Python library they offer.
Wiring the sensor
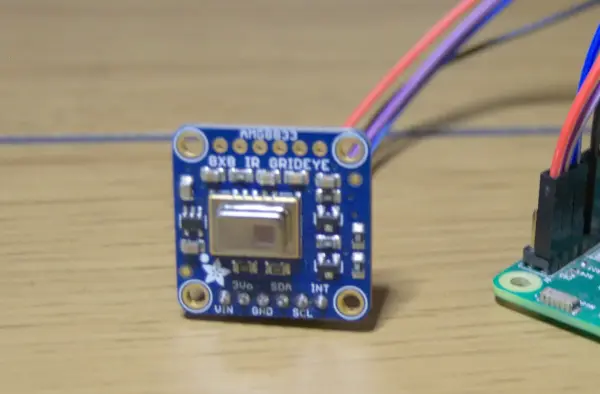
Regardless of the supplier from which you obtain the sensor, it is likely that the header pins will come unassembled and require soldering. It is necessary to solder these pins onto the breakout board for our purposes.
Both the AMG8833 and MLX90640 breakout boards utilize the I2C protocol to communicate with the Raspberry Pi. This protocol employs one wire for bi-directional serial data transmission and another wire to supply a clock signal.
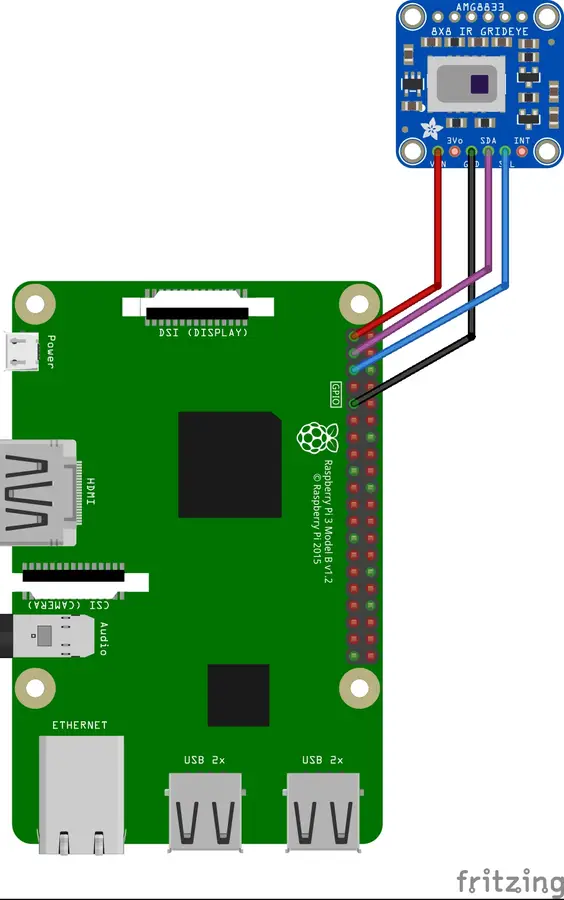
To ensure the safety of both the sensor and the Raspberry Pi, follow these steps with the Pi powered off:
1. Use one of the jumper wires to connect the Vin pin on the sensor to pin 1 on the Raspberry Pi.
2. Connect the GND pin on the sensor to pin 9 on the Raspberry Pi.
3. Connect the SDA pin on the sensor to pin 3 on the Raspberry Pi.
4. Connect the SCL pin on the sensor to pin 5 on the Raspberry Pi using the remaining wires.
Enable the I2C Bus

A fresh install of Raspberry Pi OS has the I2C interface disabled by default. It will be necessary to turn it on.
- Open a terminal window on the Raspberry Pi and run the following:
sudo raspi-config - Select Interface Options then I2C.
- Select Yes to enable the interface.
Install libraries
In the next step, we will install a Python library that will handle the processing of the sensor's input signal and convert it into useful data. If you are using an MLX90640-based sensor, you may need to consult the manufacturer for the appropriate library. For the AMG8833-based sensor, we will install a library provided by Adafruit.
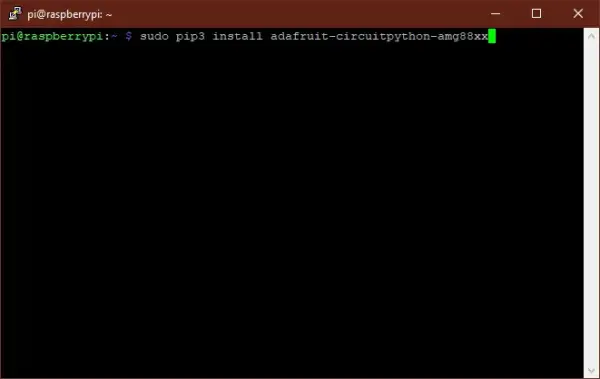
In a terminal window run the following:
sudo pip3 install adafruit-circuitpython-amg88xxThis will install the library necessary for interfacing with the sensor.
The following libraries are only needed to run the graphical example code provided by Adafruit. Run the following commands in a terminal:
sudo apt-get install python-dev libatlas-base-devsudo pip3 install scipy pygame colourThe initial command installs the necessary dependencies for NumPy, which is a fundamental part of SciPy. SciPy is a data library that will be utilized in the example code to perform pixel data interpolation.
Pygame, typically used for game development, will be employed in this context to display the sensor data on the screen.
Additionally, the Colour library, which simplifies color data manipulation, is installed to facilitate color-related operations.
Run the Example Code
We are almost ready to see some output.
We will fetch the example code with this command:
git clone https://github.com/adafruit/Adafruit_CircuitPython_AMG88xxChange to the example code directory:
cd ~/Adafruit_CircuitPython_AMG88xx/examplesFinally, run the example:
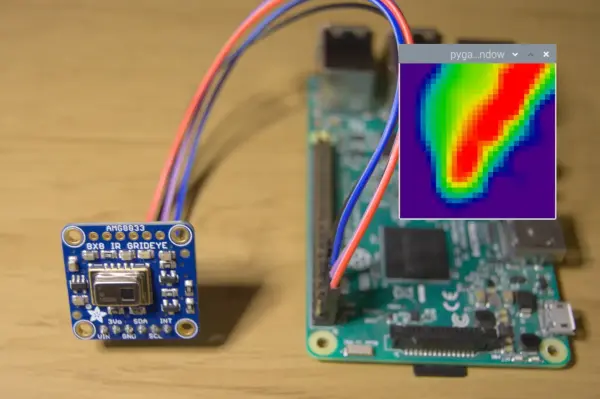
python3 amg88xx_rpi_thermal_cam.pyAfter executing the code, a Pygame render window will appear, displaying a color representation or “heat map” of the sensor data. Cooler temperatures will be depicted with blue and green hues, while warmer temperatures will be represented by shades of yellow, orange, and red.
In this configuration, the sensor and the Raspberry Pi combine to function as a low-resolution thermal camera. Feel free to explore the other scripts provided in the example folder to discover how you can incorporate this sensor into your own code and projects. For instance, you could consider setting up a Raspberry Pi security camera that utilizes thermal imaging for enhanced surveillance capabilities!