The Raspberry Pi is an excellent computing device; however, it may not always be the most convenient to access. Unless it is consistently connected to a display, the typical methods of accessing it include SSH, VNC, or RDP.
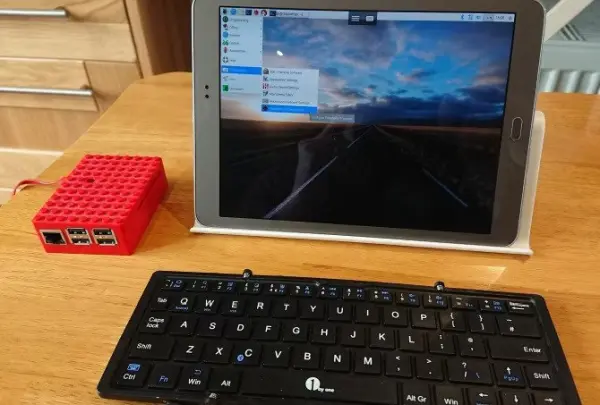
However, what if you lack a compatible display? How can you utilize it then? One possible solution involves repurposing an old Android tablet as a display for the Raspberry Pi.
What You Need to Use a Tablet Display With Raspberry Pi
Interested in configuring your Android device as a display for your Raspberry Pi? It's actually easier than you might imagine.
Here are the essential requirements:
- A Raspberry Pi 3 or a newer model (older versions require a wireless networking dongle)
- Both devices connected to the same network
- A keyboard and mouse connected to the Raspberry Pi (USB, Bluetooth, or wireless)
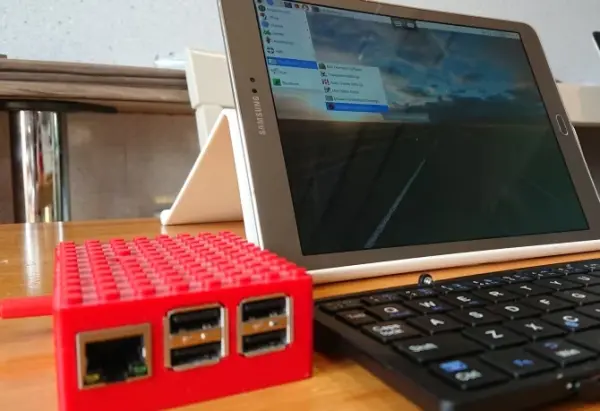
- A tablet stand or a suitable case to position your Android device as a monitor
Unfortunately, it's not feasible to directly connect your tablet's display to a Raspberry Pi. The GPIO and DSI ports on the Raspberry Pi are not compatible with tablet displays. Consequently, using an old tablet screen as a Raspberry Pi display is not possible. Even if you manage to establish a connection between the devices, the visual output will be unsatisfactory.
In some cases, acquiring a new Raspberry Pi may be necessary.
Using an Android Tablet as a Screen for Raspberry Pi
Instead of directly connecting your Raspberry Pi to an Android tablet, you can utilize remote desktop software.
There are two options available for using your Android tablet or phone as a display for your Raspberry Pi:
- RDP (Remote Desktop Protocol): Microsoft's Remote Desktop Protocol.
- VNC (Virtual Network Connection): A virtual network connection.
Both options allow you to access the complete desktop of your Raspberry Pi through your Android device. Fortunately, setting up either option is not complicated. Although they have been tested with a Raspberry Pi 3, they should work with older versions and even the Pi Zero.
It's crucial to ensure that both your Raspberry Pi and the Android tablet are connected to the same network. Additionally, this method won't work if you are using the Android device as a wireless access point. In that case, you would need two Android devices—one for the wireless access point and another for the display.
For both RDP and VNC options, you need to ensure that SSH (Secure Shell) is enabled on your Raspberry Pi. Enabling SSH simplifies the “headless” setup, allowing you to configure RDP and VNC from your PC before establishing the connection from your Android device.
There are three ways to enable SSH:
- Via the command line: Use the raspi-config screen, select “Interfacing Options,” then “SSH,” and finally “OK.” Reboot your Raspberry Pi when prompted.
- Via the Raspbian desktop: Go to “Preferences,” select “Raspberry Pi Configuration,” navigate to the “Interfaces” tab, and choose SSH. Click “OK” to confirm.
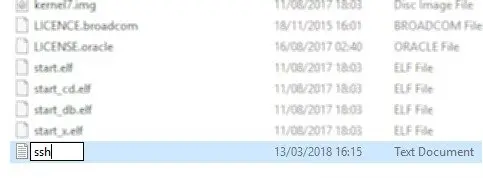
- With your Raspberry Pi powered down, remove the SD card and insert it into your desktop PC's file browser. In the boot directory, create a new file named “ssh” (without any file extension). Safely remove the SD card and insert it back into your Raspberry Pi. When you power it up, SSH will be enabled.
To establish a connection with your Raspberry Pi using SSH, you can utilize the terminal app in Linux and macOS. Similarly, there are several reliable options available for SSH on Windows.
To use SSH, you will require the IP address of your Raspberry Pi. You can find this information by entering the following command:
ifconfig wlan0Make a note of the IP address, as you'll need it later.
Connect Android to a Raspberry Pi via RDP
Let's start by attempting it with RDP, which is the recommended option as it offers more capabilities for remote access. RDP is particularly suitable for graphic-intensive sessions, whereas VNC might struggle in such scenarios. Linux has its own RDP software called xrdp.
Here's what you'll need:
- RDP software installed on your Raspberry Pi.
- An RDP app installed on your Android device.
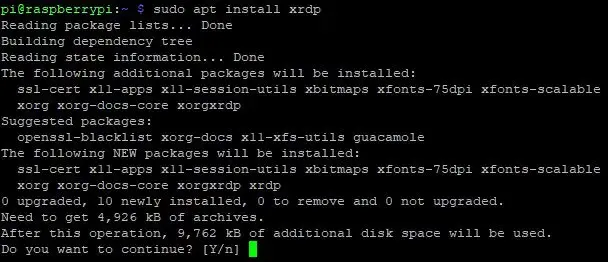
To proceed, establish an SSH connection to your Raspberry Pi and enter the following commands to update the package list and install xrdp.
sudo apt update
sudo apt install xrdp
Tap Y when prompted.
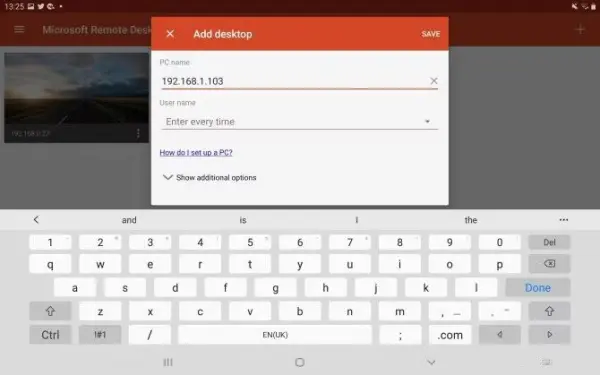
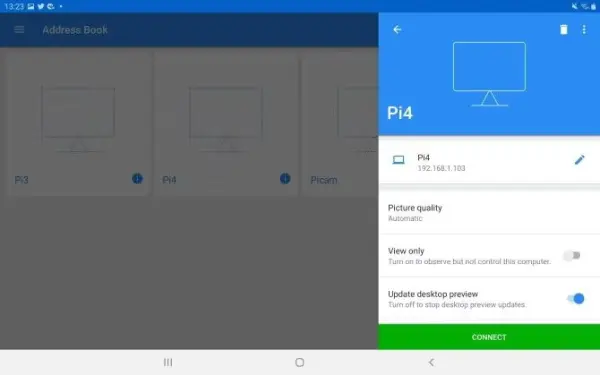
At this point, you will receive a notification stating that the connection is unencrypted. You can accept this connection (considering you are on your home network) and proceed to enter the password when prompted. Once you click “Continue,” the connection will be established.
Enter the password as prompted, and now you can enjoy access to your Raspberry Pi using your Android tablet as a display, along with the convenience of a connected keyboard!
When you're ready to end the connection, click X.
Add a Simple Raspberry Pi Display With an Android Tablet
Utilizing an Android tablet as a display for a Raspberry Pi is an excellent solution, especially when repurposing an old device. The setup process is straightforward, and as long as the tablet's battery remains charged, it should provide reliable performance. If you're interested in portable projects, there are practical methods available to power a Raspberry Pi.
Furthermore, by equipping your Raspberry Pi with a keyboard, mouse, and a convenient battery recharger, you can make it fully portable. Having an internet connection via your Android tablet's 4G connection can also be incredibly useful. Additionally, combining a Raspberry Pi with a tablet touchscreen enhances portability even further. For those looking to delve deeper into this topic, our guide on building your own Android tablet with a Raspberry Pi can provide valuable insights.


