This Pico-based International Space Station (ISS) Tracker project will cost around £25 ($30) – most of which is the cost of the display I used. It can be adapted to use any Pico-compatible display you may have, or even to send the tracking information to another PC or Raspberry Pi.
![]()
In its current form, it will:
- Show the latitude and longitude of the sub-satellite point (the point on the earth directly below the ISS)
- Show the distance to a designated base station.
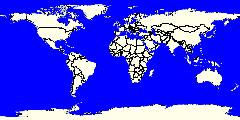
- Show the ISS position on a world map.
- Indicates when the satellite gets within 5000 km of the base station using the display's on-board RGB LED using different colours as it gets closer.
Supplies
- Raspberry Pi Pico W (the WiFi version) with GPIO pins fitted
- A display compatible with the Pico. For this project I used the Pico Display Pack 2.0 which has a resolution of 320 x 240 pixels, 4 user definable buttons and a programmable RGB LED. It will fit directly onto the Pico GPIO pins and does not need a separate power supply.
Step 1: Setting Up
If using the Pico Display Pack, follow the instructions on installing it from here. The easiest way is to use the custom UF2 file which includes all the required libraries for the display. Otherwise, you can download the display libraries (picographics) from here. This includes the README.md document that contains the documentation describing programming and using the display.
The secrets.py file included with the project code below, has the following information that will need changing to set your location and WiFi credentials:
SSID=”<SSID>” # keep the quotes but swap the <SSID> for your wifi's SSID
PASSWORD=”<PASSWORD>” # keep the quotes but swap the <PASSPORT> for your wifi's passport
LONGITUDE=<base longitude> # e.g. 52.4193
LATITUDE=<base latitude> # e.g. 2.2342
You can obtain your latitude and longitude from Google MAPS by right clicking on your location. The required figures will at the top of the drop-down menu.
Step 2: Getting the ISS Position
The Pico does this by polling http://api.open-notify.org/iss-now.json every 5 seconds which is the minimum recommended interval.
The documentation for this service is here. It describes the limitations in accuracy and the recommended polling rates.
Step 3: Display Sprites
I use a sprite to show the location of the ISS on the world map however it is of a file type that can not be uploaded to an Instructable so these are the instructions on how to create it.
The documentation for sprites on the Pico display is a little bit sparse. You need to create a Sprite Sheet using an app like Paint and then convert them to RGB332 format. I have included the SpriteSheet as a JPEG file – it is the jpeg image below (next to the world map) with the red cross in the top left hand corner. Download it by right-clicking and selecting “Save Image As” and save it in a directory with file name spriteSheet.jpg.
To convert it, download spritesheet-to-rgb332.py from here into the same directory as the image.
Note that all the python commands are using python 3.7. You may have to install it from the Python site if it isn't
You will also have to have the Pillow module installed. To check if it is already installed use:
pip list
and see if it is in the list of available modules on your PC.
If it isn't use the following to install it:
pip install pillow
To run enter:
python spritesheet-to-rgb332.py spriteSheet.jpg
Note: Do not have the secrets.py file in the same folder as spritesheet-to-rgb332.py as the conversion process will fail.
If successful you should have file called spriteSheet.rgb332
Upload this file to the Pico along with main.py, secrets.py and world.jpg
Step 4: RGB LED and Buttons
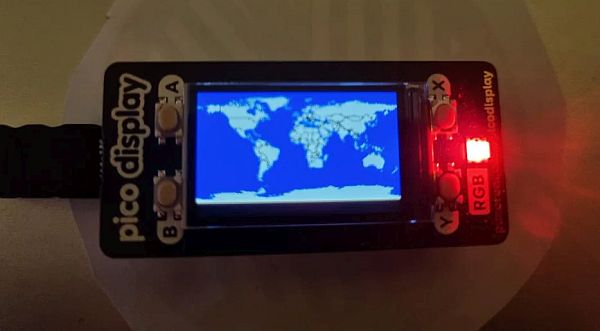
RGB
The display has a programmable RGB LED that has been set up to show when the ISS is within 5000 km of the base station. It uses the following indications:
ISS Position Colour
>5000 km Off
5000 – 4000 km Dark Red
4000 – 3000 km Bright Red
3000 – 2000 km Dark Green
2000 – 1000 km Bright Green
1000 – 0 km White
Buttons
The Pico Display used has 4 buttons of which buttons A and B are used (hold and press them until the display changes to the required mode):
Button A – Switches to the World Map
Button B – Switches back to Lat/Lon mode
Step 5: The Code