
Introduction
This article will provide you with an introduction to using the PiCamera, the integrated webcam on the Raspberry Pi. The PiCamera is a valuable accessory that offers the capability to capture high-definition images and videos, making it an excellent tool for exploring the Raspberry Pi's potential. Additionally, it enables image analysis in Python through various libraries, including OpenCV.

This article serves as an introductory piece in a series that will delve into the captivating realm of image analysis. Subsequent articles will gradually explore more intricate details, allowing you to harness the power of Python for image analysis.
The PiCamera v2
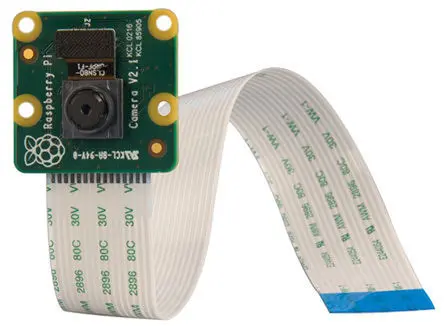
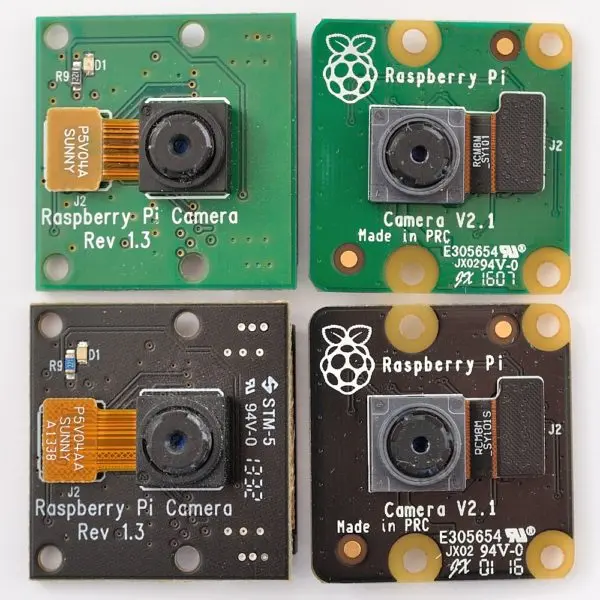
Introduced in April 2016, the PiCamera v2 is the upgraded version of its predecessor, the PiCamera v1.3. Designed to be compatible with all existing Raspberry Pi models, it retains the same flat cable that can be connected to the dedicated connector on the top side of any Raspberry Pi board.
The PiCamera v2 features a Sony IMX219 camera, offering an improved 8-megapixel resolution. This marks a significant upgrade from the previous model, which was equipped with the OmniVision OC5647 camera with a 5-megapixel resolution.
Installing the PiCamera
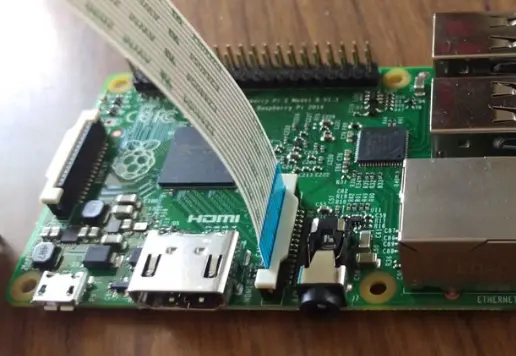
As I wrote before, the PiCamera is a module designed to be used on Raspberry, and therefore has a dedicated port on the card. So with the Pi off (I recommend), insert the flat cable, making sure that the blue side faces the Ethernet port. After connecting the WebCam turn on the Raspberry Pi.
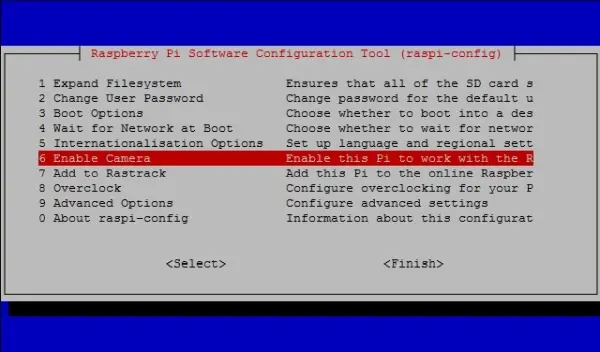
Once the Raspbian system is activated, launch a terminal session and enter the following command to the configuration.
$ sudo raspi-config
In the displaying menu, select Enable Camera, and then select Enable. Select Finish and finally press Yes to reboot.
After rebooting Raspbian, it is essential to verify the functionality of the PiCamera. To do this, open a command console once again and execute the following command:
raspistill -o image.jpg
Upon executing the command, a preview of a few seconds should appear on the screen. Following the preview, a new file containing the captured image will be saved in the current directory.
Using the PiCamera with Python
To utilize the PiCamera with the Python language, you can employ the python-picamera module. This module, developed by Dave Jones (refer to the link provided), enables you to create programs for capturing pictures, recording videos, and performing subsequent processing. Additionally, by utilizing the GPIO pins, you can integrate the camera with sensors or switches to enhance functionality.
To begin working with Python and the PiCamera, you need to install the required modules.
$ sudo apt-get install python-picamera python3-picamera python-rpi.gpio
Once you have successfully installed all the necessary modules, you are ready to test the functionality of your PiCamera using the Python language. To do this, create a new file and save it as “get_image.py”. Please ensure that you do not save it with the name “picamera.py” to avoid any potential conflicts.
$ nano get_image.py
To begin, you will need to import the PiCamera class, which corresponds to your PiCamera module and serves as the primary interface for accessing its functionalities. Additionally, import the time module, which will be used to manage waiting times between commands.
from picamera import PiCamera
import time
Now you can proceed with entering commands to capture an image using the PiCamera module, which will be saved as a JPG file directly on the file system.
camera = PiCamera()

camera.start_preview()
time.sleep(10)
camera.capture('/home/pi/image.jpg')
camera.stop_preview()
Save the code pressing CTRL+O and the exit with CTRL+X. Now you can execute it
$ python get_image
After executing the appropriate commands, you should observe the preview from the PiCamera on your screen. The preview will remain active for a duration of 10 seconds, allowing the sensor to adjust and set the optimal levels of light before capturing the picture. Once the 10-second delay has elapsed, the PiCamera will capture the image and the preview window will close.
If you find that the preview displays the image in a reversed or upside-down orientation, there is no need to physically reverse the PiCamera. Instead, you can simply include a command in your code right before calling the `start_preview()` function. This command will adjust the image orientation during the preview to ensure it is displayed correctly.
camera.rotation = 180
Now, after you checked that the PiCamera is working properly, and find out how you can use it with Python, it is time for you to try some simple tasks that you will find helpful to improve your approach to this WebCam.
Taking a sequence of pictures
To capture a sequence of images, you can modify the example provided above by incorporating it into a loop. For instance, if you wish to capture a sequence of nine photos, you would need to enclose the previous code within a loop structure.
from picamera import PiCamera
import time

camera.start_preview()
for i in range(9):
    time.sleep(5)
    camera.capture('/home/pi/image%s.jpg' % i)
camera.stop_preview()
By examining the script mentioned above, it becomes evident that adding a number to the end of the file name is a simple way to prevent overwriting of the JPG files.
Now, let's explore the possibility of creating a movie using all of these photos. For this purpose, you can utilize the avconv application. If avconv is not already installed on your Raspbian system, you can install it by executing the following commands:
$ sudo apt-get install libavcodec-extra
$ sudo apt-get install libav-tools
After successfully installing the required codec and avconv, which is included in the libav-tools package, you can proceed to create a video by combining the sequence of captured images. This process enables you to generate stop-motion videos, where individual frames are assembled to form a cohesive video.
$ avconv -r 10 -i image%d.jpg animation.mp4
You obtain a movie file named animation.mp4.
As mentioned earlier, one of the fascinating aspects of using the PiCamera is the ability to interact with it based on sensors and switches connected to GPIO pins. A simple example of this is capturing a picture in response to pressing a button.
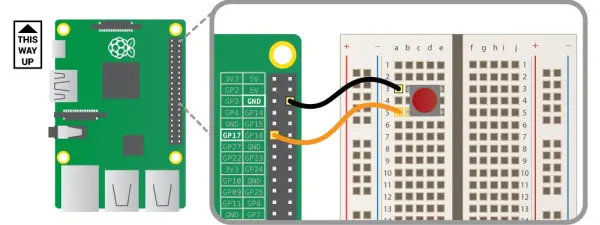
To implement this, you will first need to connect a button to the Raspberry Pi board using two wire jumpers and a button. You can refer to the diagram below as a guide, and place the components on a breadboard for ease of connection.
Once you have set up the circuit as described, open a file editor such as nano and create a new file where you can write the following code. As with any Python script, begin by importing the necessary modules.
import time
import picamera
import Rpi.GPIO as GPIO
After importing the required modules, proceed to set up the GPIO pins. Specifically, set PIN 17 as an input pin with the pull-up configuration.
GPIO.setmode(GPIO.BCM) GPIO.setup(17, GPIO.IN, GPIO.PUD_UP)
Lastly, the subsequent commands will activate the PiCamera. When the input pin detects a falling edge, triggered by pressing the button directly connected to it, an image will be captured and saved as a JPG file.
camera = PiCamera()
camera.start_preview()
GPIO.wait_for_edge(17, GPIO.FALLING)
camera.capture('/home/pi/image.jpg')
camera.stop_preview()
Save the script in a file and execute it. Upon running the script, a file named “image.jpg” will be saved on your file system. This file will contain the picture captured by the PiCamera at the exact moment when you pressed the button.
Recording a video
PiCamera is not limited to capturing still images; it also has the capability to record videos. With Python, you can easily utilize the PiCamera module to capture videos for later playback. This process is straightforward and bears resemblance to capturing still images.
To proceed, open a new file and save it as “get_movie.py”.
$ nano get_movie.py
Here, too, you have to import the modules needed to use the PiCamera. Then define the PiCamera.
from picamera import PiCamera
import time

camera = PiCamera()
The following code is very simple and understandable.
camera.start_preview()
camera.start_recording('/home/pi/video.h264')
time.sleep(10)
camera.stop_recording()
camera.stop_preview()
Then execute the Python script
$ sudo python get_movie.py
After running this script, you will have a new video.h264 file containing the recorded video in 10 seconds. In order to view it, for example, you can use omxplayer application.
$ omxplayer video.h264
If you need to install omxplayer you have to enter the following command
$ sudo apt-get install omxplayer
If for example you want to view the video on a different operating system (Windows), you must convert the H.264 format into a more common format such as MP4. You can do this with avconv, launching the following command:
$ avconv -i video.h264 -c:v libx264 video.mp4
Or you can use another application called GPAC. It is very fast. Install it
$ sudo apt-get install -y gpac
and then launch the conversion with the MP4Box tool, included into this application.
$ MP4Box -fps 30 -add video.h264 video.mp4