
The true potential of Raspberry Pi systems lies in their ability to be embedded in various environments, rather than serving as desktop replacements.
Enable Remote SSH Access to Your Raspberry Pi
If you've recently acquired a Raspberry Pi computer, it's likely that you started by installing NOOBS/Raspbian and explored its functionality as a simple desktop system. While this is a valid use case, it's important to recognize that the true strength of Raspberry Pi lies in its versatility to be utilized as an embedded system in various contexts. Whether you're seeking an affordable network-attached storage (NAS) solution, a gaming device, or a controller for devices like irrigation equipment or a 3D printer, relying on a physical keyboard and monitor at each remote location can be inconvenient.
Thankfully, there is a solution called SSH, which stands for secure shell.
Enable SSH
To begin, you'll need to establish either a wireless or wired network connection on your Raspberry Pi, assuming you have already done so during the initial setup. By default, SSH (secure shell) is disabled on Raspberry Pi boards for security purposes. To enable SSH, you have a couple of options:
- In the Raspbian graphical user interface (GUI), there is a configuration setting to activate SSH. Alternatively,
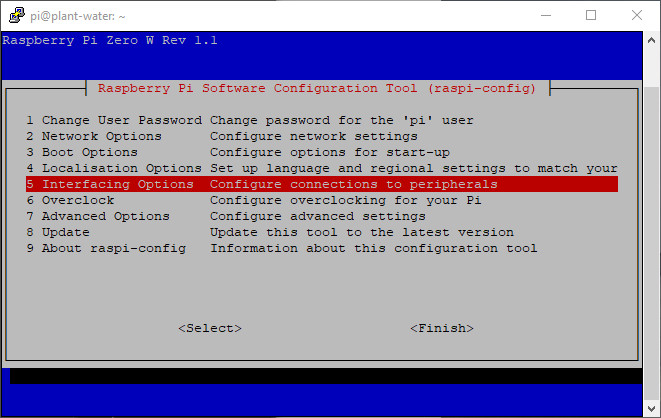
- You can access the command prompt and enter the command “sudo raspi-config”. From there, navigate to the “Interfacing Options” menu, select SSH, and enable it.
However, enabling SSH through these methods requires you to have a keyboard and monitor connected to the Pi, which can be inconvenient in certain scenarios. As an alternative approach, you can follow the instructions provided here. By placing a file named “ssh” in the “/boot/” directory of your SD card and configuring the Wi-Fi settings, you can establish SSH connectivity without the need for additional peripherals.
Find the Pi
To access your Raspberry Pi on the network, it's necessary to determine its IP address. One convenient way to accomplish this is by utilizing an IP scanner, such as the one I use (link provided). This tool allows you to scan your network and identify devices with “Raspberry Pi” in their names, making it easier to locate your Pi for connection. If you are already connected to the Pi either through SSH or an actual display, you can type in the command “ifconfig” to display the IP address, along with other relevant information.
Log On

To access your Raspberry Pi remotely, you will need a remote SSH client. PuTTY is commonly used for connecting to the Pi and is widely regarded as the go-to option. Once you have PuTTY open, simply enter your Pi's IP address and choose SSH as the connection type. Click on “Open” to establish the connection, and you will be presented with a remote terminal to your Pi. From there, you can log in using your username and password. By default, the username is “pi” and the password is “raspberry.” Once logged in, you can start interacting with your Raspberry Pi remotely.
Change Password
Once SSH is enabled on your Raspberry Pi, it is highly recommended to change the default password and potentially even the username to enhance security. To change your password, simply enter the “passwd” command in the terminal. Follow the instructions provided to set a new password of your choice. By doing so, you add an additional layer of protection against potential threats and unauthorized access to your device, making it more secure.
Static IP
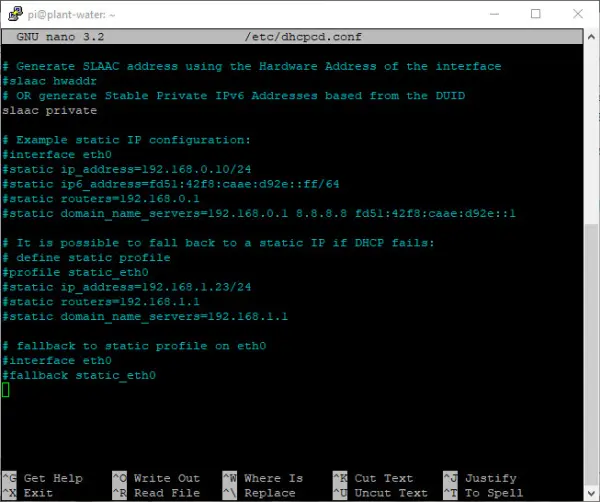
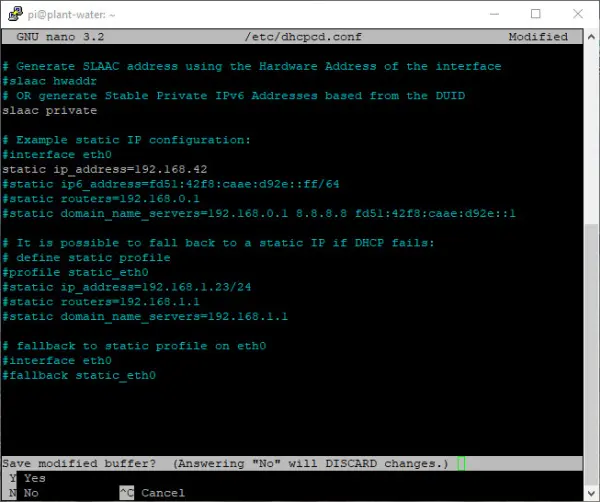
To simplify the process of finding the IP address of your Raspberry Pi, you have the option to set up a static IP address instead of relying on scanning or physical connections. To do this, open the terminal and enter the command “sudo nano /etc/dhcpcd.conf”. Look for the line that begins with “#static ip_address=192.168.0.10/24” and remove the “#” at the beginning of the line to uncomment it. Modify the IP address to your preferred choice, ensuring that the first three sets of numbers match what your scanner displays, and choose a unique number for the last set. Save the changes by pressing Ctrl+X, followed by ‘y', and then press Enter. Finally, reboot your Raspberry Pi using the command “sudo reboot” for the modifications to take effect.
Conclusion
Once you become familiar with the process, connecting to your Raspberry Pi remotely using SSH is straightforward. However, there are a few nuances that I struggled to grasp initially. Utilizing a network scanner proves to be particularly advantageous as it allows you to view all devices on your network, including the Raspberry Pi, without the need to physically connect a computer. Even after assigning a static IP address, having a network scanner as a handy tool can be incredibly beneficial.