
Feeling nostalgic? Want a blast from the past? This Instructable details how to make your own RetroPie Arcade Machine and play with all your favorite video-game characters again, like Ms. Pac-Man, Donkey Kong, and Frogger to name a few.
I decided to build my own Retropie Arcade Machine for my Principles of Engineering SIDE Project because seeing the latest popular video games, such as Valorant and Among Us, made me truly miss the simpler games and graphics. Materials and guidance were provided by my engineering teacher, Ms. Berbawy, peers, and online resources.

Step 1: Gather Materials and Tools
Cabinet Materials
- 12in x 24in x 1/8in pieces of wood (x12)
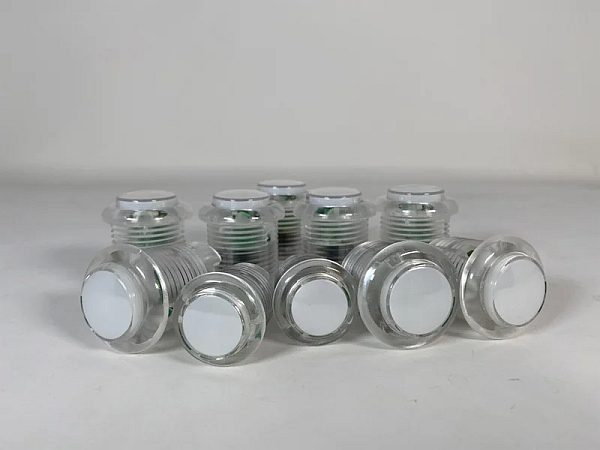
- 1 player arcade buttons and joystick
- Optional: 12in x 24in x 1/8in sheet of acrylic (x1)
- Gorilla Wood Glue (or any wood glue of the same caliber)
- Wooden dowels (at least 1/2in thick)
Electronics
- Monitor
- Raspberry Pi3
- Rechargeable Bluetooth Speaker
- SD card
- USB
- MicroUSB
- HDMI cable
- VGA cable
- Audio jack
- Wires
Software
- Fusion 360 (or any CAD software of choice)
- Etcher (or any other working SD card flashing software)
- Optional: Adobe Illustrator
Tools
- Scissors
- Optional: 1/4in drill-bit
- Glue gun
- Wire cutters
- Woodworking clamps/any heavy objects at home
- Sandpaper
Extras
- Velcro strips
- Optional: Black electrical tape
Image Credits:
Step 2: Design Side Panels
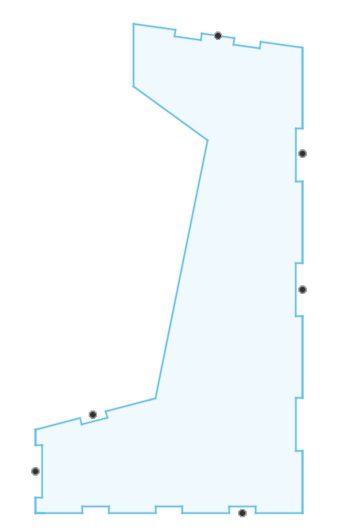
Creating your own arcade machine has many different routes you can take. For instance, you can choose to design and create your own or purchase one online. If you decide to create your own cabinet from scratch, it is important to know that it may be a long, tedious process, and sometimes even costly. I chose to design and laser-cut my own panels (took me several months with a lot of trial and error).
The order in which you create your panels does not matter, but I personally found it easier to design my side panels first and then use them as a reference when creating my other panels. To start off, I measured my monitor, which came out to be 12in x 9in x 2in, and my buttons, which are each 1.25in x 1.5in, and started sketching in Fusion 360 using these measurements. If you feel confident and comfortable with how you are piecing your cabinet together, you do not have to design and create it in CAD, however, I recommend CAD to ensure everything fits.
TIP 1: Instead of using brackets or screws to secure the pieces together, my engineering teacher, Ms. Berbawy, recommended using “fingers”, or little dove joints. This is otherwise known as the concept of connecting pieces together like a puzzle and is guaranteed to have your cabinet kept strongly together. My “fingers” range from 1 to 2 inches long and are 0.25 inches deep (the depth must be the thickness of your material).
To create the fingers, I used the points and lines tools in Fusion. I put points on the sides of the panel, used the measuring tool to create a line between them, and connected a line from each point going downwards. Finally, I would connect one more line between these two lines.
TIP 2: As Ms. Berbawy also recommended, in CAD, I used centimeters as my unit instead of inches because it is more precise.
I extruded the side panel by the thickness of my wood, or by 0.25 inches. Fusion 360 has a nifty trick in which you can copy-paste extruded bodies instead of resketching.
CHALLENGE: Make sure you are aware of your own constraints BEFORE designing. In our engineering classroom we had more 0.125-inch wood available, so I decided to laser-cut each panel twice and glue them together to be 0.25 inches thick. The size constraint of how big pieces can be to fit into the laser-cutter was also something to take into consideration (12in x 24in).
Step 3: Design the Top, Bottom, and Back Panels

Once I finished designing my side panels, I used them to create my top and bottom panels. Again, there are many ways to design and create your panels, but this is the way that worked best for me.
I started a new sketch within the same Fusion 360 project (so I don’t have to move around parts when testing fitting) on a side panel (either side panel works). In the sketch, I traced the existing dove joints on the side panel and then extruded them across. I repeated this process for my bottom panel too. Using the top and bottom panels, I created a new sketch on them and traced their fingers.
TIP 3: Either your side panels or back panels should have small holes for wires to plug into an outlet. The size and location of these holes on your panels are tailored to what you need, but I recommend putting them towards the bottom.
TIP 4: The back panel should have holes for audio. Without these holes, the audio of your games could echo, but it could also sound muffled. I recommend locating these holes towards the middle of your back panel. Like me, if you are not sure where your speakers would be located inside your machine, you also have the option to drill holes later, however, it can be messy and time-consuming.
An additional panel you may need is a panel with a hole in the middle to mount your monitor. I leaned it against the interior of my back panel and used my glue gun to secure the bottom of the panel with wooden dowels.
Step 4: Design the Control Panel
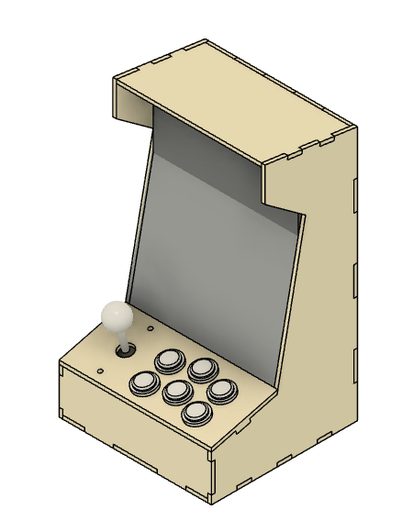
The control panel is one of the most critical parts of this project since this is the placement of the buttons, therefore where players will interact with most. There is also another option to purchase handheld controllers instead.
I created my control panel sketch on my side panels, utilizing the top view to trace the side panels for the “fingers”. For the joystick, make sure to leave enough space between it and the edges of the panel, and create holes for its screws.
TIP 5: It is recommended to stagger the buttons. This matches how your fingers would typically rest on a surface ‒ in a curved formation.
TIP 6: Avoid keeping the buttons too close to the joystick. Consider when you type on your keyboard and emulate the same space between your hands onto your control panel.
*I later added a sheet of acrylic on top for presentation and a smoother finish.
Step 5: Cut Panels
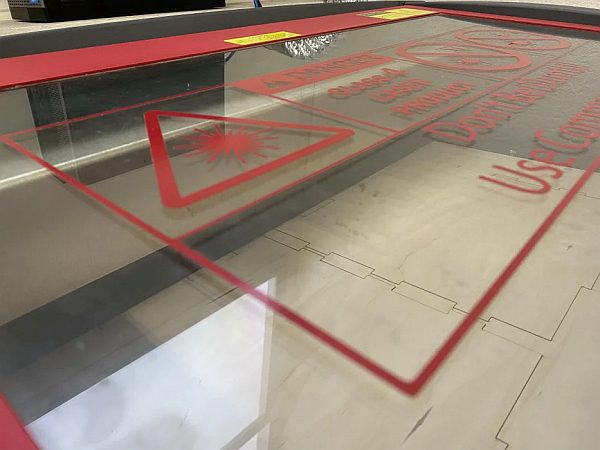
Now that you have your designs, it is time to cut! I used Ms. Berbawy’s laser-cutter to cut each of my panels, but sawing your panels or paying a visit to your local woodworking shop are also good options too. *If you are using acrylic, it is recommended to laser-cut since it can easily crack or scratch.
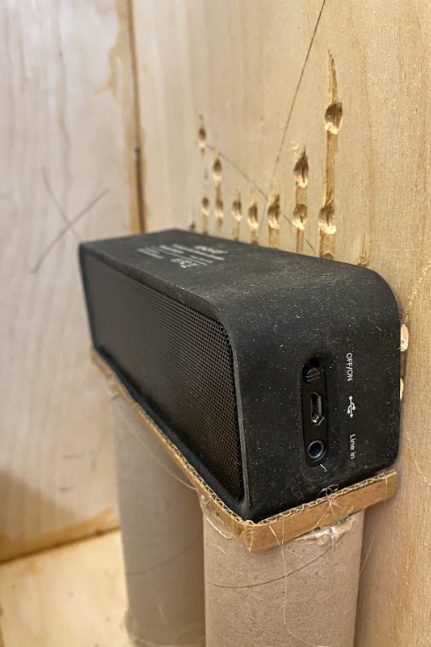
To have a bit of fun with my design, I also drilled a Space Invaders design on my back panel for sound purposes.
CHALLENGE: When laser-cutting, pieces can burn. It is important to pay close attention to your pieces if you laser-cut and use the non-burnt side of your panel on the exterior.
Step 6: Sand Panels
Cut pieces may not be perfect and that’s okay! I sanded the edges of my panels so they would fit together easier, especially with the “fingers” securing them a little too tightly (this is a personal preference but I like having the pieces looser before I start working on the electronics on the inside).
Sanding also leads to fewer splinters 🙂
Step 7: Downloading and Transferring RetroPie
The next step is downloading RetroPie, an open-source emulation system, or a retro video games emulator!
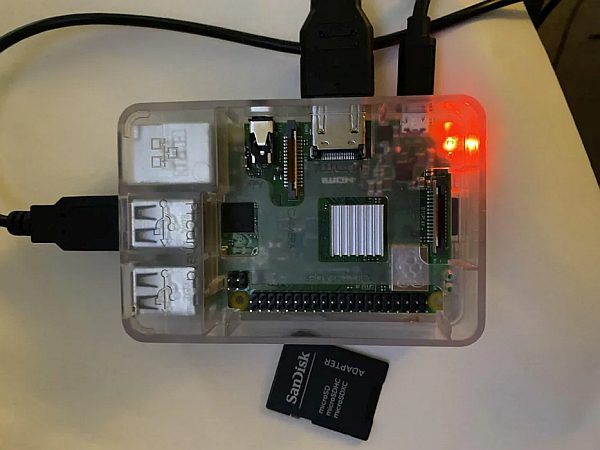
I downloaded the RetroPie SD card image to my computer and then unzipped the file. I’m working with a Raspberry Pi3 but make sure to download the file corresponding to your Pi. I used a 32 GB SD card and MicroUSB card to transfer RetroPie. I also formatted my SD card to a “FAT” format so it would be compatible with my Pi.
*If your SD card is 32GB or smaller, format it as MS-DOS (FAT). If your SD card is 64GB or larger, format it as ExFAT. TIP 7: Formatting on Mac and Windows systems are different. I used HowChoo's Raspberry Pi guide to help me format and flash my SD card.
To install RetroPie, I downloaded and opened Etcher, an SD card flashing application compatible with both Windows and Mac. I selected my SD card image and the downloaded RetroPie file in their respective fields and clicked “Flash!”.
Once it finished flashing, I safely ejected my SD card and put the MicroUSB card into my Pi.
Step 8: Downloading and Transferring ROMs
Now you get to choose and download the games you would like to play! Be sure to not download any copyrighted content and even downloading older games owned by companies still involves piracy. There are many websites you can download ROMs from/use as a guide, such as MAMEdev, HowChoo, Zophar, and Retro Built Games.
CHALLENGE: There are many other sites you can download ROMs from, however, keep in mind that not all ROMs work and are compatible with your system.
After you’ve finished downloading your ROMs to your computer, you can transfer them to your Pi via Network Share, USB, or FTP (SFTP). For a step-by-step for each process, check out HowChoo’s detailed guide.
I found the easiest way for me was to use a USB, which I formatted to FAT32 so it’s compatible with RetroPie. I connected the flash drive to my computer and created a folder called “retropie”. Then, I turned on my Pi and plugged in my flash drive. To ensure it’s working, check to see if there is a red LED blinking. Once it stops blinking, gently remove the flash drive from your Pi and connect it to your computer. From there, add your downloaded ROMs into the folder.
Once your ROMs have been successfully loaded, safely eject the flash drive and plug it back into the Pi and wait for the LED to stop blinking before removal. Be sure to reboot your system to see the loaded ROMs in your system.
Step 9: Electronics
VIDEO RESOLUTION
Use a VGA adapter and HDMI cable to connect your monitor to your Pi.
CONTROLS
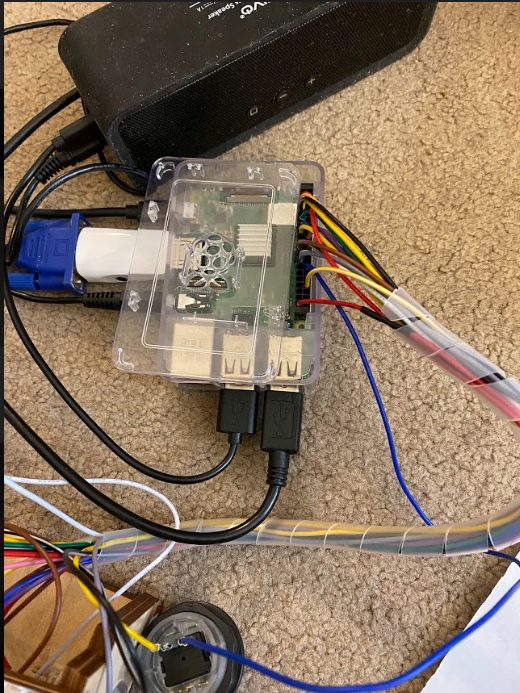
After I secured my buttons and joystick, I used the schematic my Pi came with (there are schematics according to your Pi version online) to begin wiring the buttons. You will also be needing a pinout schematic for your joystick.
TIP 8: I was afraid of soldering wires wrong to my Pi, so I used pre-crimped wires instead. This allowed me to gently pull out my wires when I needed to readjust without worrying about damaging my Pi.
Using the Pi and joystick’s provided schematic, I wired each button and joystick switch to my Pi. For the buttons, don’t forget to use a daisy chain for your ground. Arcade buttons can also vary, but if yours are like mine, be sure to connect both the wire to your Pi and the ground on the side with the longer ends.
AUDIO
For sound, connect a power and audio cable from your speaker(s) to your Pi. From there, you’ll need to restart your system and then configure your audio output. Make sure your speaker(s) is on!
MONITOR ROTATION
If you need to rotate your monitor’s orientation, you’ll need to write a few lines of code in “Config.txt”. The picture shows my monitor before I rotated the orientation.
First write: sudo nano /boot/config.txt and then write one of the following lines of code below according to how much you need to rotate your monitor.
- display_rotate=0 (normal configuration)
- display_rotate=1 (90 degrees)
- display_rotate=2 (180 degrees)
- display_rotate=3 (270 degrees)
Make sure to save your file by hitting “X”. For more information, visit RetroPie’s helpful screen rotation resource.
Step 10: Configuration

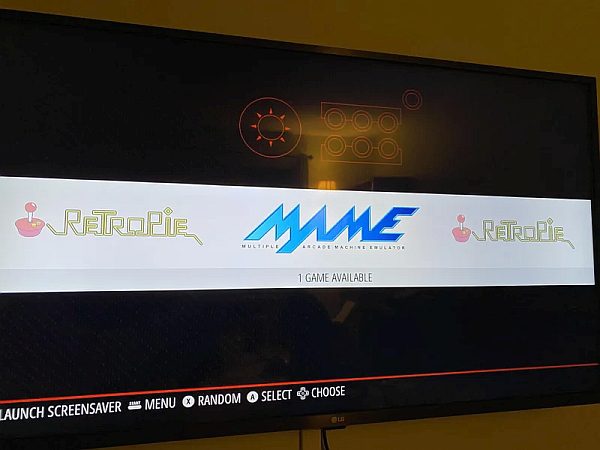
When you first boot up your RetroPie system on your arcade machine, you will see a “WELCOME” screen. Connect a gamepad or keyboard and hold down any button on it. Its name will pop up and follow the on screen instructions. To skip configuring for buttons you do not have, just hold down any button.
For additional information, visit RetroPie's site on first installation.
Step 11: Assembly
My final step was to glue the panels together with wood glue. I sanded the panels’ edges and then joined them together, putting Gorilla wood glue in the cracks. I used heavy objects or woodworking clamps to assist with the gluing process.
TIP 9: To make my arcade machine look cleaner, I also added black electrical tape along the rim of my monitor and used velcro strips to attach the Pi’s power button on the back exterior.
Step 12: Conclusion
Overall, I learned so much from this project. This project is no way an easy project, but that doesn't mean it's impossible. Key engineering practices that are involved with this project include wiring, CAD, dove-joints, tolerances, laser-cutting, and so much more. Even if you are not entirely well-versed in these concepts, there's pretty of room to learn and/or improve your skills.
I would like to thank Ms. Berbawy, my peers, and the online resources (all linked in previous steps) for the support and encouragement that shaped this to be an excellent learning opportunity and definitely a project to remember 🙂
I hope you have as much fun building your own arcade machine as I did!
Source: Retropie Arcade