
If you want to debug any microcontroller, it can be tricky at times. But with the newly launched Raspberry Pi Pico, we have several options to debug the board. It is now possible to use one Raspberry Pi Pico to debug another Raspberry Pi Pico using the ‘Picoprobe’ application or the traditional way of using SWD protocol.
It is always difficult to figure out what is not working. However, Pico comes with three pins for debugging using the Serial Wire Debug (SWD) protocol. To debug a binary program, you need to build a debug version of the binary and get some additional tools.
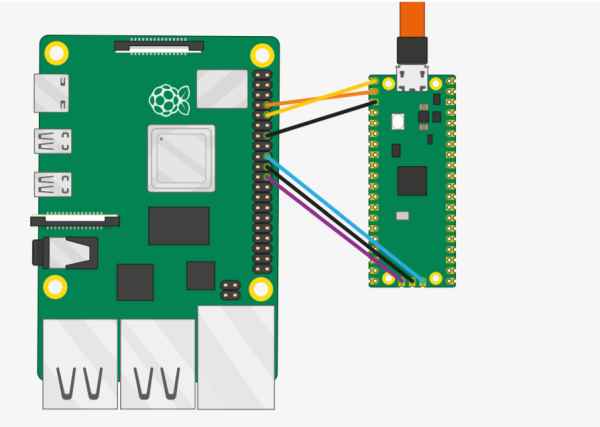
The above reference image shows the wiring of Raspberry Pi 4 with Pico board. Connect the SWD port directly to the Raspberry Pi to maintain the signal strength. For more information on this method, refer to “Chapter 5” of the “Getting Started with Raspberry Pi Pico” guide.
What makes Pico debugging different is the additional approach of using one RPi Pico to debug another. Even if you use platforms like Windows, Mac, and Linux, you can still use the ‘Picoprobe’ application. This application allows a Raspberry Pi Pico to act as a USB to SWD and UART converter.
This interface allows you to add up to four breakpoints and two watchpoints. This gives you more control over how your program runs as you develop software.
Read more: UNDERSTANDING THE WAYS TO DEBUG YOUR RASPBERRY PI PICO DEVELOPMENT BOARD