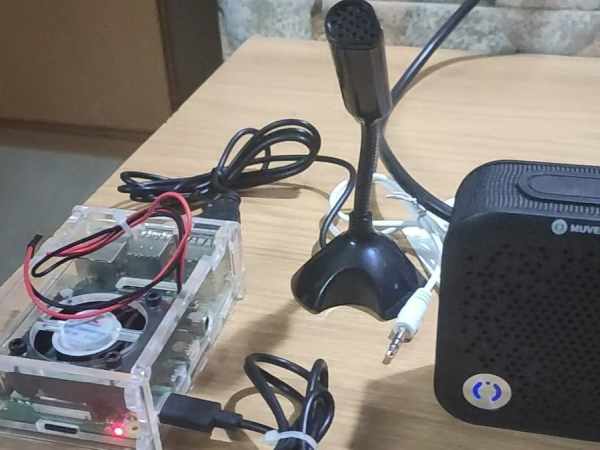
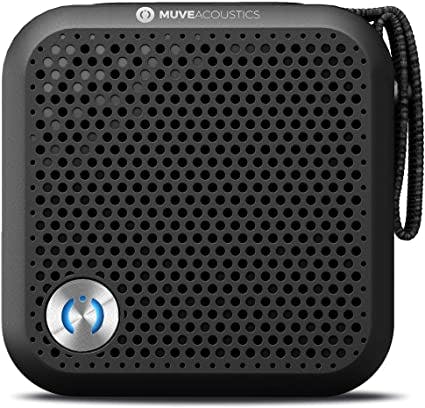
This Amazon Alexa which is built with Raspberry pi and Bluetooth Speaker.

Description: This is Amazon Alexa which is built by using Raspberry Pi and Bluetooth Speaker. This is a step by step tutorial to build Amazon Voice Service(AVS) SDK on Raspberry Pi. Please refer to Amazon's official documentation for detail in depth.
Note: Raspberry Pi Zero W, Raspberry pi model 3B+, and Raspberry Pi 4B can be used in this project as they support Bluetooth. If you are using Model 2B or 2A, 2B+, 1B, 1B+, 1A then you have to use USB Bluetooth for which Steps may be a little different and are out of the scope of this Tutorial.
Bluetooth Speaker

Any Bluetooth speaker with A2DP-SINK or AVRCP Profile can be used in this tutorial.
If the Speaker has inbuilt Microphone then no need to use USB Microphone.
Required Hardware
1. Raspberry Pi: You can use Raspberry pi zero w, 3, or 4. However please note that Raspberry pi zero w works slow or sometimes not capable to build the app. The best option here is raspberry pi 3 or raspberry pi 4. Raspberry 4B+ with 8GB ram works the best.
2. Heat sink plus Cooling Fan: attach heatsink plus cooling fan if you are using Raspberry pi 3 or 4. If you have raspberry pi zero make sure to use a good quality heatsink.
Reason: If you don't use a cooling fan and the heatsink, your raspberry pi might overheat and overload. Due to this, it may get stuck while building the app by the “make” command.
3. Bluetooth Speaker: This tutorial is regarding building the app with a Bluetooth speaker. so make sure to have a Bluetooth speaker supporting the required profiles.
4. Vnc viewer: By VNC viewer installed on your laptop you can connect your raspberry pi to your laptop. you need to turn on VNC in raspberry pi for this to work. Alternatively, you can also use an HDMI monitor, keyboard, and mouse to operate your pi. But using it through vnc will be easier.
5. Micro sd card: Make sure you have a micro-sd card with a minimum of 8GB space.
6. USB Microphone(optional): if your Bluetooth speaker doesn't have an inbuilt microphone you will have to use a USB Microphone.
Alexa Voice Service (AVS) – SDK Architecture
The first step to get started is by knowing what exactly amazon voice service actually is. One of the best resources to learn this is amazon's official website documentation. Make sure you have completely understood what amazon voice service actually is.Below is the link to learn all about Alexa Voice Service and SDK architecture
>> https://developer.amazon.com/en-US/docs/alexa/avs-device-sdk/overview.html
Installing Bluetooth Dependencies
To enable BlueZ and PulseAudio, the SDK uses the following libraries, modules, and dependencies. You can choose to build with different dependencies, however, they haven't been explicitly tested against the SDK.
1.SBC Library: Minimum Version should be 1.3
pi@raspberrypi:~ $ sudo apt-get update
pi@raspberrypi:~ $ sudo apt-get upgrade
pi@raspberrypi:~ $ sudo apt-get install libsbc-dev
2.BlueZ 5.37: Minimum Version should be 5.37.
pi@raspberrypi:~ $ sudo apt-get install bluez3.PulseAudio and PulseAudio Bluetooth
pi@raspberrypi:~ $ sudo apt-get install pulseaudio
pi@raspberrypi:~ $ sudo apt-get install pulseaudio module-bluetooth
To Know about more dependencies visit this official page of amazon :
>>https://developer.amazon.com/en-US/docs/alexa/avs-device- sdk/dependencies.html
Make an Amazon Developer Account
1.To access Amazon Voice Service, you need an Amazon Developer account. You create one by visiting the Amazon Developer Services and Technologies website and clicking on “Sign In” and then on “Create your account”. You can also sign in via your regular Amazon account, if available.

2.Once you have provided the necessary information and agreed to the terms of use and guidelines, you will have access to the Developer Dashboard, which allows you to view and manage your various Amazon projects. Under the heading “Amazon Alexa” you will find “Alexa Voice Service”, which starts the activation of your Raspberry for the language assistant:

