
Introduction
The upcoming guide will demonstrate how to utilize the Raspberry Pi as an object counter utilizing an Infrared (IR) sensor. IR sensors, renowned for their ability to detect object proximity, will be harnessed for tallying objects traversing our miniature conveyor system.
In developing our Python Flask application, we'll employ the WebSockets protocol, facilitating real-time communication between clients and the server. This protocol offers minimal overhead, akin to what we've utilized in our ESP32 Robot Car utilizing Websockets project. For those who prefer video tutorials, you can find them below or view them on my YouTube channel.
Prerequisites
Below are key points to understand in order to effectively follow this project.
Prior to proceeding with this project, it's essential to have a grasp of interfacing an Infrared (IR) sensor with your Raspberry Pi. If you're unfamiliar with this process, I recommend referring to my guide on “Utilizing Infrared (IR) Sensor with Raspberry Pi.”
Additionally, proficiency in Python, Flask, and Flask-SocketIO is required. Familiarize yourself with “Displaying Real-Time Updates Using Python, Flask, and Websockets” as it provides detailed explanations of the logic employed in this project.
Ensure you're comfortable interacting with your Raspberry Pi via terminal or PuTTY. It's also imperative to have the latest version of the Raspberry Pi OS installed. For guidance on setting up your Raspberry Pi headlessly without a monitor, refer to my earlier post on “Setting up Raspberry Pi Headless Without a Monitor.”
The conveyor project featured here showcases my own creation of a DIY Cardboard Conveyor Belt. For a demonstration, please refer to the video below.
Design
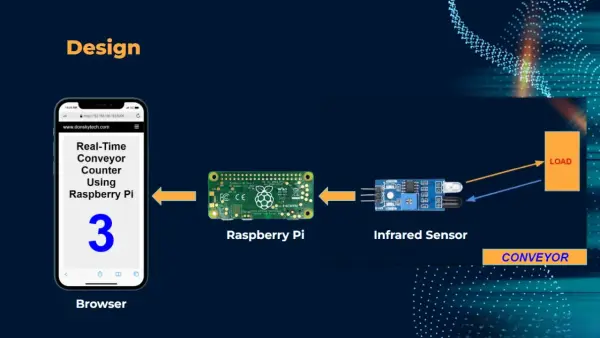
The project's overall architecture, depicted in the image above, can be outlined through the following points:
– Within the Raspberry Pi, Flask and Flask-SocketIO are installed to host our Object Counter Web Application and WebSocket server.
– It interfaces with an Infrared (IR) sensor responsible for detecting any passing load on our conveyor.
– Upon detecting a load passing through, the IR sensor sends a signal to the Raspberry Pi.
– The Raspberry Pi increments its internal counter and dispatches a WebSocket message to all connected clients.
– When accessing the web application via mobile phone, a WebSocket client is initiated towards the Flask-SocketIO WebSocket server. Subsequently, it remains attentive to incoming WebSocket messages and updates its own counter accordingly.
Tech Stack
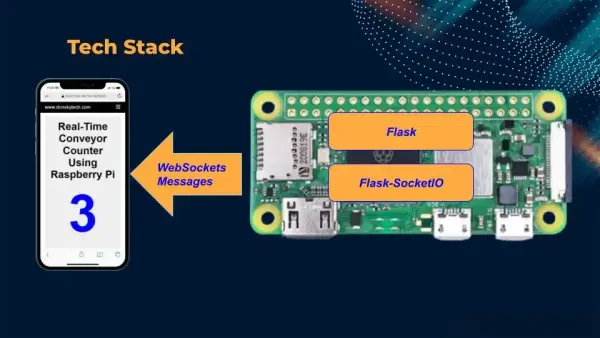
We'll utilize Flask and Flask-SocketIO to develop our Object Counter Web Application. I've extensively detailed this process in my tutorial on Displaying Real-Time Updates Using Python, Flask, and Websockets, so I recommend reviewing it beforehand as I won't delve into those aspects here. For programming, we'll employ Python, along with some JavaScript to manage WebSocket messages, and mincss for styling.
If you're interested in delving deeper into WebSocket, I suggest checking out my post on Using WebSocket in Internet of Things (IoT) projects.
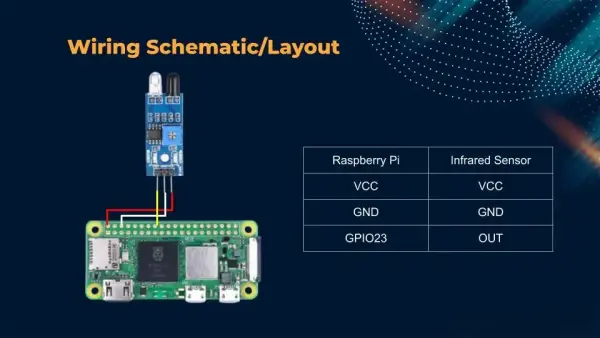
Wiring/Schematics
Running the Project
The complete code for this project is available in my GitHub repository, accessible through this link.
Clone my project
Establish a connection to your Raspberry Pi using either PuTTY or SSH. Once connected, navigate to your home directory where you can either create your project or execute the provided commands.
cd ~
mkdir -p Projects
Please use the following commands to clone my repository.
git clone https://github.com/donskytech/raspberrypi-projects.git
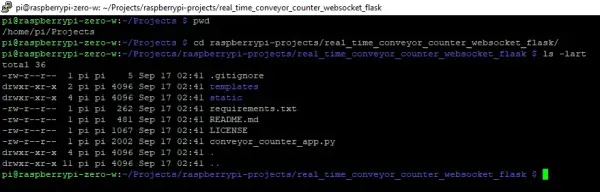
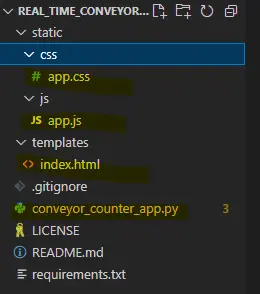
cd raspberrypi-projects/real_time_conveyor_counter_websocket_flask/You should have access to my project files.
Creating Python Virtual Environment
To initiate a Python Virtual Environment for this project, execute the following command:
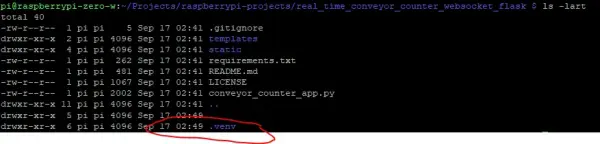
python3 -m venv .venvThis action will generate a concealed directory named “.venv” in the main/root folder.
Activate the virtual environment.
source .venv/bin/activateYou'll recognize that you've entered the Python Virtual Environment when the following is visible in the terminal.
![]()
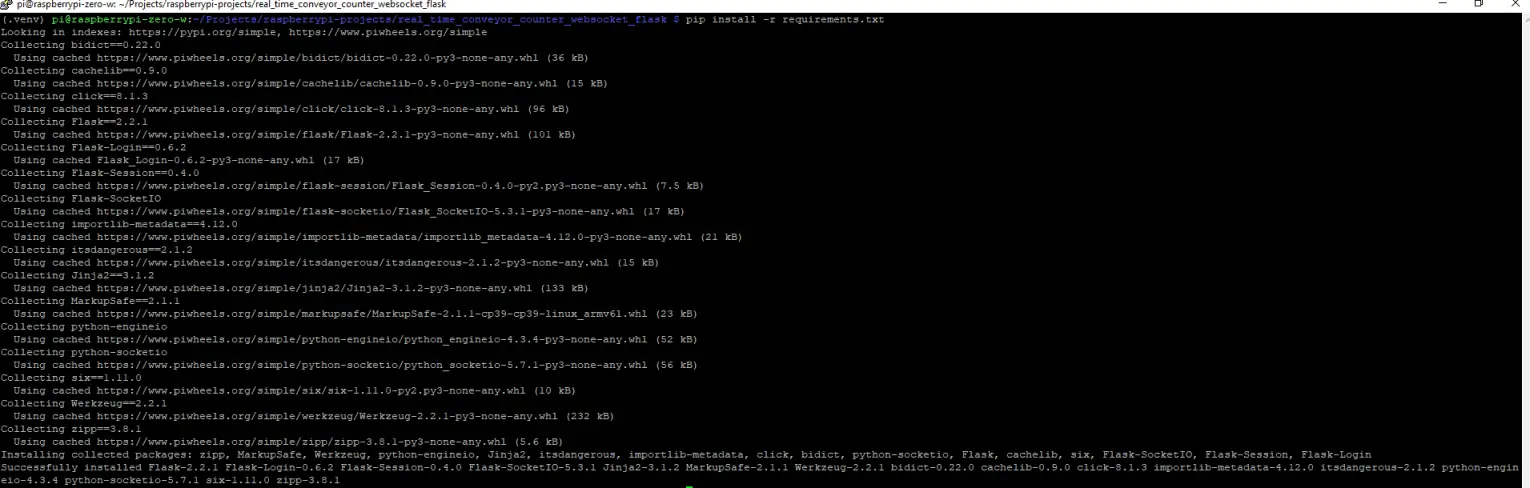
Install the dependencies using the below command.
pip install -r requirements.txtOnce the above command completes execution, the installed dependencies required for this project will be shown.
Running the project
To run the project then execute the below command.
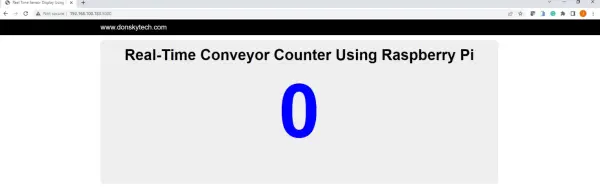
python3 conveyor_counter_app.pyThis should run the Flask development server.

Access the application by entering the IP address provided above into your web browser. This action will launch our application.
Code
Below are the key components of our project. While the overall logic bears resemblance to our previous post on Displaying Real-Time Updates Using Python, Flask, and Websockets, I will outline the distinctions here.
conveyor_counter_app.py
Here's the code for conveyor_counter_app.py, serving as our Flask and Websockets server. Additionally, it monitors the Infrared (IR) sensor, incrementing our counter whenever a load approaches the IR sensor's proximity.
from flask import Flask, render_template, request
from flask_socketio import SocketIO
from random import random
from threading import Lock
from datetime import datetime
import RPi.GPIO as GPIO

sensor_pin = 23

# set the behaviour of led as output
is_load_detected = False
count = 0

"""
The callback will listen to
"""
def check_event(pin):
    global count
    if is_load_detected:
        print("Sending counter event...")
        count+=1
        socketio.emit('updateSensorData', {'value': count, "date": get_current_datetime()})

GPIO.setmode(GPIO.BCM)
GPIO.setup(sensor_pin, GPIO.IN)
GPIO.add_event_detect(sensor_pin, GPIO.FALLING, callback=check_event)


# Flask and Flask-SocketIO configuration
app = Flask(__name__)
app.config['SECRET_KEY'] = 'donsky!'
socketio = SocketIO(app, cors_allowed_origins='*')

"""
Background Thread
"""
thread = None
thread_lock = Lock()

"""
Get current date time
"""
def get_current_datetime():
    now = datetime.now()
    return now.strftime("%m/%d/%Y %H:%M:%S")

"""
Generate random sequence of dummy sensor values and send it to our clients
"""
def background_thread():
    print("Generating random sensor values")
    global is_load_detected
    try:
        while True:
            if GPIO.input(sensor_pin):
                is_load_detected = False
            else:
                is_load_detected = True
    except KeyboardInterrupt:
        GPIO.cleanup()

"""
Serve root index file
"""
@app.route('/')
def index():
    return render_template('index.html')

"""
Decorator for connect
"""
@socketio.on('connect')
def connect():
    global thread
    print('Client connected')

    global thread
    with thread_lock:
        if thread is None:
            thread = socketio.start_background_task(background_thread)

"""
Decorator for disconnect
"""
@socketio.on('disconnect')
def disconnect():
    print('Client disconnected',  request.sid)

if __name__ == '__main__':
    # Access app in all IP not just localhost
    socketio.run(app, host="0.0.0.0")
Le us go over the code for you to understand better.
from flask import Flask, render_template, request from flask_socketio import SocketIO from random import random from threading import Lock from datetime import datetime import RPi.GPIO as GPIO
Import the required modules and packages
sensor_pin = 23
# set the behaviour of led as output is_load_detected = False count = 0
We assign a pin to the sensor and introduce the variable “is_load_detected,” which is set to true when the IR sensor detects an object in close proximity. The “count” variable maintains our current count.
The callback will listen to
“””
def check_event(pin):
global count
if is_load_detected:
print(“Sending counter event…”)
count+=1
socketio.emit(‘updateSensorData', {‘value': count, “date”: get_current_datetime()})
Here is our callback function triggered when the IR sensor detects an object passing through. This function activates when the sensor pin reading changes from HIGH to Low. Upon activation, it increases the counter and sends a WebSocket message to the client initiating the request.
GPIO.setmode(GPIO.BCM)
GPIO.setup(sensor_pin, GPIO.IN)
GPIO.add_event_detect(sensor_pin, GPIO.FALLING, callback=check_event)
GPIO configuration is set up in this section, with the crucial addition being the incorporation of a callback within the add_event_detect function applied to our sensor pin. This callback function serves as an interrupt mechanism for our project.
# Flask and Flask-SocketIO configuration
app = Flask(__name__)
app.config[‘SECRET_KEY'] = ‘donsky!'
socketio = SocketIO(app, cors_allowed_origins='*')
Flask and Flask-SocketIO configuration is declared here.
Background Thread
“””
thread = None
thread_lock = Lock()
“””
Get current date time
“””
def get_current_datetime():
now = datetime.now()
return now.strftime(“%m/%d/%Y %H:%M:%S”)
“””
Generate random sequence of dummy sensor values and send it to our clients
“””
def background_thread():
print(“Generating random sensor values”)
global is_load_detected
try:
while True:
if GPIO.input(sensor_pin):
is_load_detected = False
else:
is_load_detected = True
except KeyboardInterrupt:
GPIO.cleanup()
This is our background thread that checks for the reading from our IR sensor.
Serve root index file
“””
@app.route(‘/')
def index():
return render_template(‘index.html')
“””
Decorator for connect
“””
@socketio.on(‘connect')
def connect():
global thread
print(‘Client connected')
global thread
with thread_lock:
if thread is None:
thread = socketio.start_background_task(background_thread)
“””
Decorator for disconnect
“””
@socketio.on(‘disconnect')
def disconnect():
print(‘Client disconnected', request.sid)
if __name__ == ‘__main__':
# Access app in all IP not just localhost
socketio.run(app, host=”0.0.0.0″)
Below are our decorator functions for Flask and Flask-SocketIO, which we utilize to display our index.html and to monitor connect and disconnect events through our Websockets.