
|
||||||||||||||||||||||||||||||||||||


STORY
I had for a while been looking for a display for my Raspberry, but most of the displays I saw, all had some kind of crazy wiring setup along the lines.
Now since my interest wasn’t so much in messing with hardware, but building a home automation gateway, I wanted a neat package, so I could just focus on building the software.
This is exactly what I was looking for. A 5” 800×480 LCD touch display that simply plugs in on top of the Raspberry.
If you’re interested in the same display, you can get it here on Amazon:
Nice and clean 🙂
Now this display supports touch, but there isn’t any Windows 10 IoT supported touch drivers for any touch display out there. This is very frustrating because you can run these neat XAML-based apps on it, but the only way to interact with things on the screen is to use a mouse.
Luckily, someone has already done the hard work, and you can find a project on hackster.io that got code for reading this particular touch processor. However it doesn’t really deal with XAML elements (it uses some custom SPI rendering and manual touch trigger on rectangular regions), and I personally didn’t like the code too much for my need, so decided to do a major refactor for easier reuse. So in best stand-on-the-shoulders-of-giants style, I’ll build on top of this and created a more reusable touch processor, and a xaml-based calibration view to calibrate your screen. None of this is an actual touch driver that just drives touch into any app running on the PI, but app-specific code. A driver would be the best, but the following is a good start. If you just want the code, just jump to the bottom.
The library that I provide here consists of 3 things:
- An implementation of the TSC2046 touch screen controller
- A touch processor that runs a thread for changes to touch and raises events on pointer down, moved and up
- A UI Control for performing a screen calibration.
1 is very hardware specific. If you have a different controller, you can implement the ITouchDevice interface – 2 and 3 and work with any device implementing this interface.
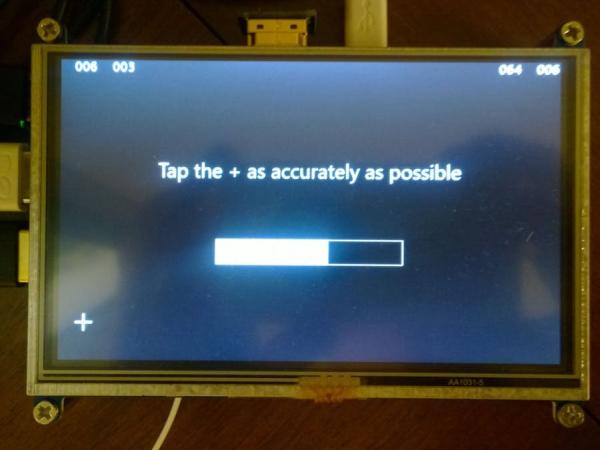
The screen calibration utility allows the user to click a number of control points so the reported touch points will be returned in screen units rather than raw touch device units. You should always run a screen calibration (and save it for future use) the first time. The calibration even returns an “s0” estimate of accuracy. If this is more than a few pixels, you should probably reject the calibration and have the user try again. Calibration can be run with 4, 5 or 7 points (well anything from 4 and up, but I just made UI for has these). The more you have, the better calibration and the better it is at detecting outliers, but for the most part 4 or 5 points are plenty to get a good calibration.
So to use the library, when your page loads, create the device, load / create calibration, and start listening for events. Here’s an example of that:
TouchPanels.Devices.Tsc2046 tsc2046 = await TouchPanels.Devices.Tsc2046.GetDefaultAsync();

try
{
    await tsc2046.LoadCalibrationAsync("TSC2046");
}
catch (System.IO.FileNotFoundException)
{
    //Initiate calibration if we don't have a calibration on file
    var calibration = await TouchPanels.UI.LcdCalibrationView.CalibrateScreenAsync(tsc2046);
    tsc2046.SetCalibration(calibration.A, calibration.B, calibration.C, calibration.D, calibration.E, calibration.F);
    await tsc2046.SaveCalibrationAsync("TSC2046");
}

//Load up the touch processor and listen for touch events
processor = new TouchPanels.TouchProcessor(tsc2046);
processor.PointerDown += Processor_PointerDown;
processor.PointerMoved += Processor_PointerMoved;
processor.PointerUp += Processor_PointerUp;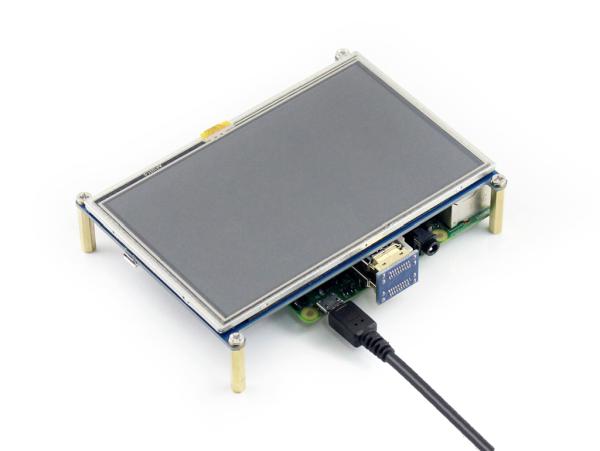
Read More: Building a Touch-enabled Interface for Windows IoT