
IoT garden using Raspberry Pi and Telegram Bot to water plants, flip lights, take NDVI pics, videos, and more…
The idea behind IoT garden project
Have you ever played Farmville? – That’s the social network game where you basically manage a simulated farm, you can either do this in a single player or in a multiplayer setting. Now what if that farm was real – then you would say well that would be just real life farming – but bear with me here, what if you could still be online, play as a single player or a multiplayer to manage this real life farm? Then that would be something more than “just farming” right.
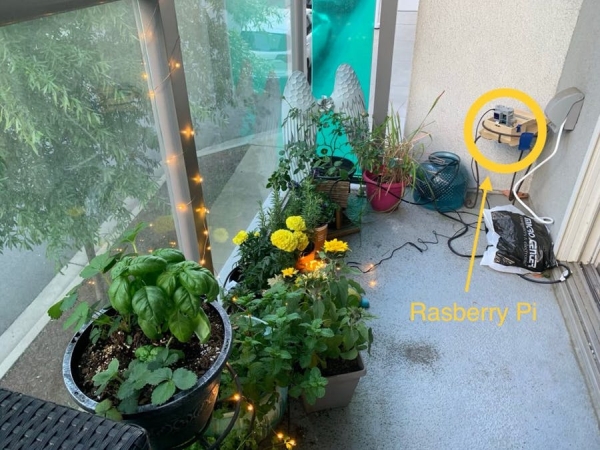
Well I don’t have a farm, I live in an apartment in an urban area and have a small garden, but the above idea was my inspiration behind creating an Internet of things (IoT) community garden which could be managed remotely by a group of like-minded people using Telegram app group chat. For those unfamiliar with Telegram, it is a messaging application similar to Whatsapp, but it allows any user to create a bot using an API, a bot is simply some code which responds to commands in an automated fashion. So I implemented my idea by coding up a Telegram Bot which runs on a Rasberry Pi and accepts commands from users – to water plants, take a picture, turn lights on and off. I plan to further expand this in the future by adding temperature and moisture sensors, but for now I simply pull the weather data using weather API for dark sky. On April 4th 2019 I posted about the bot on Facebook groups and soon had random people from around the world join my Telegram group to play with my bot. Currently as I write this article I have about 30-35 people who interact with the bot daily.
Let’s take a small pause – if at this moment you want to test out our community IoT garden yourself, then download the Telegram app on your smart phone and simply look for our chat group called: “iotgarden”, or click the link : https://t.me/iotgarden from your mobile device. Another option is to look directly for: ZenofallBot or click the link: https://t.me/Zenofallbot from your mobile device.
What are the differences between the two?
- Iotgarden is a Telegram chat group – there are multiple users in this group, the bot called Zenofallbot is added to the group similar to a real user, more importantly everyone can see each other’s interaction with the bot. The idea here is to build a community where we can not only interact with the bot as a community, but also discuss ideas for improvement to the project, other DIY projects or have general tech discussions. Also you can directly interact with me here and ask questions, I am the admin of this group.
- Zenofallbot is the actual Telegram Bot – if you want to privately interact with the bot without being part of the community then directly search its name – no one else will be able to see your interaction.
Once you have initiated a chat with the chat group or directly with the bot, just type the command “/start”, hit send, a menu should pop-up with buttons for actions.
As far as our IoT garden is concerned, management only implies watering the plants at regular intervals, analyzing the plant health –by monitoring photosynthesis activity using Infrared imaging (NDVI), and finally turning led string lights on or off – the last one doesn’t really affect plant health but is purely for garden decoration. It can also be a lot of fun to flip the lights on/off around the garden and take pictures or videos to check if everything worked as designed, this by itself is totally incredible to me – as you could potentially be flipping the lights on/off for my garden from any part of the world.
As I mentioned before live in an apartment and have a small garden, but if you have a big back yard or have wild animals or rodents roaming around that eat your garden produce – then you could potentially consider expanding the application by introducing a motion detection system to the same setup – and turn on flood lights or some other form of deterrent when motion is detected. The possibilities of what such an integrated IoT system can do are only limited by one’s imagination. The concept can be further extended to manage an actual farm as long as the Raspberry Pi can be connected to internet – one could use low power Xbee sensors in the farm to monitor environmental activity.
Setup
I built this using simple inexpensive components such as:
- Raspberry Pi – the brain that runs the bot
- Raspberry Pi NoIR camera with a blue filter
- 433Mhz radio transmitter chip
- 433Mhz Christmas light switches – Receivers
- Small aquarium pump
- Led String Lights
This project requires a power supply and wifi connectivity, this wasn’t a problem for me as I live in an apartment and my garden is 10ft away from my router.
Drip Irrigation
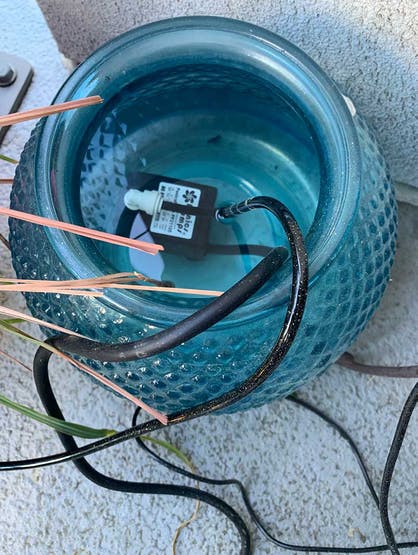

The drip irrigation system mainly consists of a small aquarium pump and tubes, the pump is connected to 433Mhz radio outlet from etekcity, which is in turn connected to a power source. The pump is immersed in a bucket of water. The main reason for choosing the 433Mhz power outlet is that we can use a transmitter chip with Raspberry Pi to turn the outlet On/Off. I have explained how to do this in a previous blog post.
The pump and the tubing I purchased were both from amazon:
Pump : https://www.amazon.com/PonicsPumps-PP21105-Submersible-Hydroponics-Aquaponics
Tubing: https://www.amazon.com/gp/product/B01DEYGBO2/
There are two main things to consider while choosing the pump and pipes:
- The power of the pump – for my application I needed a lift of about 6 to 12 inches, as the lift increases the water delivery rate decreases i.e. the gallons per hour specification. The pump I chose delivered 211gph at zero lift, and about 192gph at 12” lift. As my garden is small this was sufficient for me. I only planned to run the pump for 1min when I watered my plants – this was supposed to deliver approximately 192gph / 60 mins = 3.2gallons of water in 1 min, but empirically I realized it delivered close to 0.5 gallon every 1min I ran the pump. This was still good enough for me.
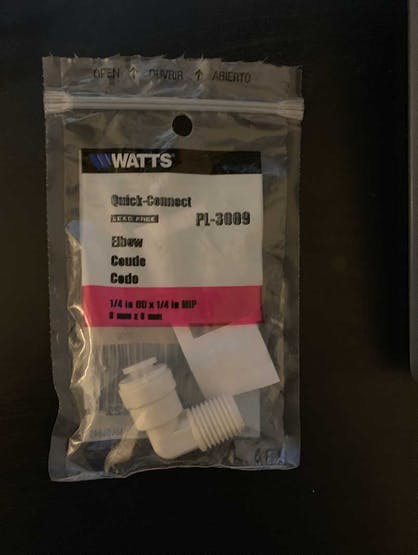
- The tubing should fit the pump.<pan>This was the main problem I encountered while setting up the irrigation system was that the smallest connector that came with the pump was ¼’ internal diameter (ID), but the tubing was ¼’ outside diameter (OD). I knew the two were incompatible just based on specification of products before I made the purchase, but I had to make the purchase because I was unable to find drip irrigation pipes in different size or the pump with a smaller nozzle. I solved the problem by buying an elbow connector from home depot, with the right size diameters at both ends
Lights
I have also put up some decorative led string lights around my garden, which are again connected to a 433Mhz power outlet, same as the irrigation pump. As mentioned above the 433Mhz outlet can be turned on/off from a Raspberry Pi using a 433Mhz transmitter chip. The calibration steps for getting the outlet on/off codes is mentioned in a previous blog post.
Camera
I use the Raspberry Pi NoIR camera, with a thin blue filter taped to it, this helps record photosynthesis activity using the Normalized Difference Vegetation Index – NDVI. I will explain the logic behind NDVI in a later section. The difference between a regular camera and noIR camera is that NoIR camera does not have an infrared light blocking filter i.e. it captures infrared light.
The details on how to connect the camera to Raspberry Pi are shown in a previous post.
Source: Community IoT Garden Using Raspberry Pi and Telegram Bot