Summary:
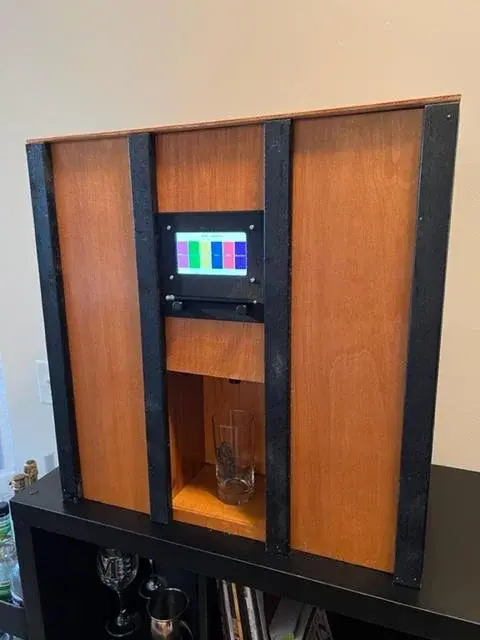
Are you looking to enhance your home bar with a modern touch while maintaining a classy ambiance? Here's an adaptable project that can be customized to suit your own design preferences. The objective of this project is to combine a Raspberry Pi, a touchscreen, diaphragm pumps, and various electrical components to create an automated drink pouring system capable of dispensing six different drinks. Each drink can be poured quickly in quantities of 0.5oz, 1oz, 2oz, or free-flow.
This project serves as an excellent introduction to programming graphical user interfaces (GUI) and learning to control mechanical components using digital commands.
The instructions will guide you through the following steps:
- Gathering the necessary supplies
- Downloading the Raspberry Pi code
- Creating a wiring schematic
- Downloading custom CAD parts 5-9. Preparing the parts 10-29. Assembling the bar setup
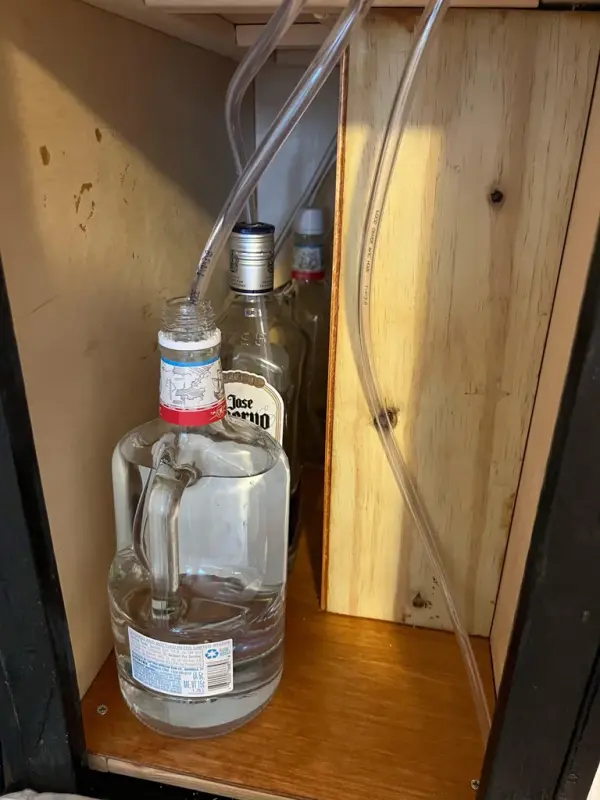
- Loading the bottles
- Finalizing the project
Step 1: Raspberry Pi Code Download
To obtain instructions for setting up and downloading the code for the Raspberry Pi, please refer to the following GitHub link:
https://github.com/Cheiner32/Perfect-Pour-Bar
Please note that within the code, you have the flexibility to customize the pump run times and the names of the drinks according to your requirements.
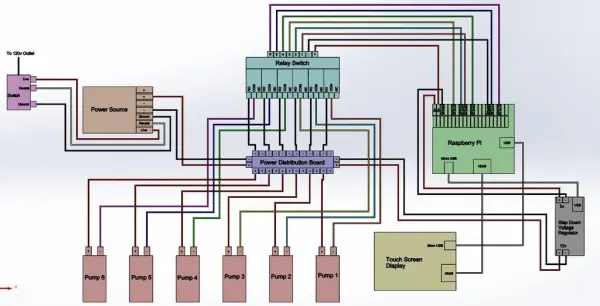
Step 2: Wiring Schematic
Step 3: Custom CAD Parts
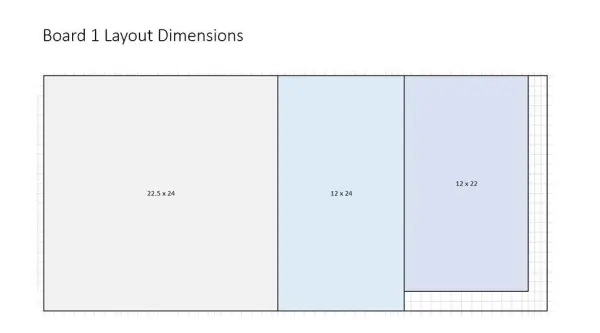
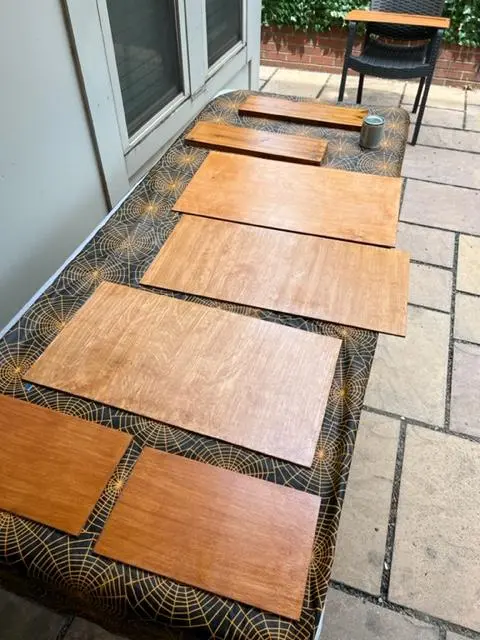
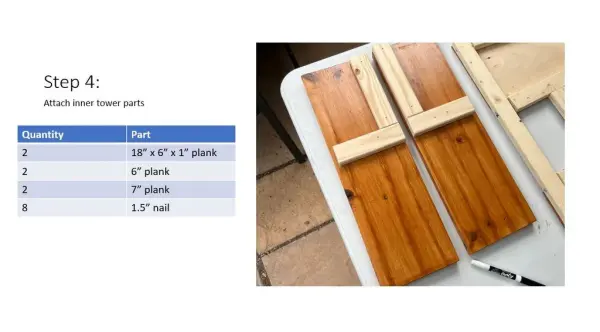
Step 4: Preparing Parts
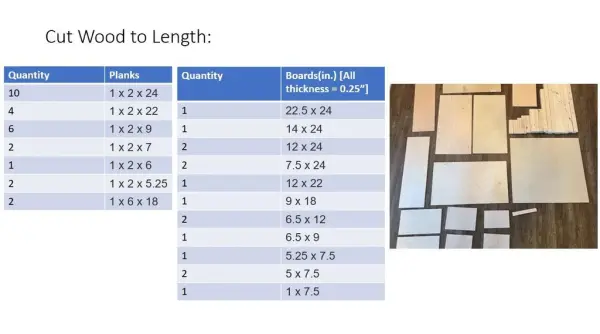
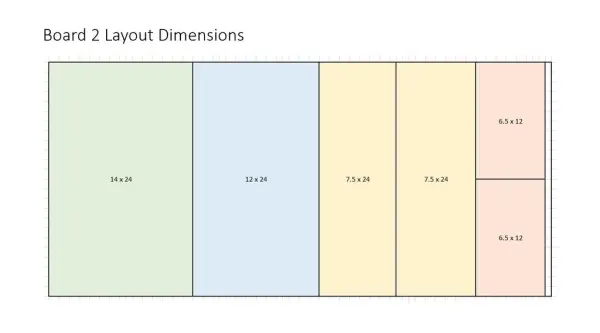
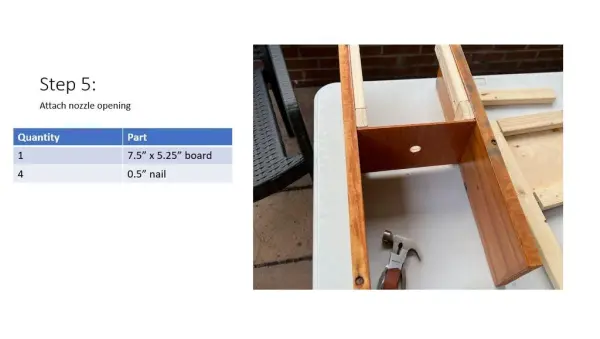
Step 5: Preparing Parts
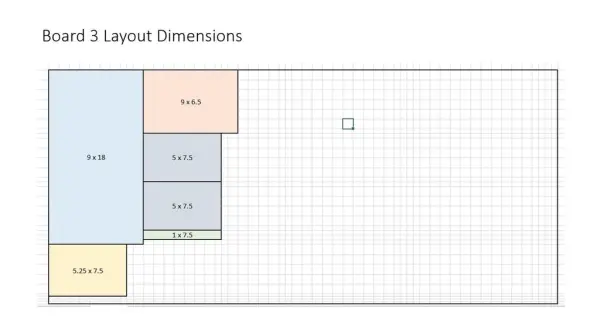
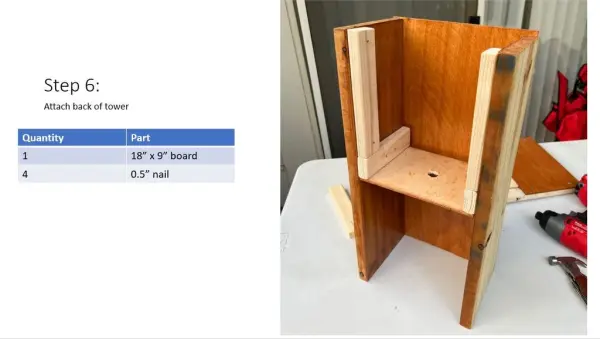
Step 6: Preparing Parts
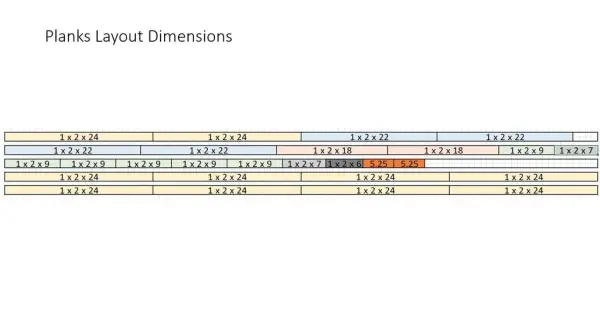
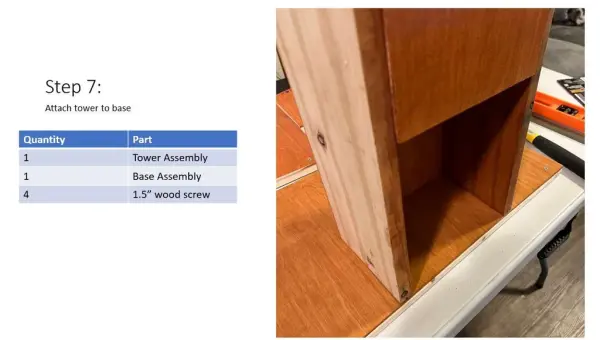
Step 7: Preparing Parts
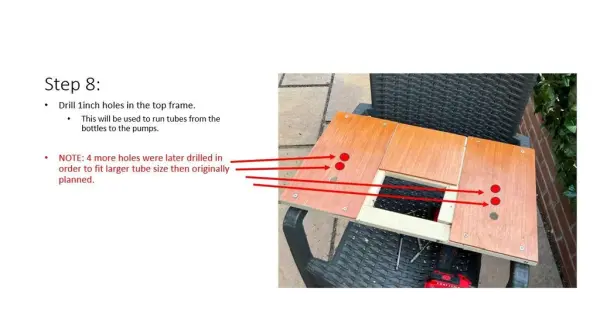
Step 8: Preparing Parts
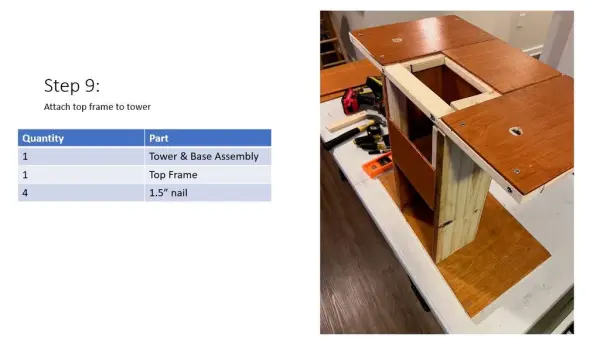
Step 9: Preparing Parts
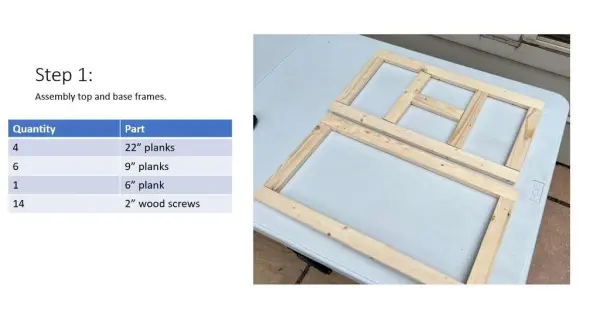
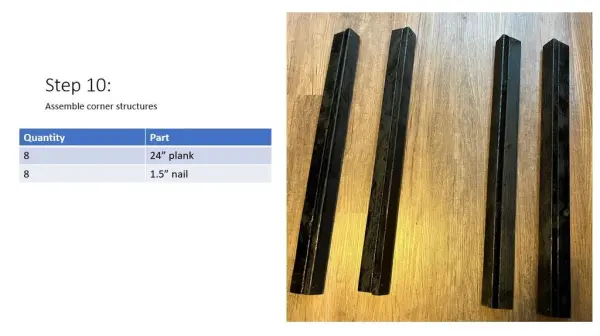
Step 10: Assembling the Bar
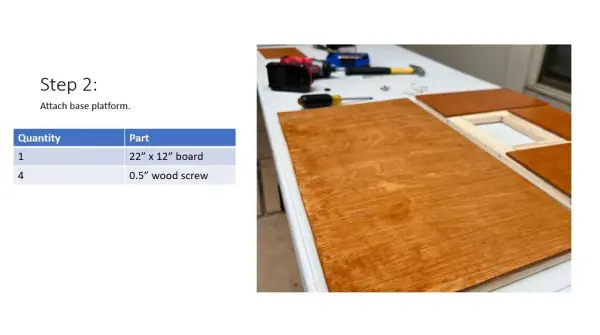
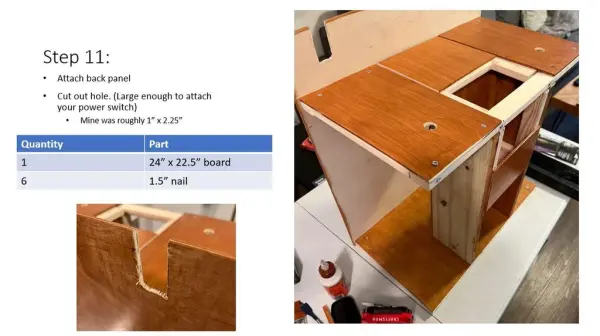
Step 11: Assembling the Bar
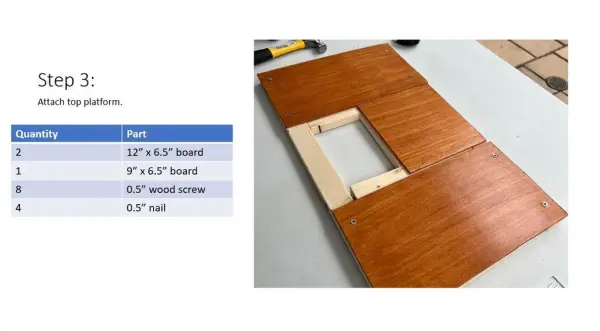
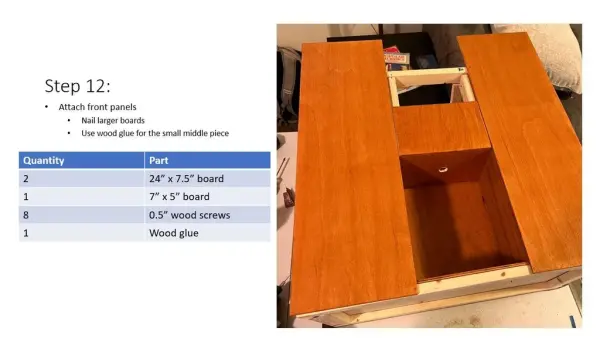
Step 12: Assembling the Bar
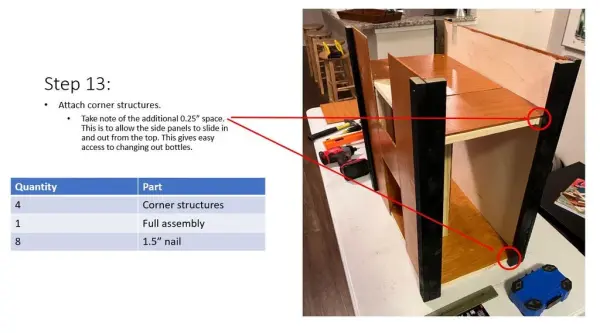
Step 13: Assembling the Bar
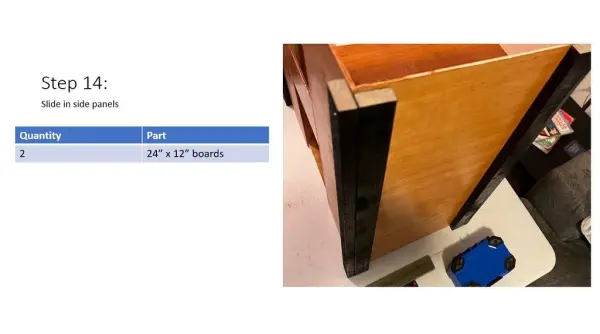
Step 14: Assembling the Bar
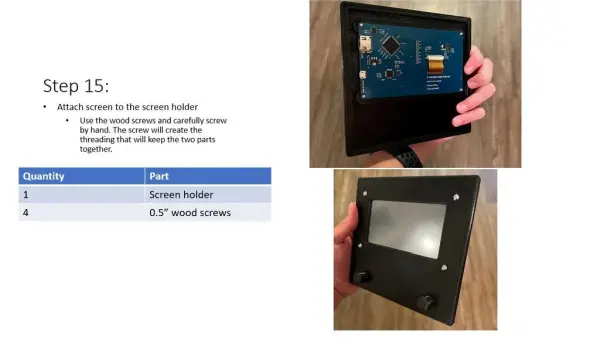
Step 15: Assembling the Bar
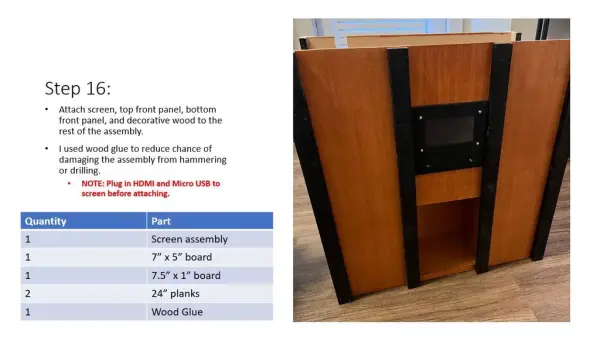
Step 16: Assembling the Bar
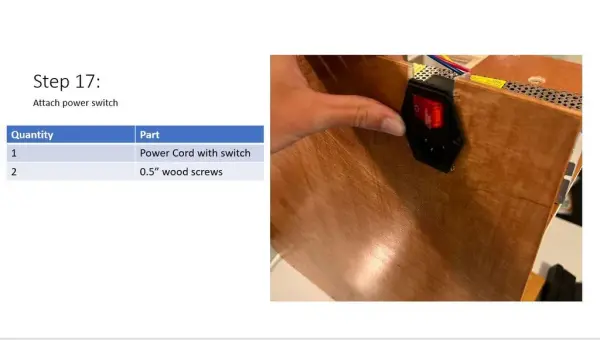
Step 17: Assembling the Bar
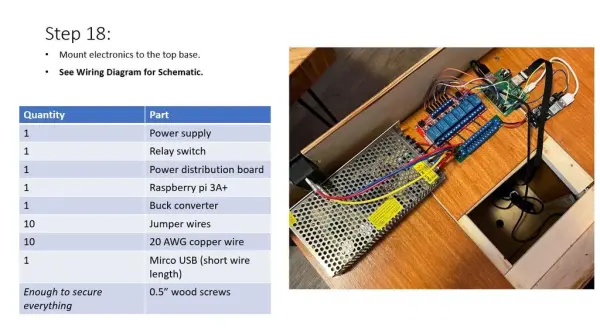
Step 18: Assembling the Bar
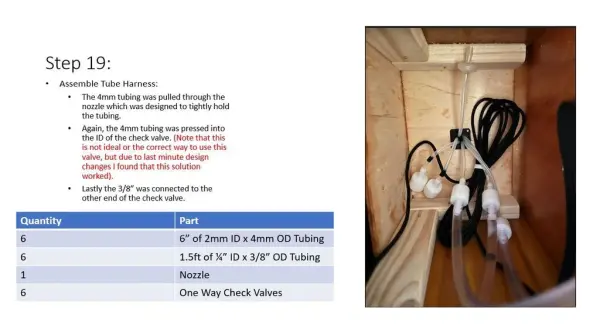
Step 19: Assembling the Bar
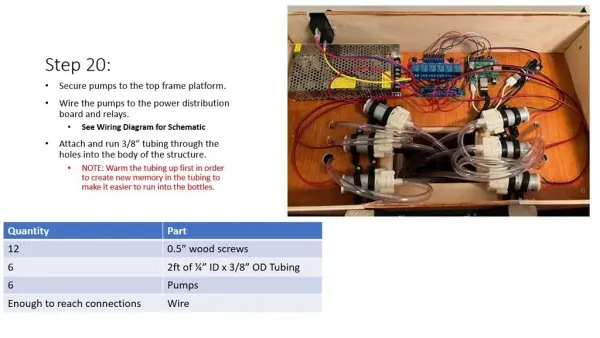
Step 20: Assembling the Bar
Step 21: Assembling the Bar
Step 22: Assembling the Bar
Step 23: Assembling the Bar
Step 24: Assembling the Bar
Step 25: Assembling the Bar
Step 26: Assembling the Bar
Step 27: Assembling the Bar
Step 28: Assembling the Bar
Step 29: Assembling the Bar
Step 30: Loading Bottles