
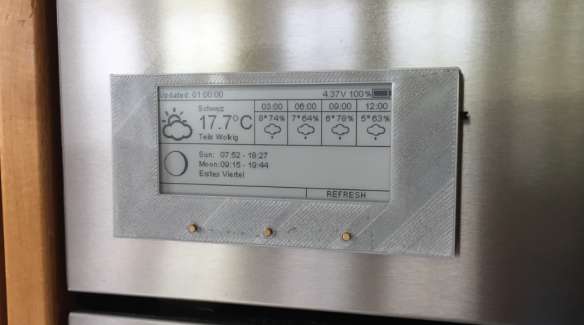
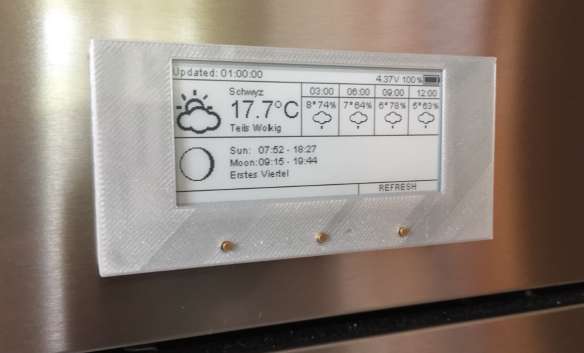
I’m a fan of all kind of weather stations. When Daniel Eichhorn twittered about his new version using an E-Paper display module, I immediately preordered one. I decided to build a station with a custom enclosure, so here is my version of a 3D printed version, featuring magnets so it can be attached to the fridge:
Using e-paper for a weather station is an ideal solution, as the data does not need to be updated often. By default, the station reaches out every 20 minutes for new data over WiFi and then updates the display. Daniel Eichhorn already has published kits for OLED (see “WiFi OLED Mini Weather Station with ESP8266“) and touch display (see “WiFi TFT Touch LCD Weather Station with ESP8266“). I like them both, but especially the TFT one is very power-hungry and not really designed to work from batteries. What I would like is a station which can run for weeks.
The e-paper weather station from Squix/Daniel Eichhorn is available in two versions:
- as a kit, with programmer, enclosure and battery: https://blog.squix.org/product/2-9-espaper-plus-kit
- or the ‘lite’ kit with the display module: https://blog.squix.org/product/2-9-espaper-lite-kit
Features:
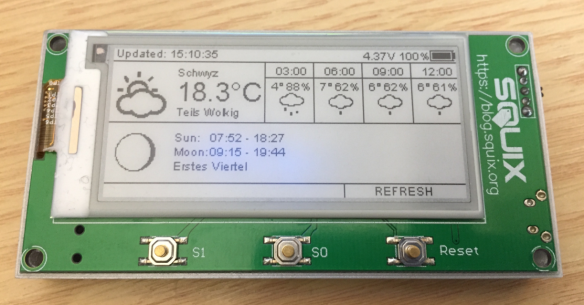
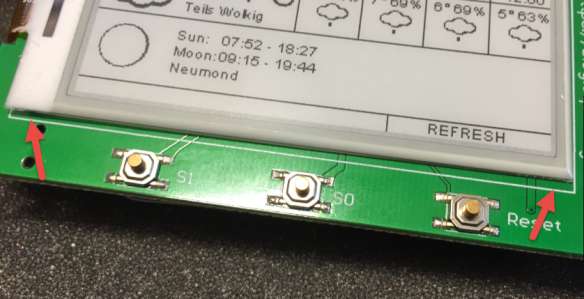
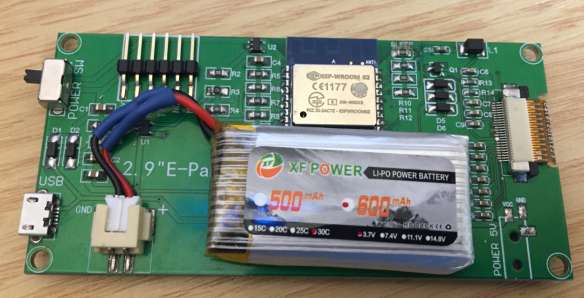
- Waveshare 2.9″ E-Paper 296×128 (black, white)
- ESP8266 WiFi module
- JST LiPo connector and charging circuit (100 mA/h)
- 3 User buttons
Because the ‘lite’ kit was supposed to be available earlier, I ordered that version. And I wanted to build custom enclosure anyway.
Setup
Daniel provides an extensive and well documented software for the module on GitHub, the setup guide is available on https://blog.squix.org/espaper-setup-guide.
Because I was familiar with his other weather stations, I had the module up and running in less than 30 minutes.
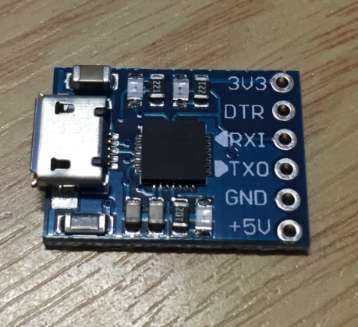
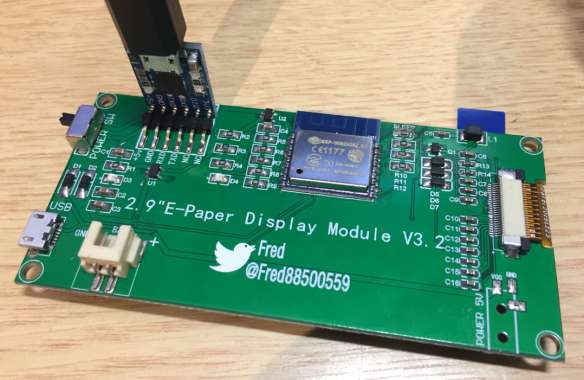
Because the ‘lite’ kit does not include a programmer (actually a USB to Serial Converter), I had ordered a CP2102 module.
And I did not need to build an adapter cable:
Display
The display is attached to the PCB with a double-sided scotch tape, but I noticed that in the factory it has been slightly placed misaligned
After consulting Daniel Eichhorn, I was able to carefully remove the display with a razor knife:
Warning: this can easily break the display, do this only on your own risk!
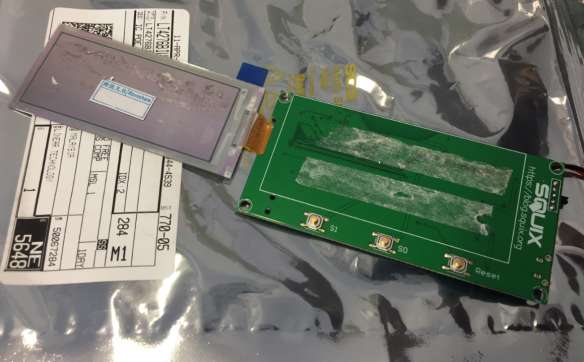
According to the label on the backside of the display, it must be the https://www.waveshare.com/2.9inch-e-paper.htm
Enclosure
I considered creating an enclosure with acrylic and the laser cutter, but then decided to do a 3D printed one as I have greater flexibility.
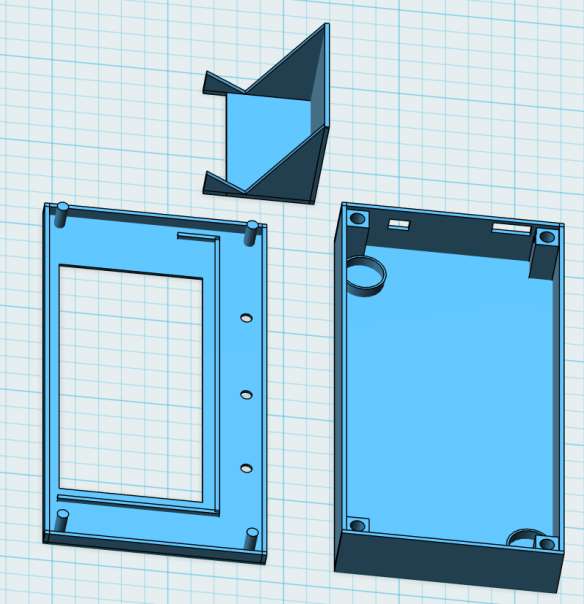
The design includes a table stand as an option, a front and a back part.
The battery fits into the back part oft the enclosure:
No screws or glue is needed to keep the front and the back part together. The back part has two round holders for magnets so it can stick to metal objects:
Summary
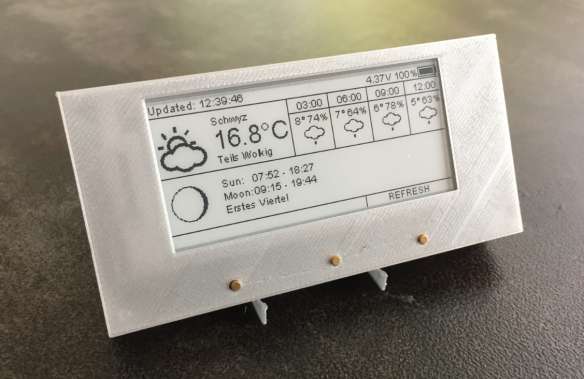
I’m happy with the design and the functionality: I have a very low power weather station in the kitchen which I can use on a stand or attach to metal surfaces. The station runs for more nearly two weeks on the same battery with only a 10 mV drop so far, with an update of the data over WiFi every 20 minutes. The grey color is fine, but maybe I will try another version with a different color? Or do a another one with the laser cutter? I think I might build up a few more of these…
Happy weathering 
Links
- Waveshare 296×128 E-Ink Display: https://www.waveshare.com/2.9inch-e-paper.htm
- USB to Serial Converter: https://www.banggood.com/CJMCU-CP2102-USB-To-TTLSerial-Module-UART-STC-Downloader-p-970993.html
- Setup Guide: https://blog.squix.org/espaper-setup-guide
- 3D Design Files on Thingiverse: https://www.thingiverse.com/thing:2598580