
Intro
One function that makes the Internet of Things the Internet of Things is remote control of devices, being able to trigger action from a remote location.
With brainbox you can edit and run your digital circuit simulation designs online on RPi, PC, Mac, thin clients, tablets within your browser and trigger any physical device.
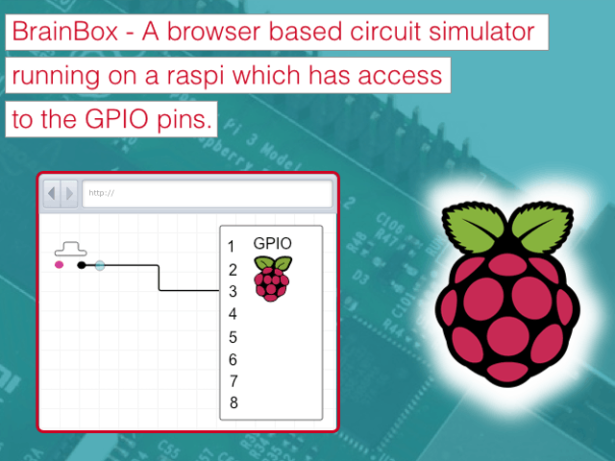
In this blog post, we’ll build and demonstrate a simple digital circuit, controlling a device from a web browser. We will build a small circuit simulation using Raspberry Pi and showcase the most common operation, switching on and off a remote device (in this case, Raspberry Pi LEDs).
How to install and use it
You have several different options to use the brainbox:
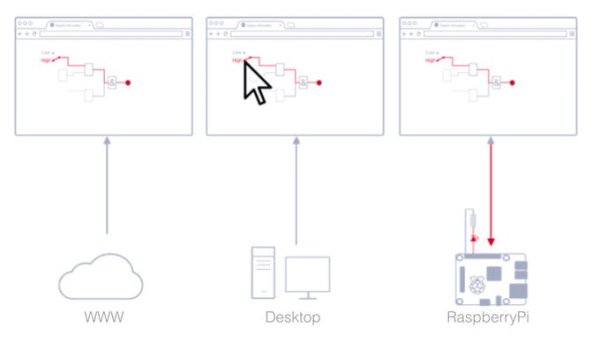
Running from the Internet
For the very first touch just you can go to http://freegroup.github.io/draw2d_js.app.brainbox/ and you can build your own digital circuits. You can save, load and simulate your created schematics if you login with your Google+ account.
Direct on your Raspberry Pi
You have full access to the GPIO pins on you Raspberry Pi with the browser based digital circuit simulator. If Node.js is already running on your RasPi you just need to install the simulator like on your desktop:
npm install -g brainbox
And start the server with brainbox. The server reports the URL how to connect to your Raspberry Pi with the browser.
>
> brainbox is listening on http://10.18.130.54:7400/
“Hello World” Example
After you have installed and started your BrainBox on your Raspberry Pi you can connect a LED to Pin 3.
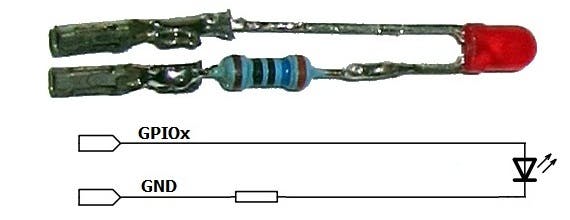
A quick word about the electronics involved. LEDs are Light Emitting Diodes and the diode part is important for us – they only pass electricity one way, so we need to make sure we put them in the right way round. They have a long leg and a slightly shorter leg. The long leg goes to the positive side and the shorter leg to the negative (or 0V) side. If we’ve cut the legs short (as I have done here), then another way is to tell is to look at the side of the LED – there will be a flat section. Think of the flat as a minus sign and connect that to the 0V side of the circuit.