
Connect your Raspberry Pi
Let’s connect up your Raspberry Pi and get it running.
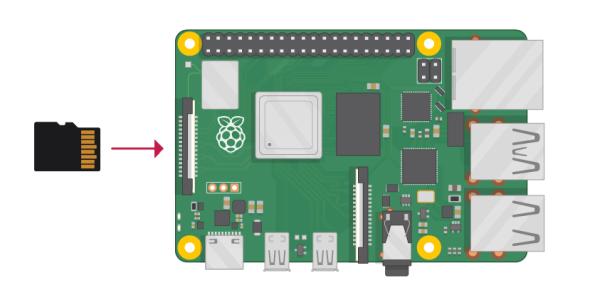
Check the slot on the underside of your Raspberry Pi to see whether an SD card is inside. If no SD card is there, then insert an SD card with Raspbian installed (via NOOBS).
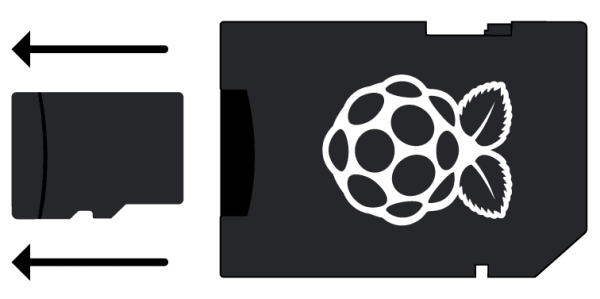
Note: Many microSD cards come inside a larger adapter — you can slide the smaller card out using the lip at the bottom.
Install Rasperry Pi OS on your SD card with the Raspberry Pi Imager
Many vendors sell SD cards with a simple Rasperry Pi OS installer called NOOBS preinstalled but you can really easily install Rasperry Pi OS yourself using a computer that has an SD card port or using an SD card reader.
Using the Raspberry Pi Imager is the easiest way to install Rasperry Pi OS on your SD card.
Note: More advanced users looking to install a particular operating system should use this guide to installing operating system images.
Download and launch the Raspberry Pi Imager
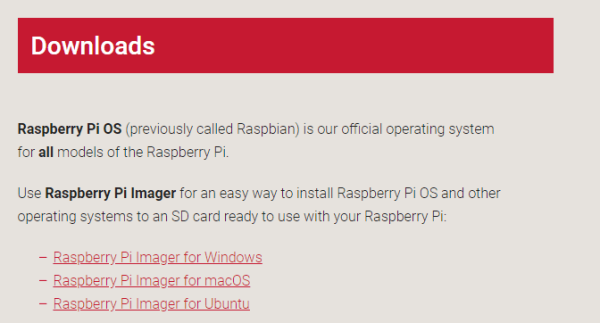
Visit the Raspberry Pi downloads page.
Click on the link for the Raspberry Pi Imager that matches your operating system.
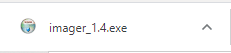
When the download finishes, click on it to launch the installer.
Using the Raspberry Pi Imager
All data stored on the SD card will be overwritten during formatting and lost permanently, so make sure that you back up the card or any files you want to keep before running the installer.
When you launch the installer, your operating system may try to block you from running it. For example, Windows may give the following message:
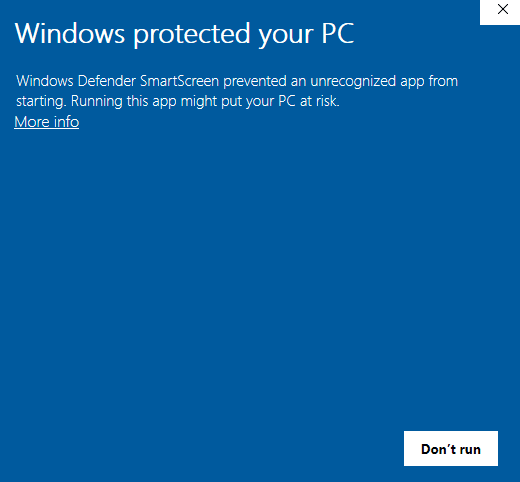
- If you get this, click on
More infoand thenRun anyway. - Insert your SD card into the computer or laptop’s SD card slot.
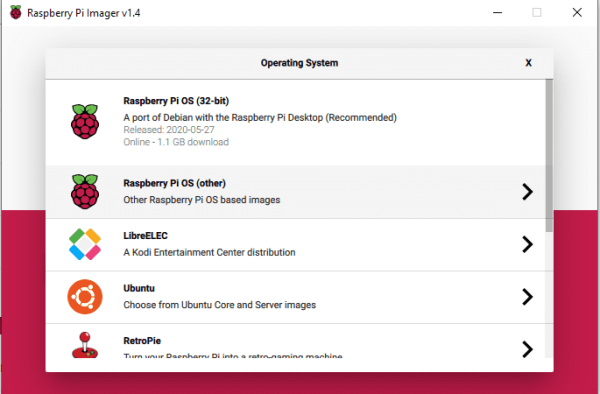
- In the Raspberry Pi Imager, select the OS that you want to install. The first option, Rasperry Pi O, is the recommended OS.
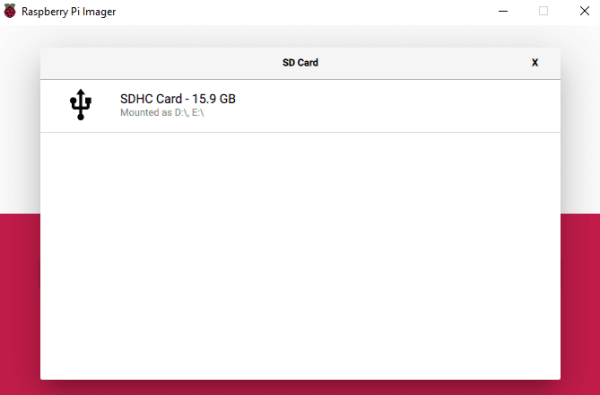
- Select the SD card you would like to install it on. Different platforms will display the drives in different ways. Mac OS, for example, will show you all drives including you main operating sysytem.
Note: Make sure you are selecting the correct drive. The drives memory capacity can be a useful indication of which drive you are selecting.
Once you have selected both the OS and the SD card, a new WRITE button will appear.

- Then simply click the
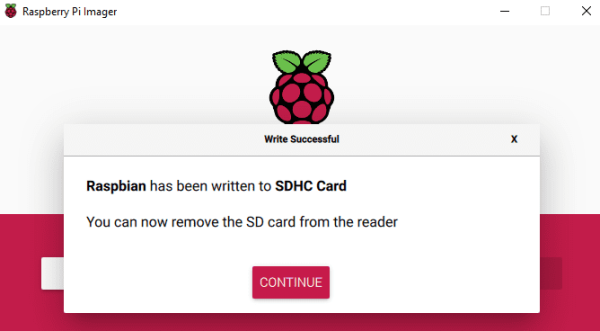
WRITEbutton. - Wait for the Raspberry Pi Imager to finsh writing.
- Once you get the following message, you can eject your SD card.
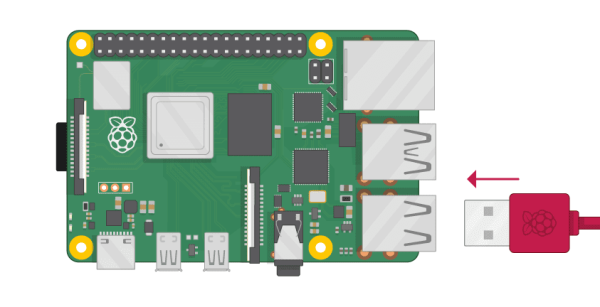
Find the USB connector end of your mouse’s cable, and connect the mouse to a USB port on your Raspberry Pi (it doesn’t matter which port you use).
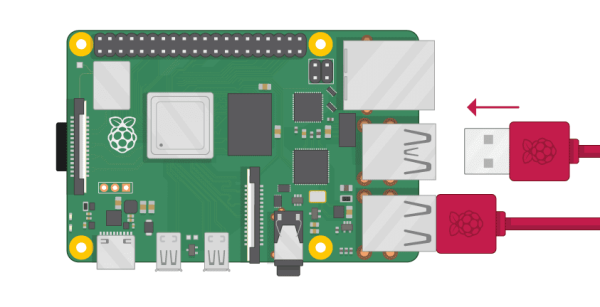
Connect the keyboard in the same way.
- Make sure your screen is plugged into a wall socket and switched on.
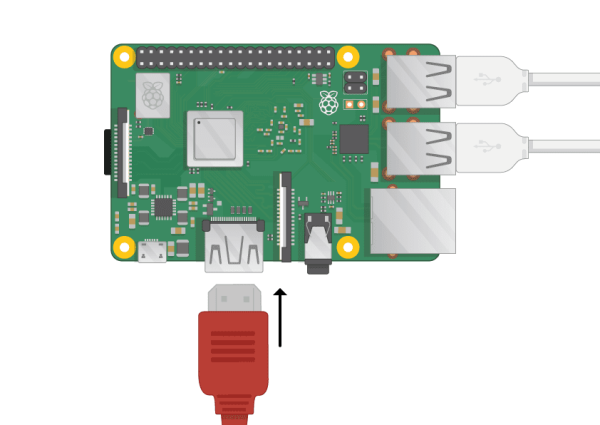
- Look at the HDMI port(s) on your Raspberry Pi — notice that they have a flat side on top.
- Use a cable to connect the screen to the Raspberry Pi’s HDMI port — use an adapter if necessary.
Raspberry Pi 4
Connect your screen to the first of Raspberry Pi 4’s HDMI ports, labelled HDMI0.
You could connect an optional second screen in the same way.
Raspberry Pi 1, 2, 3
Connect your screen to the single HDMI port.
Note: nothing will display on the screen, because the Raspberry Pi is not running yet.
Source: Getting started with Raspberry Pi