Intro
In a previous post, I showed you an Arduino based controller to manage the lighting system in the house. Such a device is useful for handling the basic ‘electrical' stuff such as lights, doorbells, gates, knobs and buttons.
For other home automation/control desires, you often need to put special purpose devices in difficult locations, such as roller-shutters near the windows, RGB-controllers in the ceiling.
To accomplish the latter, for this project, I've opted not to build all these devices myself, but instead go for a ready made solution, based on the Z-Wave protocol. This project will only cover the basics: setting up the gateway and adding/removing Z-Wave devices.
Note: The gateway is required cause Z-Wave devices can't directly connect to the internet.
Ingredients
We are going to use:
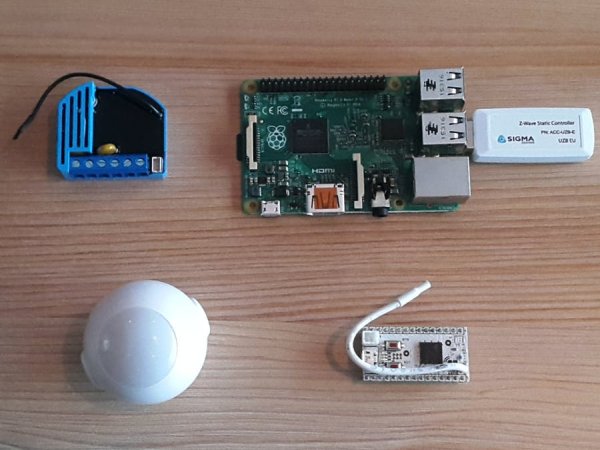
- 1 Raspberry Pi for running the applications
- 1 sigma USB controller
- 1 or more Z-Wave devices like a door-sensor, eye, roller-shutter.
The software running on the RPi is called pygate. It's a framework that turns your RPi in a gateway to the AllThingsTalk cloud. The application works with plugins so that it's functionality can be selected, depending on the project: do you want Z-Wave, virtual devices (web-resources), xBee, associations, scenes, groups, or something else, just pick the plugins that you like and put them together.
For this project, we are going to use the Z-Wave plugin. This module uses the open-zwave libraries for communicating with our devices.
The gateway is hooked up to the AllThingsTalk cloud for long distance access and for talking to other devices, like the Controllino as discussed in this post. The AllThingsTalk cloud also provides a ‘developer view‘ user interface on the gateway which allows you to configure and control the gateway and devices.
Installation
- Follow this procedure to install the Pygate framework on the RPI
- Connect the USB dongle to the RPI.
- Next, you need to install the Z-Wave plugin for Pygate. You can follow this procedure.
- Don't forget to configure the plugin
- Activate it (Note: use the manual process, since the gateway has not yet been added to the cloud)
You are now ready to start up your gateway, so reboot the RPI.
Claim
Once your RPI is running, it's time to add it to your account on AllThingsTalk. You do this by ‘claiming‘ your gateway.
Note: The claim code for your gateway, is the MAC address of the RPi, formatted like so: A44A16BF1665. You can find it with the command ‘ifconfig‘ or in the log file of Pygate.
- Make certain that Pygate is running on the RPI (and connected to the internet)
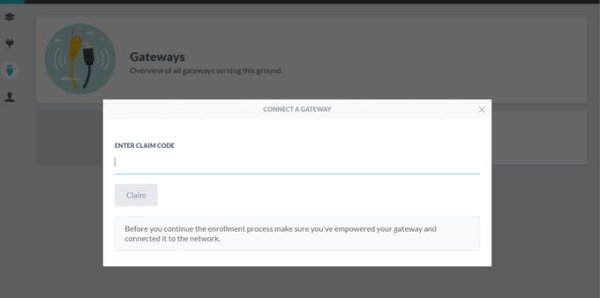
- Go to the gateways page (the connector icon in the left upper corner) and click on: ‘
connect a gateway‘
- Enter your claim code (the mac address)
- Wait until the process is done
Add a device
Once your gateway is available on AllThingsTalk, you can start adding Z-Wave devices to the controller. In Z-Wave, adding a device requires both an action on the Z-Wave controller (the RPI) and on the device. The general approach is always:
- The controller needs to be put in a special ‘
include‘ mode
- Next you probably have to do some action on the device, usually this is clicking on a button 3 times, but it is manufacturer dependent, so check the docs. For instance, some devices will perform the include immediately after power up for the first time.
- Wait until the operation is done (or canceled).
With Pygate, the procedure becomes:
- Go to the overview page of the gateway, this looks like so (Note: the UI gets frequent updates, so changes might have happened):
Read More: Home Control with a Raspberry Pi and Z-Wave


