
In a prior tutorial, I detailed the process of establishing an SSH connection to your Raspberry Pi using an ethernet connection, all without the need for an external keyboard or monitor. While connecting via an ethernet cable is a solid option if you intend to maintain a physical cable connection to your router, my preference leans towards using WiFi. This approach provides a greater degree of flexibility in terms of where I can place my running Pi.
However, it's important to exercise caution when selecting a WiFi adapter for your Raspberry Pi, as not all of them function seamlessly right out of the box. I've personally had success with a specific adapter available on Amazon, which operates smoothly without the necessity for driver installations.
Nonetheless, there are a few essential configurations that must be implemented to ensure the proper functioning of any WiFi adapter with your Raspberry Pi. In this article, I will guide you through these setup steps one by one. It is assumed that you have already established an SSH connection over an ethernet connection, as detailed in the previously mentioned post.
This video will walk you through the steps, but see below for more details:
EDIT THE NETWORK INTERFACES FILE
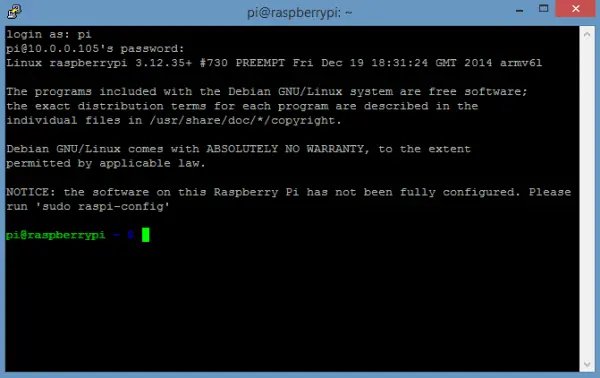
Insert the USB WiFi adapter into your Raspberry Pi, power it on, and establish a connection to your internet router using an ethernet cable, following the same procedure as outlined in the previous tutorial. Subsequently, use PuTTY to SSH into your Raspberry Pi and access the command prompt.
We have some modifications to make in the “/etc/network/interfaces” file.
To make these changes, we will utilize the Nano text editor in Raspbian. To edit the file, enter the following command at the command prompt:
“`bash
sudo nano /etc/network/interfaces
“`
Pro Tip: If you ever need to copy content from your laptop or desktop and paste it into PuTTY, simply copy the content, and then right-click with your mouse where you intend to paste it in PuTTY.
Replace the existing code in the file with the following code:
auto lo
iface lo inet loopback
iface eth0 inet dhcp
auto wlan0
iface wlan0 inet dhcp
wpa-conf /etc/wpa_supplicant/wpa_supplicant.conf
Afterwards, the file should look like this:
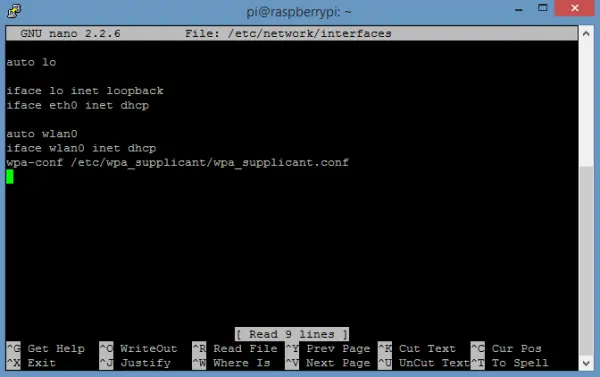
Then type Ctrl-X to exit, and Y to save the changes.
EDIT THE WPA_SUPPLICANT.CONF FILE
We must now introduce some modifications to the “/etc/wpa_supplicant/wpa_supplicant.conf” file. To access and edit this file using the Nano text editor, you can execute the following command at the command prompt:
sudo nano /etc/wpa_supplicant/wpa_supplicant.conf
Replace the code in the file with this code:
ctrl_interface=/var/run/wpa_supplicant
ctrl_interface_group=0
update_config=1
network={
ssid=”YOUR WIFI NETWORK NAME”
psk=”YOUR WIFI PASSWORD”
proto=WPA
key_mgmt=WPA-PSK
pairwise=TKIP
group=TKIP
id_str=”YOUR WIFI NETWORK NAME”
}
The file should look like this:
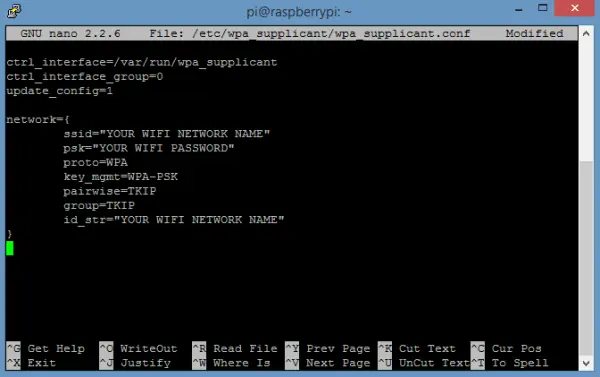
The “ssid” entry, specified as “YOUR WIFI NETWORK NAME,” should match the precise name of your wireless network, exactly as it displays when connecting to your WiFi from another computer. Pay attention to letter case sensitivity, and ensure the quotation marks remain as they are.
The “psk” entry, labeled as “YOUR WIFI PASSWORD,” should be filled with the password you typically use to access the network.
Be sure to repeat your network name in the “id_str” line as well.
Next, use the keyboard shortcuts Ctrl-X and Y to exit the file and save the modifications.
Subsequently, shut down the Raspberry Pi by entering “sudo poweroff” at the command prompt. Afterward, unplug the Pi from its power source and disconnect the Ethernet cable from your internet router. Finally, restart the Pi.
FIND THE NEW LOCAL IP ADDRESS
Previously, we accessed the Pi by SSH using its local IP address on the Ethernet port. However, when connecting via WiFi, the IP address will change. To find the new IP, you will need to utilize Advanced IP Scanner. Once you have obtained the updated IP address, use PuTTY to SSH by specifying the WiFi port's IP address.
TEST THE WIFI CONNECTION
Upon logging back into your Pi, you can verify the status of your WiFi connection by entering the command “iwconfig” at the prompt. Your WiFi network's name should be visible under ESSID as “YOUR WIFI NETWORK NAME,” with “Siamese” as an example in my case. If your WiFi connection is established successfully, you'll encounter a message resembling the following:
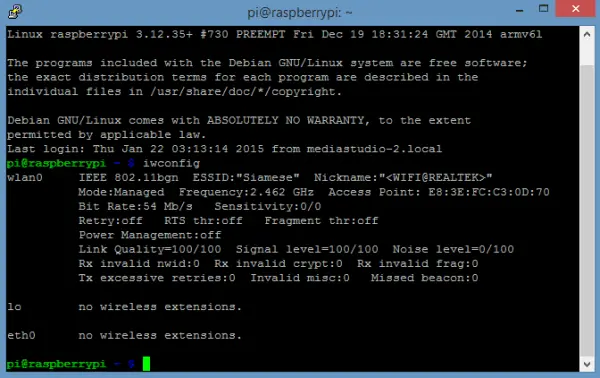
Should you come across indicators such as “Link Quality=0/100” or “Signal Level=0/100” within the “wlan0” section, it indicates that your Raspberry Pi lacks a connection to the Wi-Fi network. In such a scenario, it is advisable to revisit your configurations and ensure that every detail matches precisely with what is illustrated in the accompanying images.
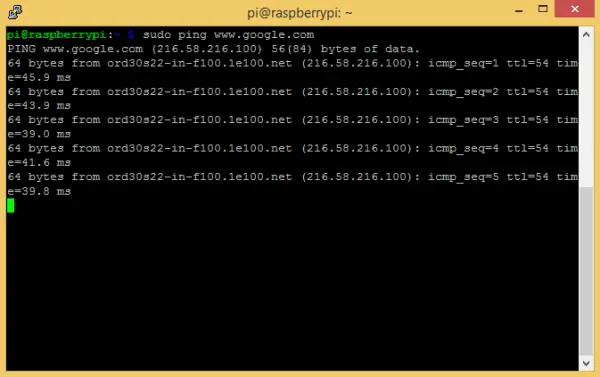
Alternatively, you can assess your Raspberry Pi's connectivity to the internet via Wi-Fi by conducting a ping test to Google. This can be executed by entering the following command with superuser privileges: “sudo ping www.google.com.”
While PuTTY is an excellent tool for command-line access to your Raspberry Pi, it has limitations when it comes to utilizing various features available exclusively through the Raspbian desktop. To remotely access the desktop, you'll need to set up and configure a Remote Desktop Connection. You can find a step-by-step tutorial on how to achieve this in the guide titled “How to Access the Raspberry Pi Desktop With a Remote Desktop Connection.”
Thank you for taking the time to read this! If you encounter any challenges while setting up the remote desktop connection, please don't hesitate to ask for assistance—I'm here to help. And, remember to subscribe to receive email notifications when we release new tutorials!