
Build a smart mirror that will give you useful information while getting ready in the morning
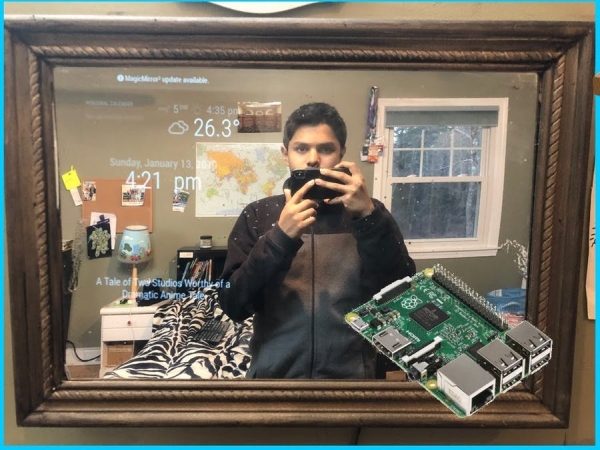
In this project, we will be building a smart mirror that will show you helpful information while you are getting ready in the morning. The whole thing should cost under $80 making it decently affordable for most people.
This guide will only teach you how to build your own smart mirror, from start to finish.
First Step: Watch The Video
This guide is an explanation of the video so your first step should be to watch the video if you have not already.
Second Step: Make the Frame
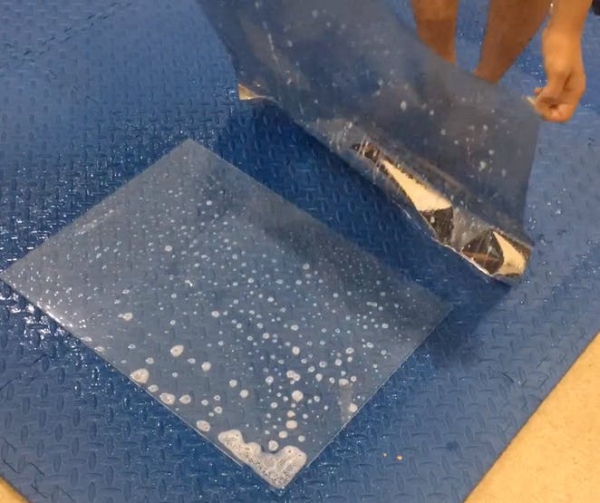
I used the double sided mirror film to make the glass a see through mirror. The film I bought required me to use soap and water to apply it to the glass. I did that and then continued to trim the excess using a razor blade.
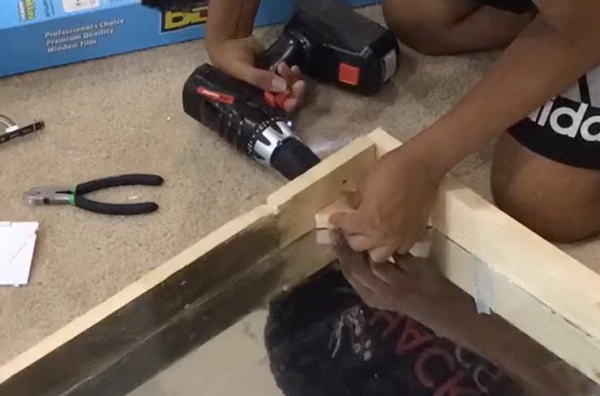
I built the wood frame out of pine 1×4's from my local hardware store. If you have any wood laying around, that can also be used to make the frame. The glass was purchased from the same Home Depot for around $10.
First, use the glass as a template to measure out the frame. Since 1×4 pine is actually around 0.75×3.75 in in dimensions, I added 0.25 inch to each side of my measurements. This is just how I did it and does not in any way mean that this is the easiest way for you to do it. The frame can be built numerous ways and the way that I used is just one of many.
It is also important to note that I used a miter saw as it was the best tool that I had available to me. However, the pieces can also be cut at your local home improvement store or at home with a hacksaw.
I then assembled the pieces together using some drywall screws and a drill. Again, this can also be done with a screwdriver if needed. *Make sure you pre-drill your holes!
Next, I cut the pieces for the molding out of some trim I had laying around. I cut 45 degree miters into them and then assembled the trim finish using nails. This could also be done with glue or screws depending on what you have laying around. I then proceeded to finally attach the trim to the base frame.
Then put the glass into the frame and make sure that everything fits together snugly. If the glass doesn't fit the first time, resize the frame and try again.
Second Step: Mount the Internals
I secured the glass where it was by cutting some small pieces of 1x4s into small triangles. I screwed them into the corners to sandwich the glass in between the two pieces of wood.
I created a monitor strap/mount using some spare 1×4 wood. I used the VESA mounting holes on the monitor to secure the monitor to the wood. I then used more drywall screws to sandwich the monitor between the strapping and the glass so that the monitor wouldn't move.
Finally, I cut out and hot glued a black foam poster board to act as an opaque layer and mounted a raspberry pi and all of the power equipment inside the frame. I cut a small notch in the frame so I could easily run the wire though,
Third Step: Program the Raspberry Pi
Like I said in the video, the software part of this project is a bit command line intensive. The steps below were taken from Magic Mirror Central's Blog Post so credit goes to them for these steps.
1. Installing Raspbian Jessie
- Download Etcher and install it to your computer. It’s available for both Windows or OSX
- Connect an SD card reader with your SD card inside.
- Grab Raspbian Jessie from here. This is the operating system for your Pi
- Open Etcher and select the Raspbian Stretch image you downloaded.
- Select the SD card you wish to write your image to.
- Review your selections and click ‘Flash!’ to begin writing data to the SD card.
2. Boot up your Raspberry Pi
Unmount the SD card from your PC and insert it into your Pi. You’ll need to connect the Pi to power and to a monitor, as well as hooking up a mouse and keyboard. After booting up, you will see the Raspbian desktop screen.
3. Connect the Pi to your Wifi
Your Pi needs the internet to update stuff that it shows you, so you have to connect to a Wifi network. In the top right corner of your screen, you should see a network icon that looks like two computers with an X. Click on it connect to your wifi network
4. Identify your Pi’s IP address
To do this, you have to open up your Pi’s terminal. Move your mouse to the top left corner, click Menu > Accessories > Terminal
When in the terminal, type in the command:
ifconfig
You’ll see some text appear, and your Pi’s IP address is next to “inet addr”. It most likely looks something like 192.168.x.x
5. Enable SSH on your Pi and connect remotely
SSH (Secure shell) is a network protocol that’s used to connect to computers remotely. That way, you can send commands to your Pi from your PC, which is handy if it’s hanging up on the wall behind a mirror!
First you have to enable SSH on your Pi. Go to Preferences > Raspberry Pi > Configuration > Interfaces and enable SSH.
After you’ve enabled SSH, restart your Raspberry Pi.
After the Pi has booted up, open up your PC computer’s terminal (Terminal on a Mac or Command Prompt in Windows) and type in the following command:
ssh [email protected]
Just replace the part after the @ sign with your Pi’s IP address. You will be asked to put in a password, which on a Raspberry Pi is “raspberry” by default.
6. Install Magic Mirror on your Raspberry Pi
the MM² platform is very easy to install. You just have to type in a single command to install it.
copy and paste the following into the Terminal:
bash -c "$(curl -sL https://raw.githubusercontent.com/MichMich/MagicMirror/master/installers/raspberry.sh)"
If you get an error that says “Unable to install dependencies!” you have to install an older version of Electron:
sudo npm install -g [email protected]
The installer will ask if you would like to use pm2 to automatically boot up into the Magic Mirror dashboard. type in y and press enter to confirm, since we want to make the mirror start up automatically if the power goes out, for example.
Now you’re ready to start up your Magic Mirror, so type in the following:
cd ~/MagicMirror
DISPLAY=:0 npm start
7. Make Magic Mirror automatically start when the Pi boots up
We want Magic Mirror to start up automatically, so type in the following command:
pm2 startup
A different command will appear. Run that command also.
Now create a shell script for startup. Open up the built-in text editor on the Pi by typing in:
cd ~nano mm.sh
The lower line basically means, “open up a file called mm.sh in the nano text editor.”
When the text editor has opened, add this to the mm.sh file:
cd ~/MagicMirrorDISPLAY=:0
npm start
Exit the editor by pressing ctrl+x and type in y to save the file.
Make your shiny new script executable by typing in:
chmod +x mm.sh
Now start up Magic Mirror and make it start up on boot:
pm2 start mm.sh
pm2 save
Now, reboot your Pi by typing in
sudo reboot
Additional steps:
Rotate the display to portrait mode if your mirror isn’t landscape:
sudo nano /boot/config.txt
Add the following line to the file:
display_rotate=1
Keep the screen from going to sleep:
sudo nano ~/.config/lxsession/LXDE/autostart
Add the following lines to that file:
@xset s noblank@xset s off@xset -dpms
Press ctrl+x, save the file and reboot your Pi. If all went well, Magic Mirror should start up after about 1-2 minutes. If it doesn’t allow you to save, try opening the file again without the “sudo” command.
You will have to edit your config file to set up weather, calendar and other stuff.
Additional settings for best experience (optional)
Here are some additional settings you can use if your smart mirror project needs them. Just copy/type them into the terminal like before.
Rotate the screen (if you have a portrait oriented mirror):
1. edit /boot/config.txt:
sudo nano /boot/config.txt
2. Add the following lines to the config file:
display_rotate=1avoid_warnings=1
3. Reboot the Raspberry pi:
sudo reboot
Set the mouse cursor to auto-hide mode:
Install the unclutter utility:
sudo apt-get install unclutter
Add Modules:
The Magic Mirror platform is very modular and expandable, so it is very easy to get started adding on modules to the platform. Visit https://github.com/MichMich/MagicMirror#modules to learn more.
Fourth Step: Mount the Mirror on the Wall
I used a stud finder to find where my studs were located near the area in which I wanted to mount my mirror.
Source: Make Your Own Smart Mirror for Under $80 Using Raspberry Pi