Can you learn with Minecraft?
The Raspberry Pi is the ideal platform for learning and there are two great ways to learn coding, and they are physical computing and Minecraft.
- Physical computing merges the code with electronics to produce all manner of cool projects. We can use all manner of electronic components, such as ultrasonic sensors as inputs and LEDs or buzzers as outputs.
- Minecraft is also an exciting way to introduce coding and by mixing these two ideas together we can create an exciting introduction to the world of coding and hardware hacking.
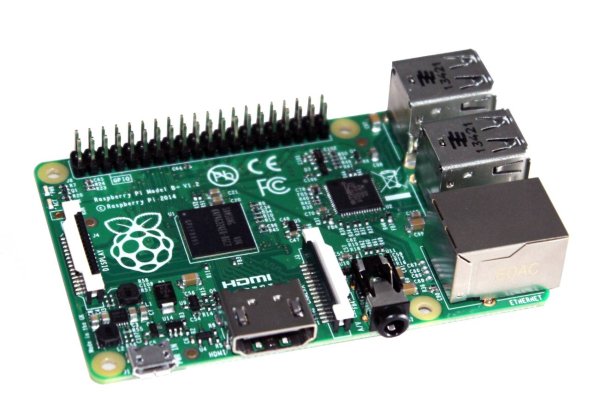
The B+ has been designed for embedded projects and can be easily integrated in to many physical projects such as robotics, scientific data collection and flight capable projects.
Attaching an add on board to the B+ is managed in exactly the same manner as previous models thanks to a standardised 40 pin GPIO. The first 26 pins of the GPIO are fully compatible with the A and B series of Raspberry Pi, enabling you access to a wealth of great add on boards. The B+ comes with a 40 pin GPIO just like the B+ and this enables future add on board to use the new HAT specification from the Raspberry Pi Foundation. The HAT specification uses pins 27 and 28 of the new GPIO to communicate between the add on board and the Raspberry Pi, enabling the board to instruct the Pi as to how it should be configured.
What better introduction to your new Raspberry Pi B+ than to delve in to the world of Minecraft and learn a little Python and electronics along the way.
Getting Started with Minecraft
Minecraft is a game created by Swedish programmer Markus “Notch” Persson and later developed and published by the Swedish company Mohjang since 2009. In recent news Minecraft is now owned by Microsoft, who purchased Mohjang in November 2014 for $2.5 billion.
Minecraft is available on most platforms, from cell phones to Playstation 4. But where it is most interesting is on the Raspberry Pi.
Why is it interesting on the Raspberry Pi?
The Raspberry Pi version of Minecraft comes with a Python API
(Application Programming Interface) that enables us to interact and alter the Minecraft world using Python and as we are using Python we can also like our Minecraft projects to the real world thanks to the GPIO and the Rpi.GPIO Python library.
As of September 2014 the latest version of Raspbian comes with Minecraft pre-installed and ready for hacking and this is the easiest way to start this project. You can download the latest Raspbian and find full instructions on how to copy it to your micro SD card via the Raspberry Pi website http://www.raspberrypi.org/downloads/.
Getting started
With Raspbian installed on your micro SD card, connect all of the peripherals required to your Raspberry Pi, remember to attach the power last. Switch on your Raspberry Pi B+ and wait for it to boot.
If this is your first boot then the raspi-config application will automatically load and ask you to configure your Raspberry Pi. At this stage we do not need to enable any special configurations, so you can move the cursor to Finish and press Enter to exit the application.
Your Raspberry Pi will now ask you to login, and the default login details are
- Username: pi
- Password: raspberry
When typing in your password the screen will not print the password to the screen, this is a normal security feature for Linux and prevents anyone from snooping your password from afar.
You will now see a prompt waiting for input, type in the following and then press enter.
- startx
After a few seconds the familiar Raspbian desktop will be loaded ready for use.
Firstly open a terminal using LXTerminal and type in the following and then press enter.
- sudo idle &
This load the idle Python editor with root priveleges, something that is needed in order for us to use the GPIO in our projects. You may be wondering what the “&” does? Well this is a Linux trick to inform the operating system that the command being run, in this case “sudo idle”, should be run and then put in to the background. This frees up the terminal for any other commands that we wish to run. With idle ready to hack, change to the Raspberry Pi second desktop via the desktop switcher in the bottom left of the screen. You can easily change back later. We do this as Minecraft has a habit of running it's window over all the other windows on the screen.
On the second desktop double left click on the Minecraft icon to load the application. Start a new game and create a new world. If you already have a world, you can load up that world instead. Once loaded you will be dropped inside of the Minecraft world. Take some time to look around and get a feel for the controls.
- Mouse – Controls where Steve looks
- Left Mouse Button – Destroys blocks
- Right Mouse Button – Places blocks
- W – Moves Steve forward
- A – Moves Steve left
- S – Moves Steve backwards
- D – Moves Steve right
- E – Opens the inventory of all block types available
- Esc – Back to menu
Now that you are familiar with the Minecraft world, press the Tab key to release your mouse and return to the first desktop via the desktop switcher in the bottom left of the screen.
To build this project you will need
- Raspberry Pi B+
- Raspbian installed on a micro SD card
- Mouse
- Keyboard
- Power Supply
- HDMI lead
- TV with HDMI
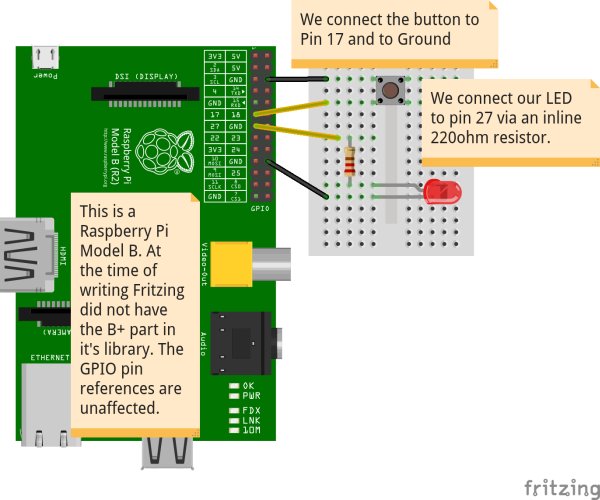
- Solderless breadboard
- Push button
- Male to female jumper leads
- 220 Ohm resistors
- 1.8V LED
In this blog post we will discover more about the B+ and Minecraft via three simple to learn projects.
These three mini projects are
Project 1: Writing to the chat – Our “Hello World” test to make sure that everything is set up accordingly.
Project 2: Push button teleport – Linking the physical world with the digital, using a push button to teleport Steve around the Minecraft world.
Project 3: Control an LED – It would be great to use an LED to indicate that our teleporter is working
Project 1 – Writing to the chat window
Minecraft has a built in chat window, which enables players in multi-player games to talk amongst one another. In this tutorial we will use this chat system as an output for messages from Python.
During our setup we have already loaded Minecraft and it is waiting for us on the second desktop. But before we go back to Minecraft, let us create a new file in idle, click on File >> New Window to launch a new blank document for our project.
We start our project by enabling the Minecraft API for Python, and to do this we import the Minecraft module into our project.
| import mcpi.minecraft as minecraft |
You'll see that we import the module “mcpi.minecraft” and change it's name to just “minecraft” we do this as it makes it easier to work with.
With the import complete we move on to the next line of code.
| mc = minecraft.Minecraft.create() |
In this line of code we create a variable, a container, called “mc” and in the variable we store the string “minecraft.Minecraft.create()” which will create a connection between our Python project and Minecraft.
Our final line of code simply calls the postToChat function and we pass if the string “Hello World”, not very original but a great test to make sure that everything is working.
| mc.postToChat(“Hello World”) |
To run your code, firstly you will need to save it, and to do this click on File >> Save. Save it to your home directory and give the file a name, but please do not save it as minecraft.py or Minecraft.py as this may cause issues in future.
With your project saved click on Run >> Run Module and then quickly switch back to the desktop with Minecraft using the desktop switcher icon.
You should see this on the screen.


