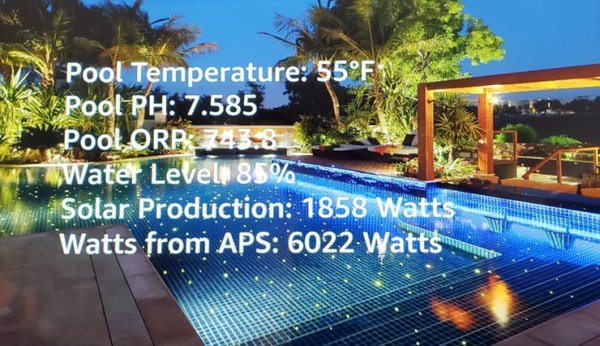
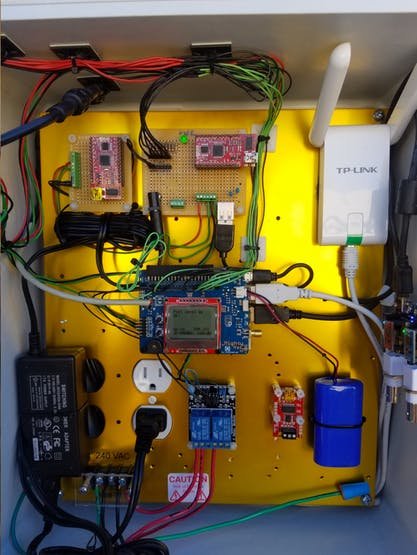
A system to monitor water level, temp, pH, ORP, filter pressure, electrical usage, and pump operation. Refills pool when necessary.
Story
The Idea
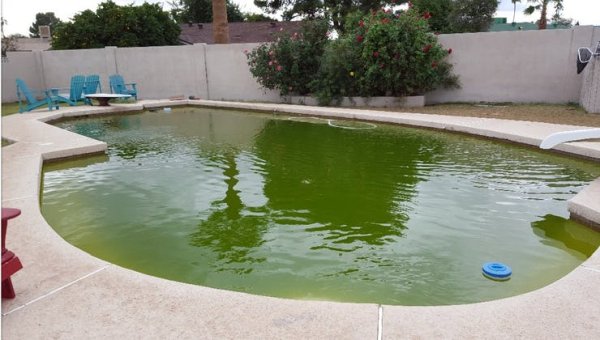
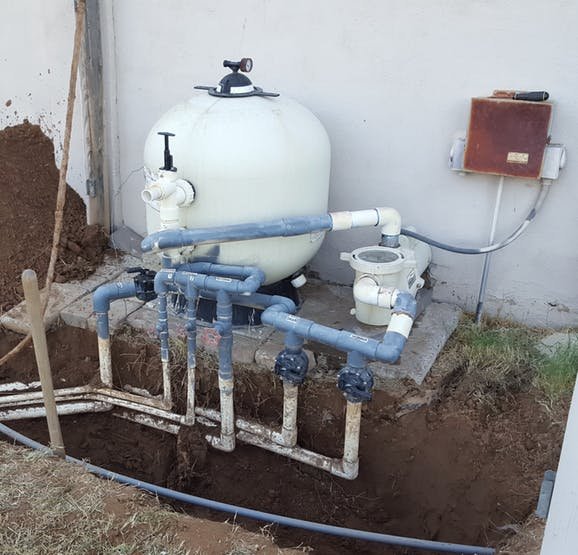
Over the summer of 2015 my sons and I rebuilt our entire pool system. It started with a problem with the water lines and valves that we inherited when we got the house, filter issues and a basically inept pool company that was a holdover from when we got the house. Once it started to look like this, I decided it was time to do something:
Getting Started
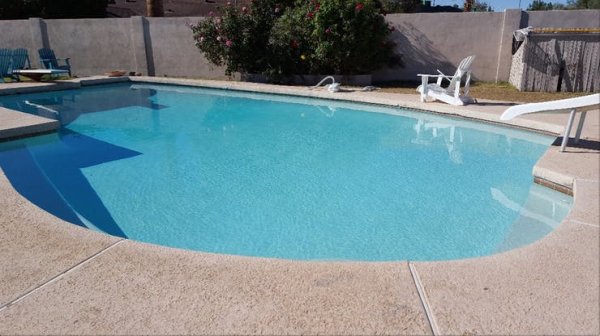
The first priority was to get the pool cleaned up and then figure out how to keep it that way. I always loved automation and I figured this was a perfect place to try it out. Shortly, the pool looked like this again:
But the problem still remained that the overall system lacked in both capability and intelligence, something that I wanted to change. So first things first, we needed to replace the filter, pump and a bunch of the valves. I spent a lot of time on a website called Trouble Free Pool and it was a lifesaver for the DIYer.
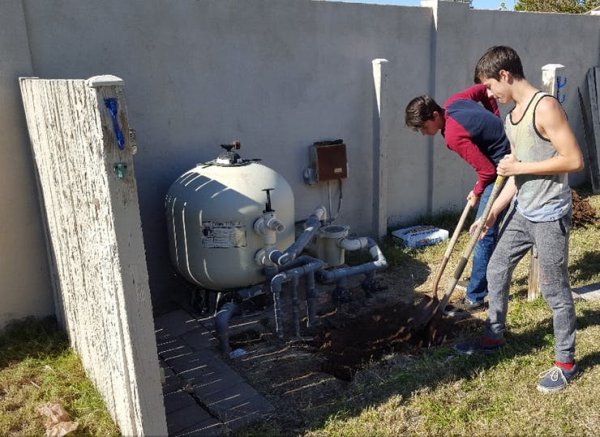
We were hit with a few setbacks, one of which was when they installed the fence they poured concrete around the lines going from the filter system to the pool.
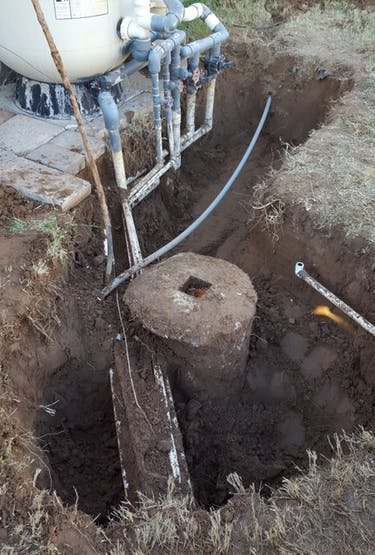
Needless to say, all of that concrete and those pool lines had to be replaced in order for the project to move forward. Pretty much everything had to go.
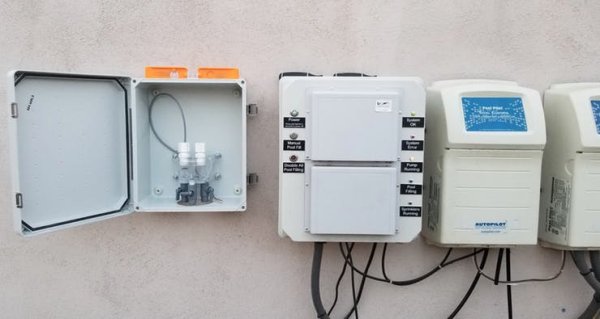
Early on I had decided to incorporate some automation into the new pool system. I opted for a management system called the Autopilot. (My family says I chose it because I am a pilot and liked the name!) This system would allow me to convert the pool to a salt water pool and handle some of the management, mainly running the salt water generator when necessary and pumping acid to manage the pH. There was no other automation beyond those things.
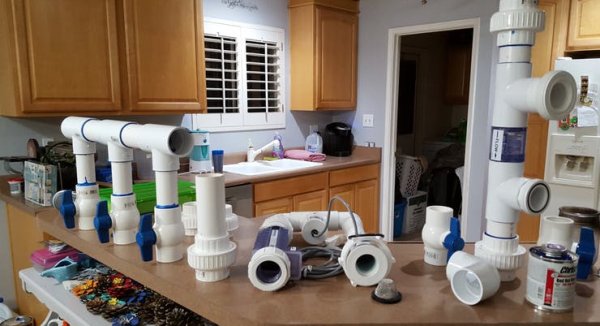
Eventually we got everything figured out. We also got our kitchen back which ended up being my workshop for the project.
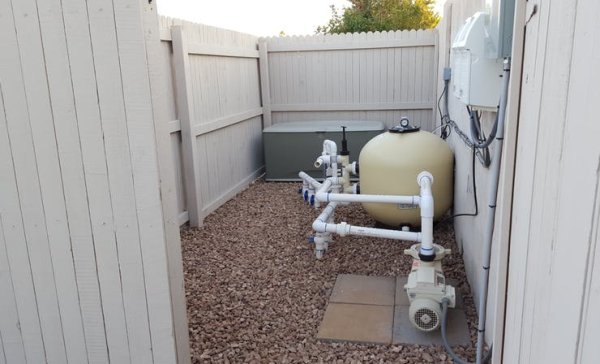
All Done:
Automation – The Beginning
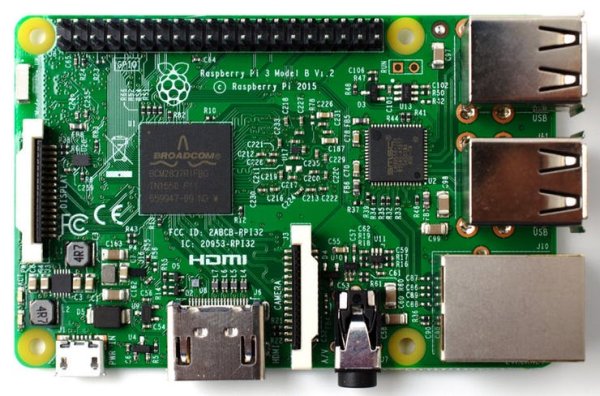
Now that the physical plant was installed and operational, I thought it would be nice to be able to fill the pool without having to get the hose out all of the time. I figured with a Raspberry Pi and a normal sprinkler valve, I would be in business! I purchased another Pi (I use them all over the place for various projects) and laid out what I wanted it to do.
Initially I figured I needed to be able to do two things:
- A way to measure the level of the water
- A way to fill the pool once the water was low
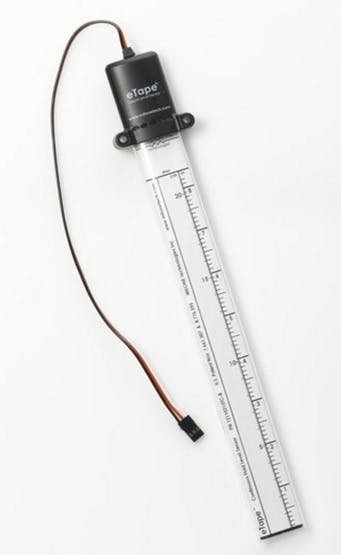
I started to doing research and came along a company that manufactured a liquid tape measure that changed resistance as the level of the water (or other liquid) went up or down. Milone would be happy to create a specific sized unit for me as well since none of their sizes would fit where I wanted to place it.
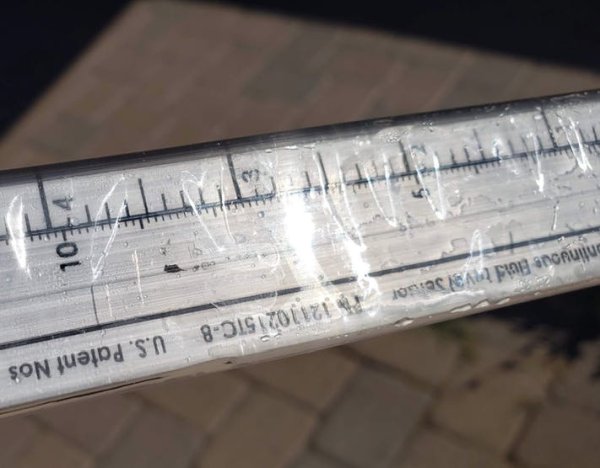
UPDATE: Unfortunately for some reason my Milone eTape suffered from getting water inside the actual jacket and failed. After discussing the issue with Milone I decided that the cost to replace it and potentially suffer the same problem, was not worth the cost of replacement. To make matters worse, I need a special size that they have to make specifically for me.
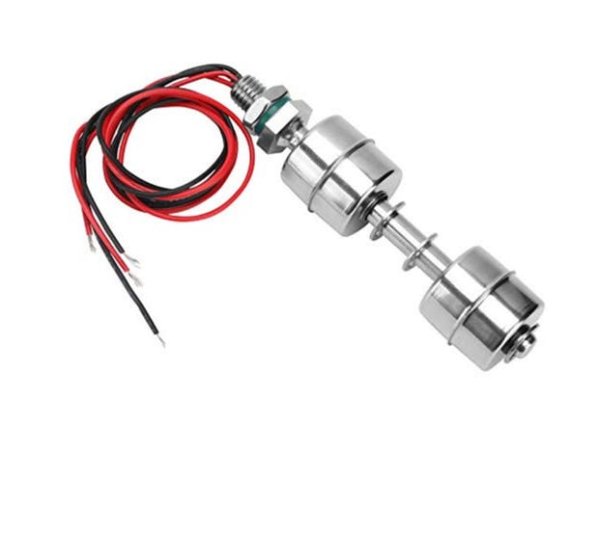
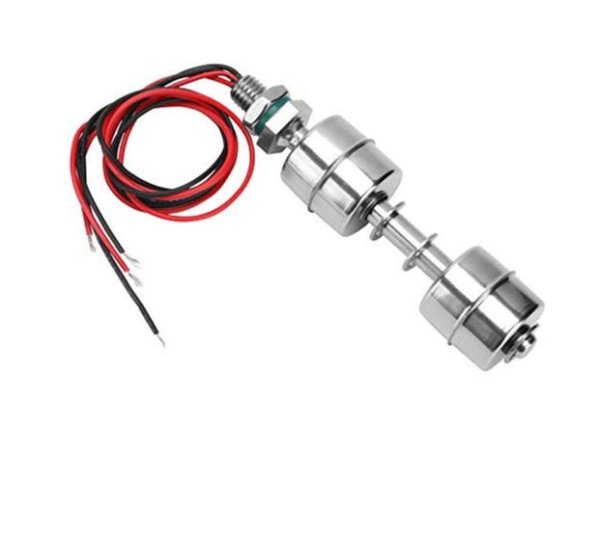
So I needed another way to measure my pool level and decided on using one of these:
Since the difference between my low water level and my normal water level is about three inches, this worked perfectly for me. I just needed to figure out a way to mount it and make it work correctly.
Since I know several other people using the eTape with great results, I am going to leave everything about the eTape in my project and add to it the way I did the dual float setup. This way people can see several different options.
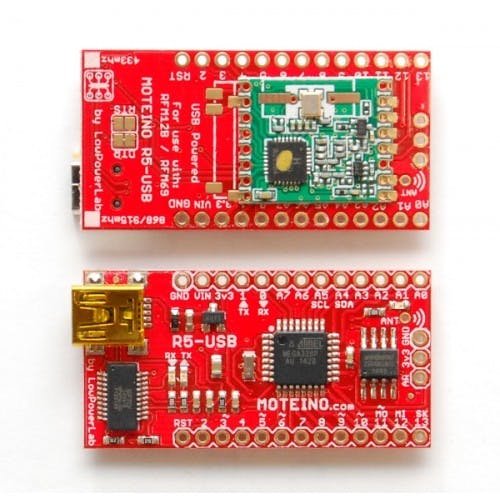
Since it was going to be located across the yard from where my Pi would reside, it was going to be necessary to connect it to its own device for reporting. Since I did not need a Pi for this, I choose a battery-operated, low-power Arduino wireless clone that would transmit the information back to an existing system that I already had in place around the house.
These units I purchased from Low Power Labs. I ended up using four of them in my project: one for the water level, one for the temperature of the water and two in the main system to monitor a combination of internal enclosure temperature, filter pressure and water usage.
These Arduino clones use extremely low power – just ~7uA in deep sleep mode which means they would last a very, very long time on two AA batteries. My water temp sensor floats around my pool and my level sensor is nowhere near a power source, so I had to use battery-powered wireless equipment.
Initially, I had no intention of doing anything other than add water to the pool automatically, but as these things often go, the project grew with a mind of its own. Eventually I would be able to do the following:
- Monitor water level & add water as necessary
- Monitor pool temperature
- Monitor filter pressure
- Monitor pH
- Monitor ORP
- Monitor power use to determine if the pool pump is running
- Monitor my sprinkler system to see if the sprinklers are running
- Notify me when the system starts or adds water (via Pushbullet, Email or SMS)
- Notify me when the system stops adding water
- Notify me if the system encounters an error condition
- Manually add water via CLI or by pressing a button on the enclosure
- Provide a clean web interface to see the status of the system and allow me to start and stop filling the pool via the web.
- Interact with my Pool Control System via Alexa (get information and start/stop water)
Filling The Pool
Regardless of what triggers the pool filling routing (manually or automatically), I had to have a way to get the water into the pool. Since we are required to have a vacuum breaker between our irrigation and our city water supply already, I choose to tie it into my existing sprinkler system to get water for the pool. I was basically creating another “zone” for my sprinkler system, complete with valve.
This presented a problem in that if my sprinklers are running and I decide to fill the pool, I would be robbing whatever lawn zone was running water and it would not water the lawn properly. So I had to devise of a way to determine if the sprinklers were running. Initially I used a “blackout” time zone – i.e., if I knew my sprinklers were running from 3 am to 6 am, don't fill the pool during that time. But that seemed a little non-technical. In researching my Rachio sprinkler system I learned that they had a built-in API that would allow me to programmatically query the status of the sprinkler system. In my case, I just had a simple question: Are you running?
In my case I just used a simple curl command to get what I needed:
rachio_url = 'curl -s -X GET -H "Content-Type: application/json" -H "Authorization: Bearer xxxx-xxxxx-xx-xxxx-xxxxx-xxx" https://api.rach.io/1/public/device/00xx00x-00xxx000-xxx0x000-00x0x0x0/current_schedule'
This is called by my get_sprinkler_status function like such:
output = subprocess.check_output(pooldb.rachio_url, shell=True)
if output == "{}":
    sprinklers_on = "No"
My main application runs every 60 seconds, so if my sprinklers are running, I just do nothing for another 60 seconds and check again. Eventually the sprinklers will stop running and the pool will start to fill automatically.
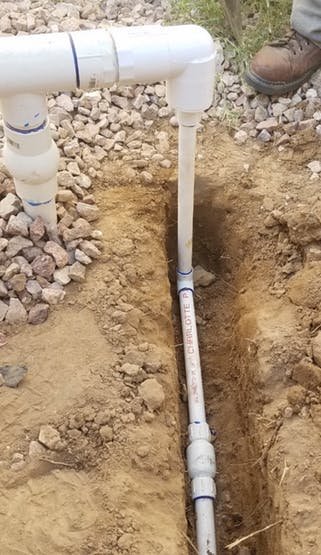
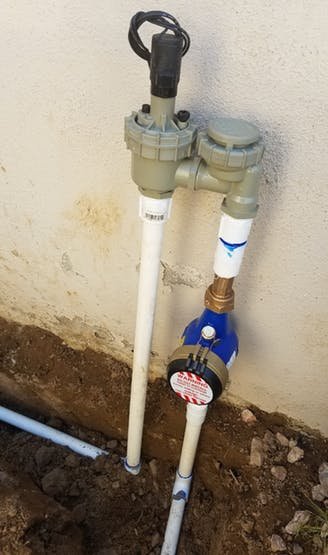
In order to actually fill the pool, I utilized a normal 24V AC sprinkler valve that I picked up at Home Depot. I installed this with a one-way valve directly into my pool piping going to my pool. The one-way valve prevents pressure from the pump from pushing water against the sprinkler valve when the pump is in operation.
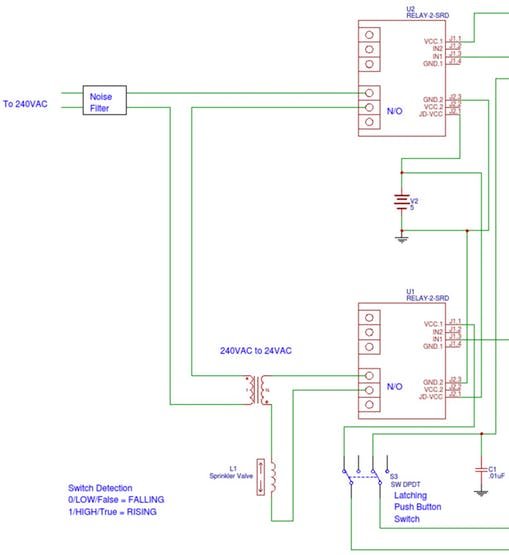
Since my pool electrical panel is 240V and I have no neutral in the panel, I had to get a 240VAC to 24VAC transformer. Simple enough. However, I didn't want to run the transformer 24×7 for no reason, so I used a relay to 1) turn on the transformer and then 2) take the 24VAC output from the transformer and connect it to the sprinkler valve.
I used the Sainsmart solid state relays (very inexpensive) in optically isolated mode where I have a separate power input powering the relays as opposed to using the 5v or 3.3v VCC from the Pi. This is supposed to help with interference from the relays.
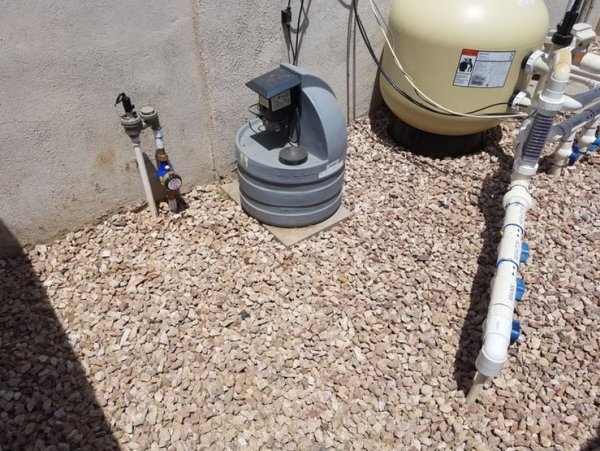
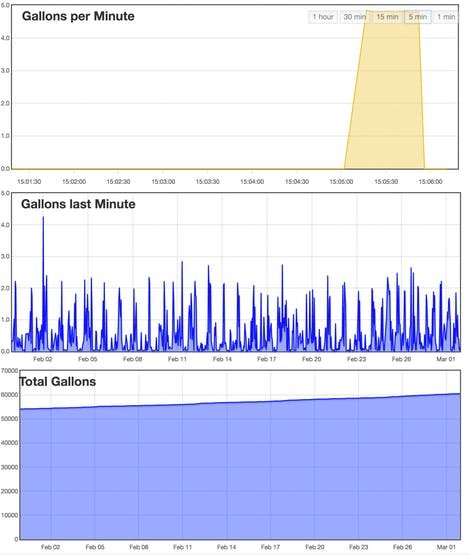
I also added a smart meter which I can read in real time to show me that water is flowing and how much water over time I have been using. This information is stored in a MySQL database and it stored historically:
Power, Power, Power
Now came the next thing I needed to figure out. While my pump was running, if I was attempting to fill the pool, I would be fighting the pressure of the pump. I determined by measuring water flow that I lost about 50% of my filling flow while the pump was running, so I figured it would be best to not fill while the pump was running at all. So I needed a way to monitor the power from my pump and figure out if it were running or not.
In this case, I had a very easy way to do this. Every single circuit in my home is monitored by an electrical monitoring system. This system is called the GEM and it is sold by Brultech.
With this system I can monitor all of the electrical usage in my house and as part of the monitoring process, I store this data in a MySQL database. So once per minute I simply query my MySQL database and figure out how many watts are currently in use by my pool panel.
 if pool_pump_running_watts > pooldb.max_wattage:
     pool_fill_control.led_control(PUMP_RUN_LED, "ON")
     pool_pump_running = "Yes"
     logger.debug('PUMP_RUN_LED should be ON. This is the YELLOW LED')
     if DEBUG:
         print("PUMP_RUN_LED should be ON. This is the YELLOW LED")
else:
    pool_fill_control.led_control(PUMP_RUN_LED, "OFF")
    pool_pump_running = "No"
    logger.debug('PUMP_RUN_LED should be OFF. This is the YELLOW LED')
    if DEBUG:
        print("PUMP_RUN_LED should be OFF. This is the YELLOW LED")
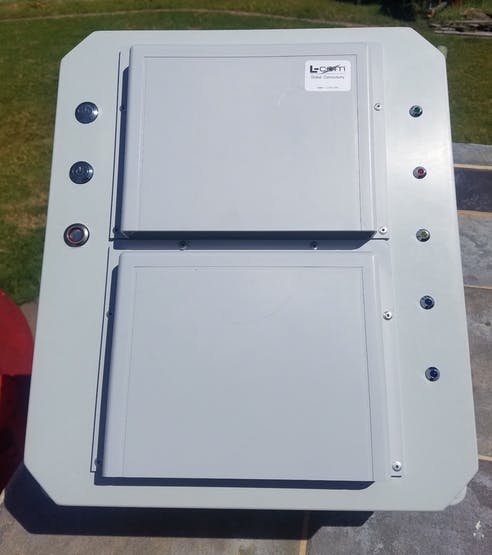
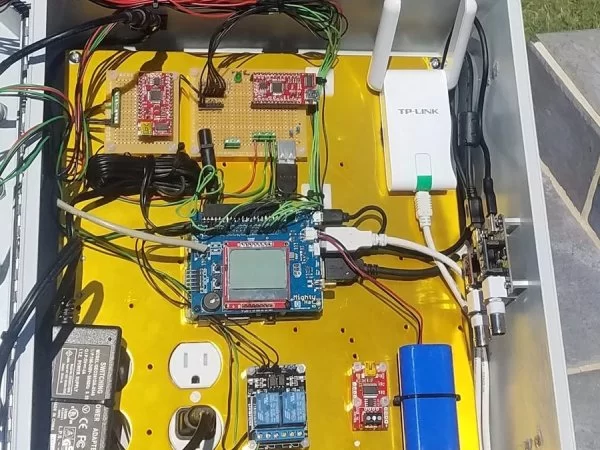
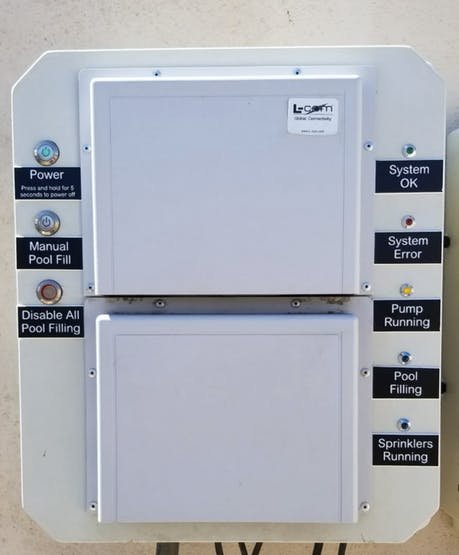
I have various buttons, switches and LEDs on the physical unit that allow me to see if the sprinklers are running, the pump is running, the pool is filling or if there is a system error of some sort. Above you can see where I toggle the pump running LED on and off when necessary.
In addition to the system LEDs, I have a system ON/OFF button (top left) which allows me to use the MightyHat system to reboot or shutdown my Pi intelligently without having to login to the Pi to do it from the CLI. I also have a momentary switch (second on the left) that allows me to manually fill my pool when I want, and finally on the left side I have a DPDT switch that physically interrupts power from my system to the sprinkler valve and triggers a GPIO event to tell the system we have manually disabled filling the pool. Nothing works when this switch has been triggered and if something were to fail programmatically, no power can make it from the transformer to the sprinkler valve regardless.
Managing the Pump
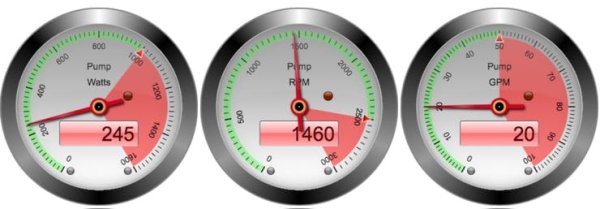
Over time I added in another piece to my pool control system. The ability to manage my Pentair variable speed pump. Enter Russell Goldin (tageyoureit)and his pool controller software project. Russell's software allowed me to communicate directly with my pool pump via an RS485 interface. Once connected, I can query the pump directly for system information like RPM, GPM and Watts in use:
def get_pump_data(key):
   verbose_debug("get_pump_data() Started")
   verbose_debug("get_pump_data() called with '{}' ".format(key))
   log("INFO", "get_pump_data() called with '{}' ".format(key))
   if pump_control_active:
       global json
       try:
           req = urllib2.Request(pooldb.PUMP_DATA_URL)
           opener = urllib2.build_opener()
           f = opener.open(req)
           data = json.load(f)
           pump_data = data["pump"]["1"][key]
           verbose_debug("get_pump_data() returned {}".format(pump_data))
           log("INFO", "get_pump_data() returned {}".format(pump_data))
           verbose_debug("get_pump_data()  - Completed")
           log("INFO", "get_pump_data() - Completed")
           if key == "gpm":
               pump_gpm = pump_data
               update_database("pump_status", "pump_gpm", pump_gpm)
               log("INFO", "Current GPM: {}".format(pump_gpm))
               log("DEBUG", "get_pump_gpm() Completed")
               debug("Current GPM: {}".format(pump_gpm))
               verbose_debug("get_pump_gpm() Completed")
           elif key == "rpm":
               pump_rpm = pump_data
               update_database("pump_status", "pump_rpm", pump_rpm)
               log("INFO", "Current RPM: {}".format(pump_rpm))
               log("DEBUG", "get_pump_rpm() Completed")
               debug("Current RPM: {}".format(pump_rpm))
               verbose_debug("get_pump_rpm() Completed")
           else:
               pump_watts = pump_data
               update_database("pump_status", "pump_watts", pump_watts)
               log("INFO", "Current WATTS: {}".format(pump_watts))
               log("DEBUG", "get_pump_watts() Completed")
               debug("Current WATTS: {}".format(pump_watts))
               verbose_debug("get_pump_watts() Completed")
           return pump_data
       except Exception as error:
           pump_data = 0
           debug("EXCEPTION: get_pump_data()")
           log("WARN", "EXCEPTION: get_pump_data()")
           log("WARN", error)
           debug(type(error))
           debug(error)
           verbose_debug("get_pump_data()  - Completed with EXCEPTION")
           log("DEBUG", "get_pump_data() - Completed with EXCEPTION")
           return pump_data
   else:
       pump_data = 0
       return pump_data
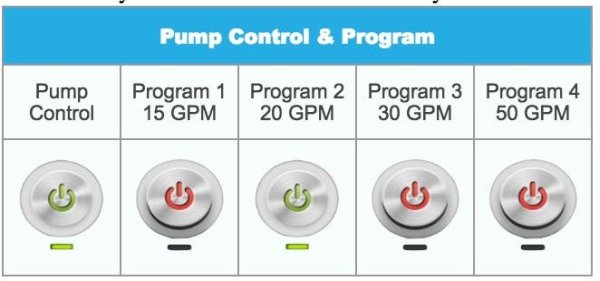
Now I can query the pump and control my pump adding in another capability that I did not have before. By altering my web interface, I added the ability to start or stop my pump as well as run one of four different pump programs that I had configure on my pump:
Of course, we get to look at RPM, GPM and Watts in real time:
Monitoring Filter Pressure
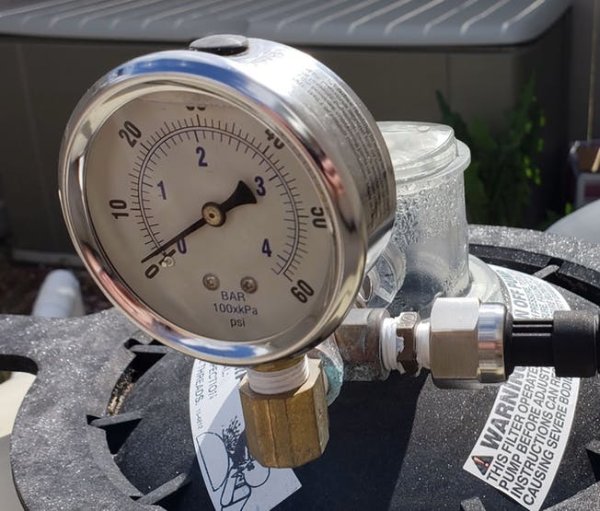
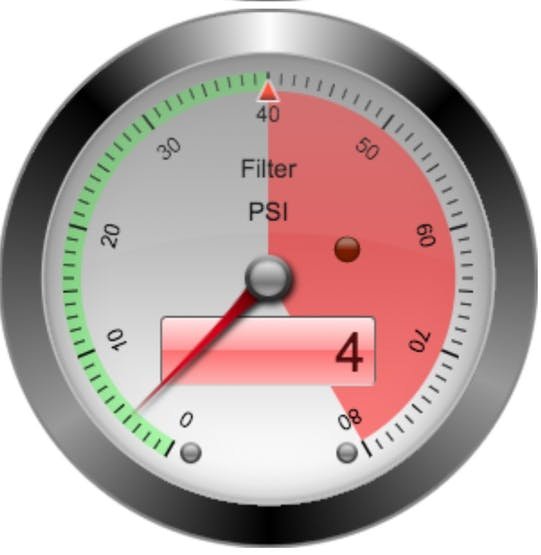
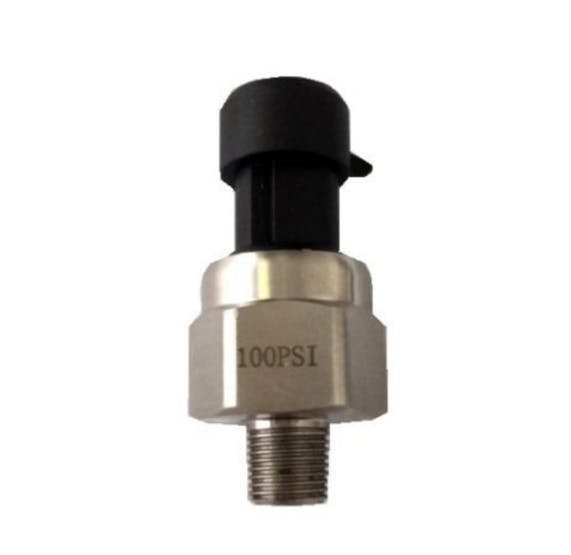
One thing I also wanted to do was to monitor the filter pressure so I knew when to back flush our filter. I purchased a 100 PSI pressure sensor off ebay and tied it into my filter next to my analog pressure gauge already on the filter.
I purchased an inexpensive sender unit off ebay (see link above) and tied it into my filer like this:
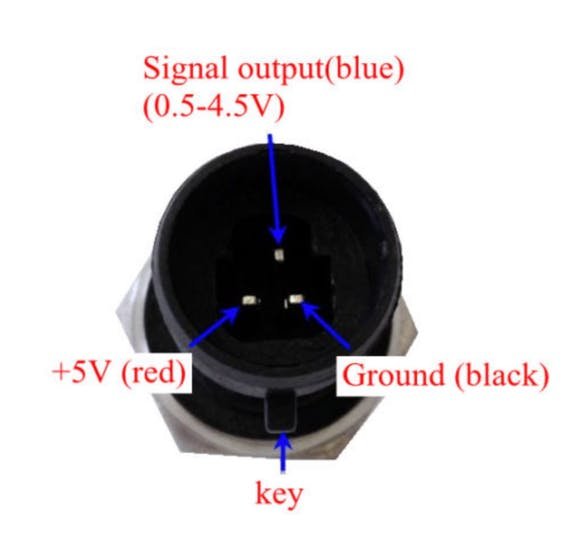
I then tied this into a Moteino-R5 and I read the pressure once per minute and then output that information to my MySQL database and then use that information to drive the gauge output on my website.
// Get our Filter Pressure
void get_filter_pressure()
{
 sensorVoltage = analogRead(PSI_SENSOR_PIN);   // Let's read our pressure sensor voltage
 PSI = ((sensorVoltage-146)/204)*25;  // Some calibration to convert the voltage to PSI and zero it
 pool_sensors.PSI = PSI;
}
Additional Hardware and Software
The main system is written entirely in Python, but I utilized other software and hardware to make my system work.
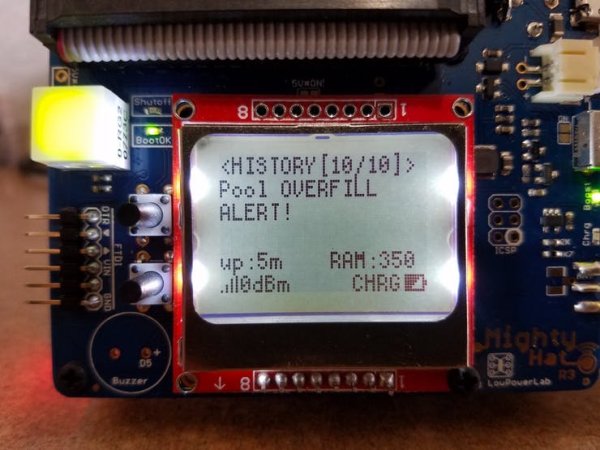
On my Raspberry Pi, I utilize a Low Power Labs MightyHat which provides UPS power backup to the Pi, an LCD status screen and intelligent power control for the Pi. I can run the Pi for about two hours or so on the small battery I have attached to the system and if the power does not come back on it time, then the MightyHat will automatically shutdown the Pi to prevent it from crashing due to a sudden power failure.
The MightyHat is an Arduino clone so I used the Arduino IDE to program it to fit the needs of my project.
For sensing I use a variety of sensors and methods of getting the information into a usable format. For pretty much all sensor data, I utilize OpenEnergyMonitor.org free EmonCMS platform. This platform allows me to collect all of my sensor data from everywhere in my house. It stores this information in a MySQL database where I can then grab it for utilization in my pool control system.
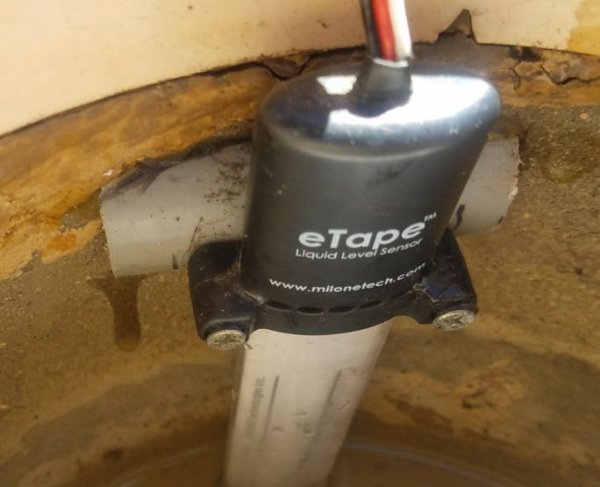
For the actual level of the pool, I utilize eTape Resistive Liquid Measuring tape (http://www.milonetech.com):
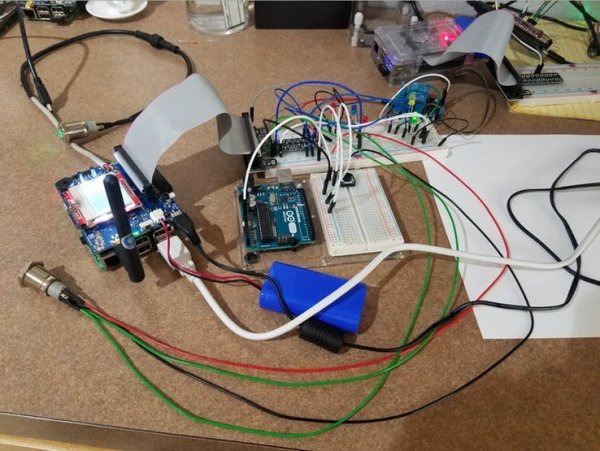
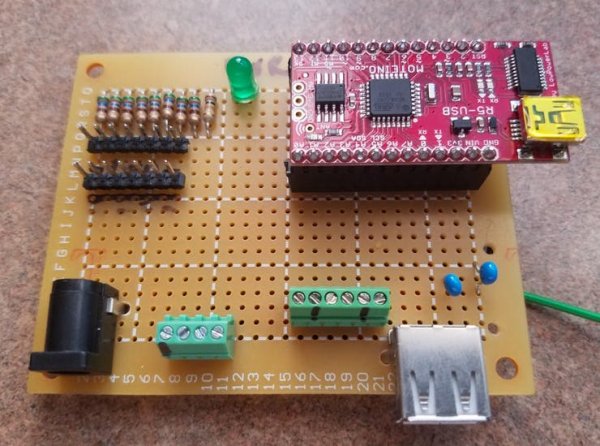
One of my IO controller boards
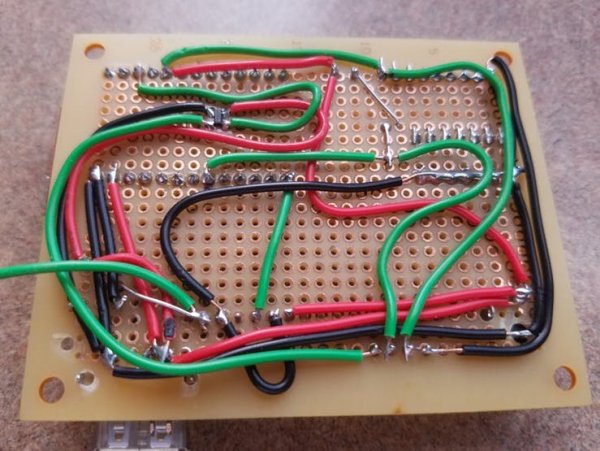
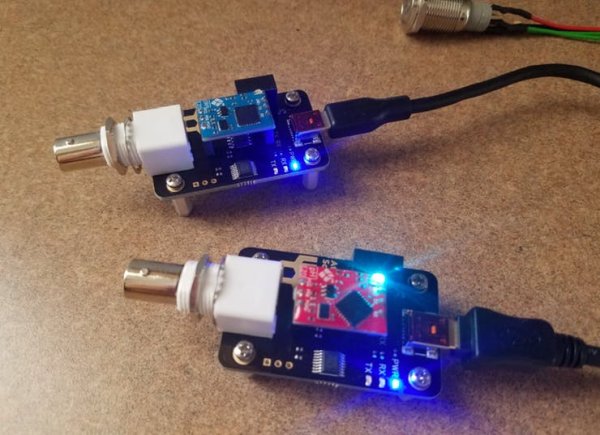
USB pH and ORP sensor boards
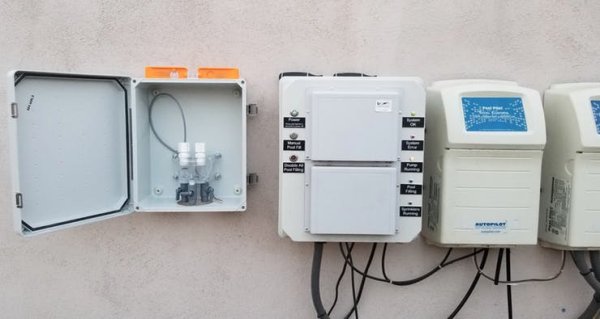
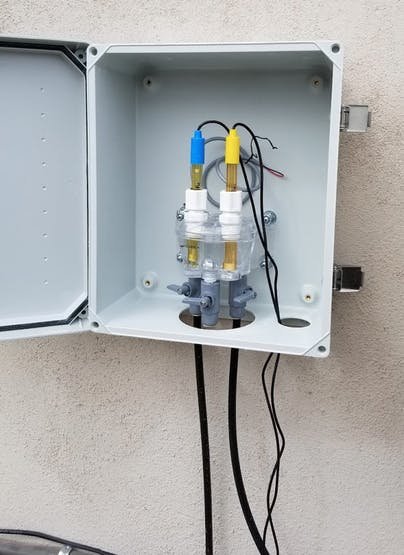
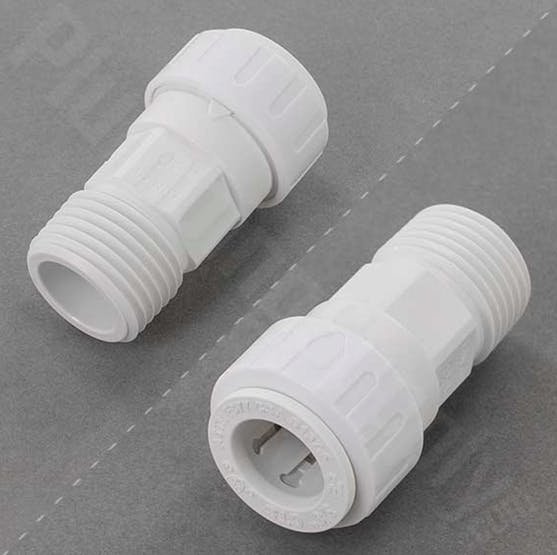
In order to get accurate pH and ORP readings, I utilize Atlas Scientific pH and ORP sensors as well as their interface boards. I installed them in a flow cell which also monitors if the pump is running. I tied the flow cell into the lines using standard John Guest 3/8″ quick connects, one on the pressure side of the filter and one on the suction side of the pump to keep water flowing through the flow cell.
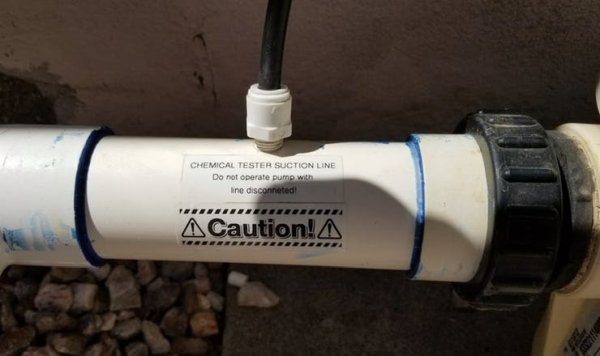
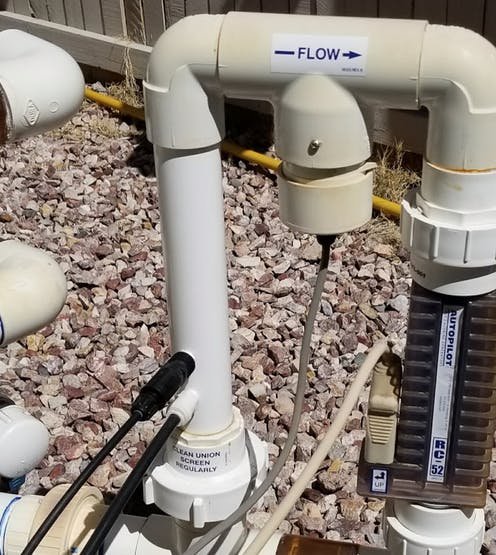
Reading our pH:
def get_ph_reading():
   log("DEBUG", "get_ph_reading() Started")
   pool_pump_running = read_pool_sensor_status_values("pool_sensor_status", "led_status", "pump_run_led" )
   if pool_pump_running == "True":
       if pooldb.temp_probe == "Yes":
           pool_temp = float(read_pool_sensor_status_values("pool_sensor_status", "system_status", "pool_current_temp" ))
           ph_value = float(get_ph.get_current_ph_with_temp(pool_temp))
       else:
           ph_value = float(get_ph.get_current_ph_no_temp())
       debug("Current pH is: {}".format(ph_value))
       influx_data.write_data("pH", ph_value)
       influx_data.write_data("pool_temp", pool_temp)
       if pooldb.emoncms_server1 == "Yes":
           res = requests.get("http://" + pooldb.server1 + "/" + pooldb.emoncmspath1 + "/input/post?&node=" + str(
               pooldb.ph_node) + "&csv=" + ph_value + "&apikey=" + pooldb.apikey1)
           log("DEBUG", "Sent current pH Value of {} to Emoncms Server 1".format(ph_value))
           debug("Sent current pH Value of {} to Emoncms Server 1".format(ph_value))
       if pooldb.emoncms_server2 == "Yes":
           res = requests.get("https://" + pooldb.server2 + "/" + pooldb.emoncmspath2 + "/input/post?&node=" + str(
               pooldb.ph_node) + "&csv=" + ph_value + "&apikey=" + pooldb.apikey2)
           log("DEBUG",
               "Sent current pH Value of {} to Emoncms Server 2".format(
                   ph_value))
           debug("Sent current pH Value of {} to Emoncms Server 2".format(
               ph_value))
       update_pool_sensor_status_values("pool_sensor_status", "pool_chemicals", "pool_current_ph", ph_value)
       log("DEBUG", "get_ph_reading() Completed")
   else:
       log("INFO", "Pool Pump is NOT running, cannot get accurate pH reading!")
       debug("Pool pump is NOT running, cannot get accurate pH reading!")
       log("DEBUG", "get_ph_reading() Completed")
This code calls the “get_ph.py” module which looks like this:
#!/usr/bin/python
## For use with pool_control_master.py
__author__ = 'Richard J. Sears'
VERSION = "V3.4 (2018-03-16)"
# [email protected]
# This is for use with Atlas Scientific pH board only.
import serial
import sys
import time
from serial import SerialException
usbport = '/dev/PH'
try:
   ser = serial.Serial(usbport, 38400, timeout=0)
except serial.SerialException as e:
   print "Error, ", e
   sys.exit(0)
def read_line():
       lsl = len('\r')
       line_buffer = []
       while True:
               next_char = ser.read(1)
               if next_char == '':
                       break
               line_buffer.append(next_char)
               if (len(line_buffer) >= lsl and
                               line_buffer[-lsl:] == list('\r')):
                       break
       return ''.join(line_buffer)
def read_lines():
       lines = []
       try:
               while True:
                       line = read_line()
                       if not line:
                               break
                               ser.flush_input()
                       lines.append(line)
               return lines
       except SerialException as e:
               print "Error, ", e
               return None
def send_cmd(cmd):
       """
       Send command to the Atlas Sensor.
       Before sending, add Carriage Return at the end of the command.
       :param cmd:
       :return:
       """
       buf = cmd + "\r"        # add carriage return
       try:
               ser.write(buf)
               return True
       except SerialException as e:
               print "Error, ", e
               return None
def get_current_ph_with_temp(current_temp):
#    send_cmd("RESPONSE,0")
   send_cmd("C,0")
   send_cmd("T,%d" % current_temp)
   send_cmd("R")
   time.sleep(1.3)
   lines = read_line()
   return lines
def get_current_ph_no_temp():
#    send_cmd("RESPONSE,0")
   send_cmd("C,0")
   send_cmd("R")
   time.sleep(1.3)
   lines = read_line()
   return lines
def main():
#    send_cmd("RESPONSE,0")
   send_cmd("C,0")
   send_cmd("R")
   time.sleep(1.3)
   lines = read_lines()
   print("No Temperature Calibration Performed:")
   for i in range(len(lines)):
           print lines[i]
if __name__ == '__main__':
       main()
The ORP is done the same way.
This flow cell also has a flow indicator installed. If water is flowing through the cell, the ring rises and closes a magnetic switch. The wiring for the switch is connected to a GPIO pin on the pi. Here is my code to read that switch:
def pool_pump_running_chemical():
   pool_pump_running_chemical = GPIO.input(pool_pump_running_pin)
   if pool_pump_running_chemical == False:
       debug("Pool Pump Running via Chemical Sensor Chamber: TRUE - PUMP IS RUNNING")
   else:
       debug("Pool Pump Running via Chemical Sensor Chamber: FALSE - PUMP IS OFF")
Water Level Sensor – Making it work
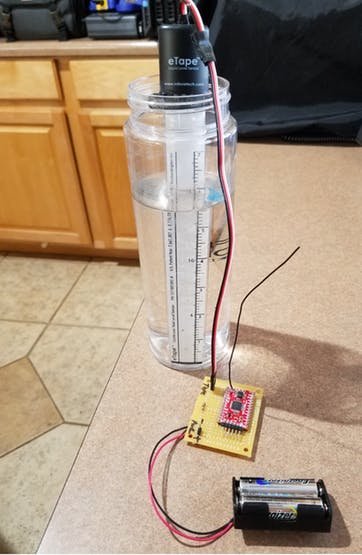
As I showed above, the water level sensor utilizes a battery powered MoteinoUBS by LowPowerLab. This is a perfect microcontroller for this application. Basically, I wake the Moteino up every sixty seconds, take a resistance reading from the eTape, fire up my transmitter and send this information to my EmonCMS system for use by my pool scripts. Then I power everything down again:
{
 digitalWrite(ETAPE_POWER, HIGH);             // Turn on the power to eTape
 pool.resistance = analogRead(ETAPE);         // read etape resistance
 digitalWrite(ETAPE_POWER, LOW);              // Turn off power to eTape
 take_battery_reading();                      // Take Battery Reading
 power_spi_enable();
 rf12_sleep(RF12_WAKEUP);
 rf12_sendNow(0, &pool, sizeof pool);
 rf12_sendWait(2);
 rf12_sleep(RF12_SLEEP);
 power_spi_disable();
 if (debug){
   flash_led(50);
 }
 // That's it - wait until next time 🙂
 sleep_until_next_reading();
}
I also track my battery voltages so that I know when it is time to change my batteries. The script has several mechanisms to make sure the batteries are good. First, I actively track the battery voltage itself, and second I track how often the sensors report back to me and the time delta of those reports. To many missed readings and I know ‘something' is wrong with that sensor and I will get a Pushbullet notification to go see what is wrong. Additionally, with the loss of a sensor, my pool fill system goes into standby and will refuse to fill the pool since it won't know when to stop.
I use 2 x AA lithium batteries and so far they have run for over a year without being replaced.
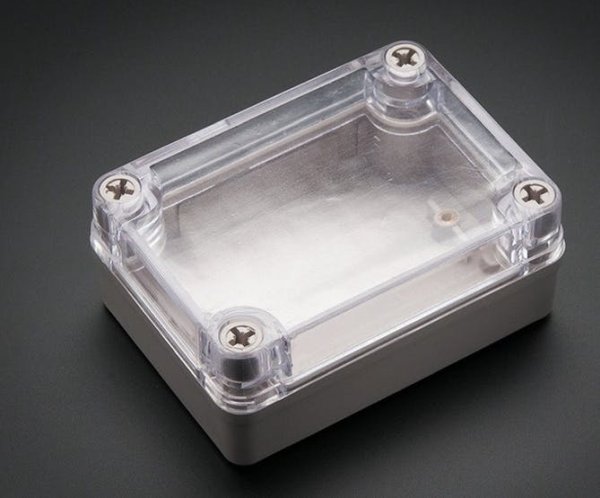
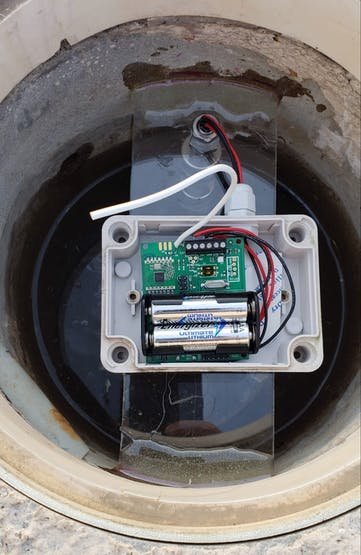
To keep the pool level MoteinoUSB safe, I needed a watertight enclosure of some sort. I chose the Adafruit weatherproof box with a clear lid.
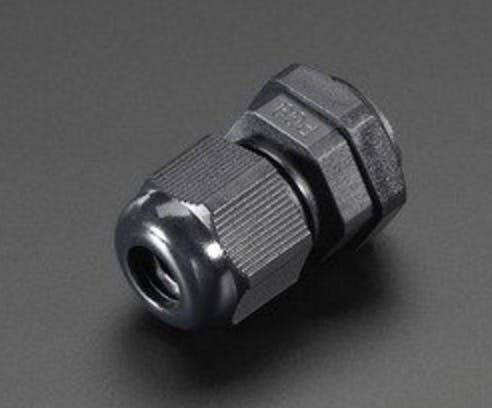
Next, I used an Adafruit PG-9 cable gland and very carefully drilled through the side of the box and installed the cable gland.
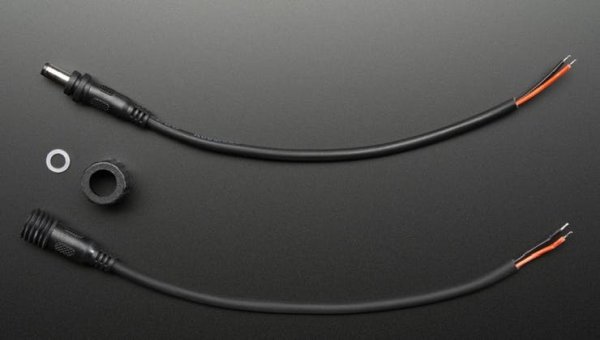
Using the Adafruit waterproof DC power cable, I connected the eTape to the MoteinoUSB and enclosure.
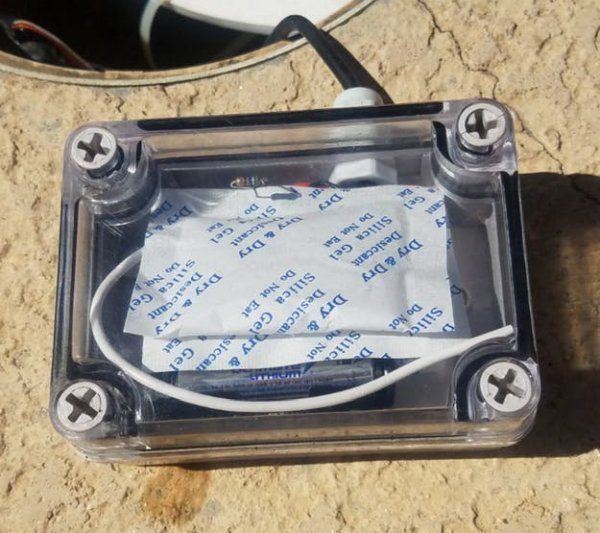
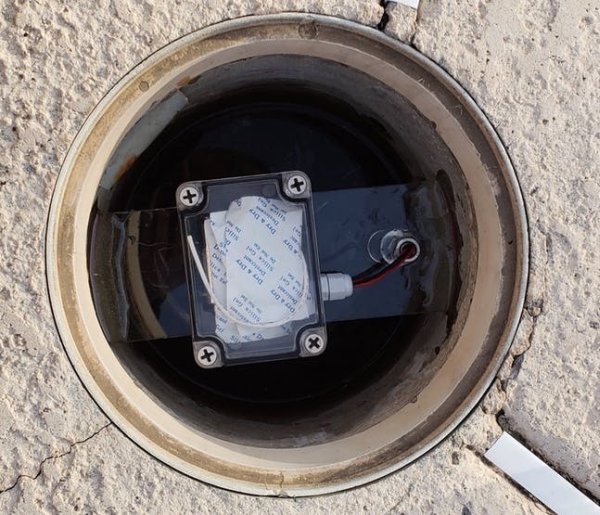
For an extra bit of dryness, I purchased desiccant to put into the enclosure to absorb and moisture that might make it into the enclosure. One thing to watch for that I learned the hard way (thankfully the sensors are inexpensive) is to NOT tighten the top or the cable glands too tightly. This took a little trial and error. In the end, after I ‘think' I have it right, I actually fill up my sink and put the enclosure underwater and hold it down with a pan filled with water placed on top of it. I keep it this way for a few hours checking every so often that I have it correct.
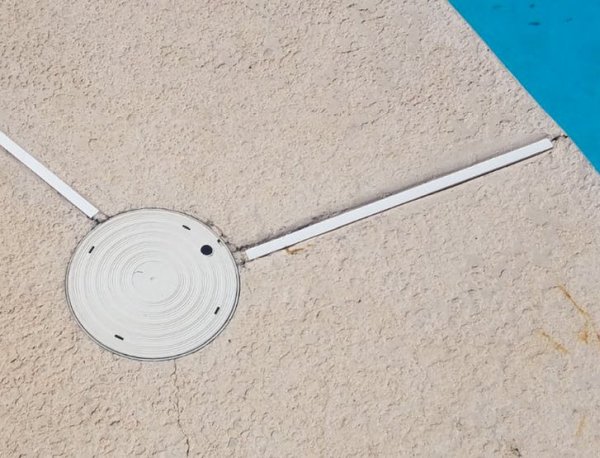
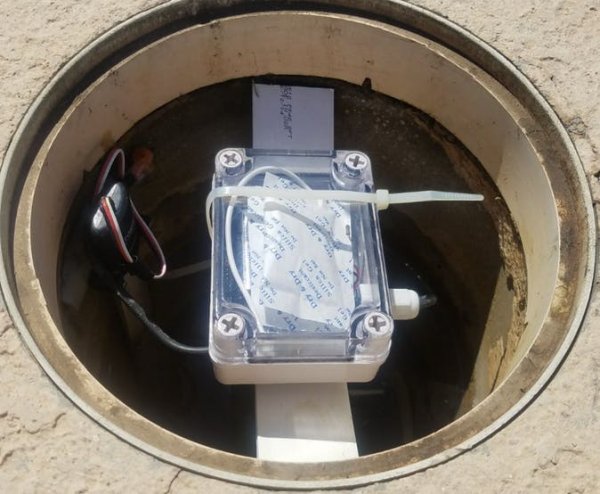
Now I needed to figure out a way and a place to mount my water level sensor. In my pool, we have a small cement basin that used to house the float that manually added water to the pool. This long ago rusted away and could not be repaired without tearing out the cement enclosure. This is what initially started my project!
The cement basin is connected to the pool with a small 3/4″ line that allows me to see the water level but the kids splashing or messing around in the pool will not affect the level of the water in the basin. This was the perfect place to mount the eTape sensor. To do the actual mounting, I took a piece of PVC pipe, cut it in half and then sanded it down so that it was the same circular shape as the cement basin. I then epoxied this piece in place directly to the side of the basin. Once that was done, I used a couple of drywall screws and screwed the eTape to the PVC pipe.
UPDATE: New Method to read water level!
If you read above, I had some issues with my eTape installation that caused my eTape to quit working and to give erroneous readings making it unusable. I worded with Chris at Mileone and we could not come up for a reason the tape failed. In the end, it was not worth another $80 for me to get another tape and have the same thing happen again, so I switched methods of reading my water level.
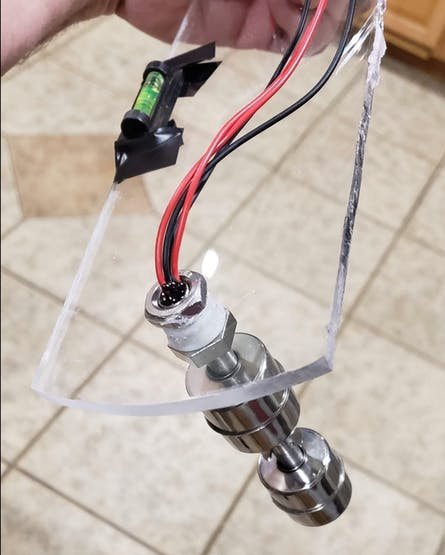
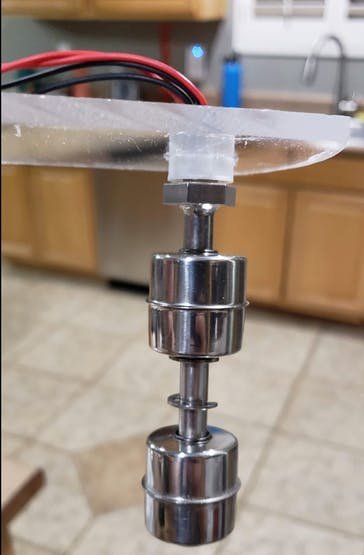
Since I really only have a 3″ difference between my low and full levels, I researched various level sensors and choose this one:
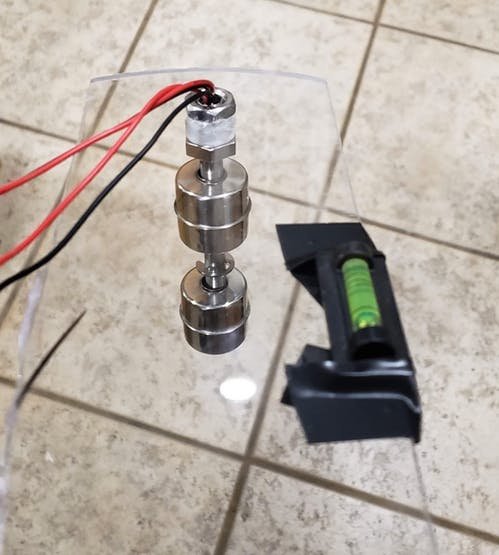
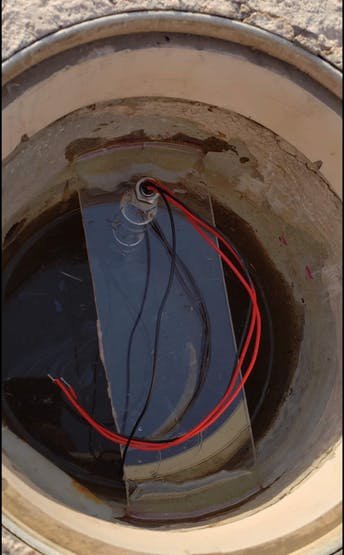
So then I had to figure out a way to mount the new sensor. I decided that I would use sone 1/4″ plexiglas to make it work. I measured the width that I needed and mounted the float with an extra set screw so I could make fine adjustments. I also taped a small level to it so when I mounted it it would be level:
To mount it I just used some epoxy and leveled it using my “built-in level:
To read the level of the pool, I need to know about the position of both floats. So I programmed my code to read the position of both floats and then send a 0, 1 or 2 depending on the water level.
If the upper float is open and the lower float is open (both floats down) then we are low and it sends a “0”. If the lower float is closed (up) and the upper float is open (down) then we are midway and we send a “1”. If both floats are closed (up) the pool is full and we do not need any water. Here is how the code looks:
UPPER_Float = digitalRead(17);
LOWER_Float = digitalRead(3);

  if (UPPER_Float == LOW)
  {
    UPPER_Float_Position = "Closed";
  }
  else
  {
    UPPER_Float_Position = "Open";
  }
  if (LOWER_Float == LOW)
  {
    LOWER_Float_Position = "Closed";
  }
  else
  {
    LOWER_Float_Position = "Open";
  }
  if ((UPPER_Float == LOW) && (LOWER_Float == LOW))
  {
   pool_level.level = 2;   // Both closed = Pool is FULL
  }
  else if ((UPPER_Float == HIGH) && (LOWER_Float == LOW))
  {
   pool_level.level = 1; // Lower closed, Upper open = Pool MIDWAY
  }
  else
  {
   pool_level.level = 0;  // Both floats open = Pool LOW add water
  }
So the value of 0, 1 or 2 is transmitted to EmonCMS and written to my database. Each minute we query that database to see if we need to add water:
get_pool_level_value = read_emoncms_database("data", pooldb.pool_level_table)
and if it is low, we add water:
if get_pool_level_value == 0:
    get_pool_level = "LOW"
    pool_fill_valve("OPEN")
And this is the new way we are reading our pool level and managing filling our pool.
Pool Temperature Sensor – Making it work
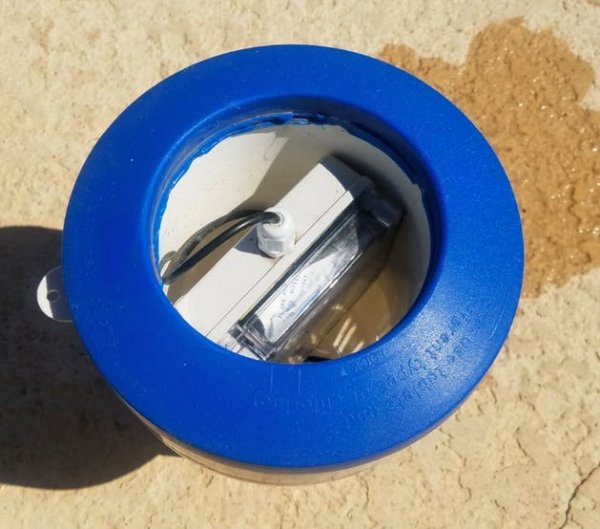
Following in the footsteps of my eTape sensor, I build the same configuration for my pool temperature sensor. This time however, I added a temp probe inside the enclosure so I could monitor the temperature in the enclosure. It would also let me know what the temperature was just above the surface of the water in the pool. The second temperature sensor was fed through the PG-9 cable gland and into the pool water. I then just tossed the enclosure into the pool and thought I was done. However, my kids had other ideas. They thought it was fun to grab the temperature sensor hanging down from the enclosure and spin it around like a top and throw it at each other. Needless to say the first one didn't last long.
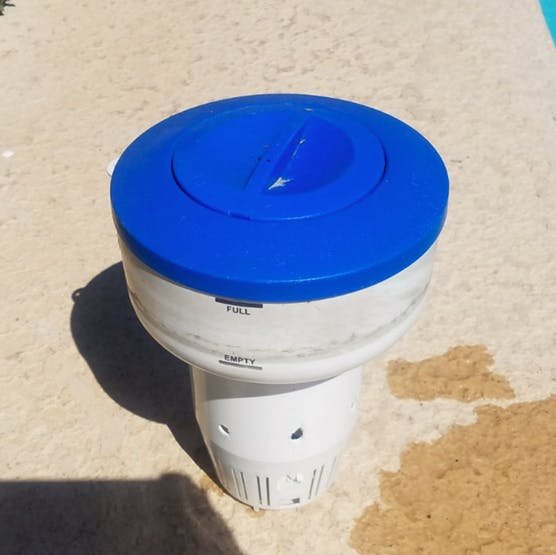
So I went down to my local pool store and purchased a chlorine floater and installed the enclosure and temp probe into it. We have not had a problem since doing so. Even if they throw it, it won't bother it at all. Most people leave it alone since they think it is chlorine even though we have a saltwater pool.
Keeping track of our Acid Level
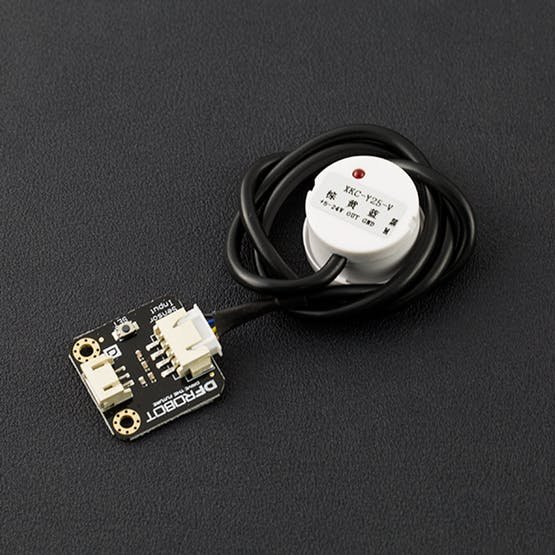
Part of the pool automation system that is not handled by my project is the dispensing of muriatic acid to keep our pH under control. While the Pool Auto Pilot system handles that, we still need to be able to see if we need acid added to the tank. For this I used a $9.00 DFRobot Liquid Level Sensor:
This particular sensor is weatherproof and works by sensing when there is no longer liquid behind whatever you have it attached to and then sending a signal to the GPIO that you can read. Once you can read it, you can then do your alerting, etc.
I simply connected this to my Pi (it utilizes the 5v rail and one GPIO pin) and then added in a little bit of code to read the state of the sensor:
def acid_level():
   acid_level_ok = GPIO.input(acid_level_sensor_pin)
   if acid_level_ok == True:
I then epoxied the sensor to our acid tank at the level where I wanted to be notified and hooked it all up:
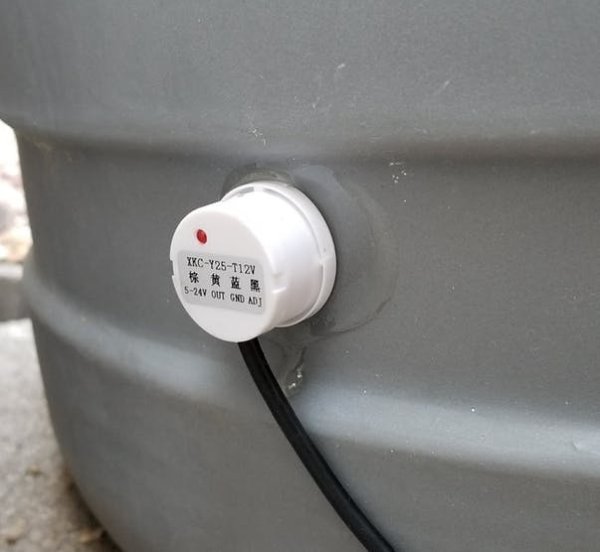
This tank has a pretty thick wall and this sensor worked great. I tested it before affixing it just to make sure.
Web Interface
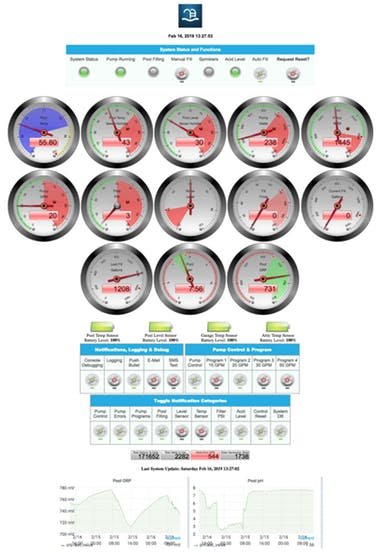
Once I had all of this pretty much working like I wanted it, I decided that I needed to have a nice interface so we could track all of the data, manually add water to the pool without having to go to the pool room, stop an automatic fill that may be in progress and check the status of the batteries in our temperature sensor and our level sensor.
The main capabilities of the web interface as of right now are:
- Visually see all sensor data on nice gauges
- See system status including overall status, pump status, filling status, sprinkler status (we cannot fill while the sprinklers are running) and our Acid level
- Visually see battery status of pool level and temp sensors (including household temp sensors)
- See temperature and humidity inside the actual sensor boxes so I can see if I have a potential water leak in my “water proof” boxes.
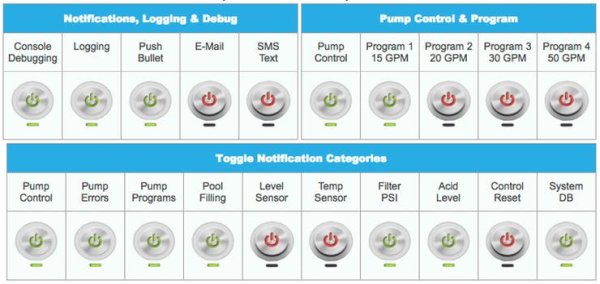
- Have the ability to toggle various notifications such as debug, logging, email, pushbullet, and sms messages from the interface
- Control Pentair Intelliflo pool pump
I am very thankful to Russell Goldin ([email protected]) for his amazing work on the Pentair RS-485 control software needed for my system to be able to talk to and control my pump. You can check out his github HERE.
With Russ's software I am able to directly control my Pentair pump without having to spend several thousand dollars on their proprietary hardware!
I spent a lot of time programming everything in python but I did not have an experience building a web interface so I asked around and eventually decided on Flask as the web framework that I would use to build the web interface.
Learning Flask was not as hard as I had thought it was going to be and it integrates very well with the python code that I had already written to control the pool. Flask is a mix of python-like code and html like templates and did everything that I needed it to do:
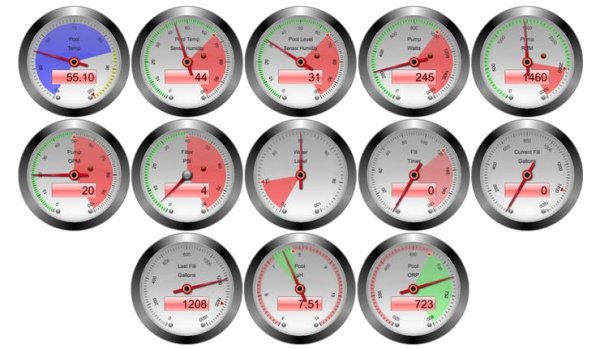
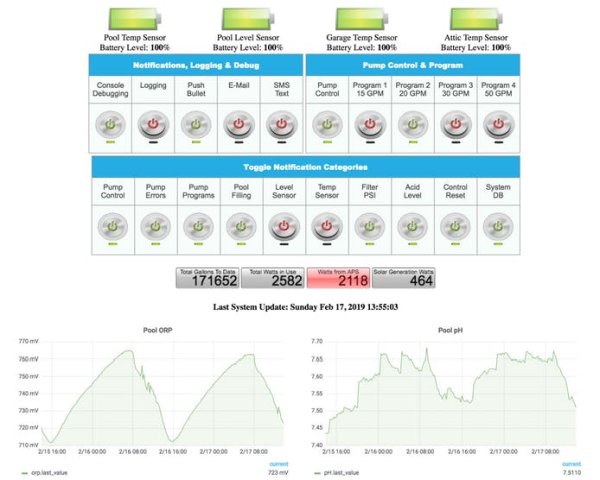
The control part of the interface is very easy. If I want to start a manual fill, I simply click on the “Manual Fill” button and as long as there is not a system problem, we are not running the sprinklers and we are not already “automatically” filling the pool, the system starts a manual fill of the pool. The “Pool Filling” led will turn blue, than “Manual Fill” button will toggle on and the “Fill Timer” will start a countup. Click the “Manual Fill” button again and the system stops filling and reverts back to normal.
If we are filling the pool automatically and I want to stop that process, I simply click the “Pool Filling” button (led reverts to button to show that you can push it to stop the automatic fill) and the system stops filling and sends me notifications based on the configuration of the system (debug, logging, email, pushbullet, sms).
Flask has the ability to process things prior to showing you the html output:
{% if system_error_led == "True" %}
                 <img src="{{url_for('static', filename='dark-red-led-circle-md.png')}}" height="50" width="50">
                 {% elif system_run_led == "True" %}
                 <img src="{{url_for('static', filename='led_circle_green.png')}}" height="50" width="50">
                 {% else %}
                 <img src="{{url_for('static', filename='led_circle_grey.png')}}" height="50" width="50">
                 {% endif %}
In this example, if there is a system error I show a red led, otherwise if the system is running I show a green led and if I am not running and there is no error, then I show a grey led. This statement is processed before the html is rendered and is a very powerful way to interact with a python driven system.
Historical Graphing
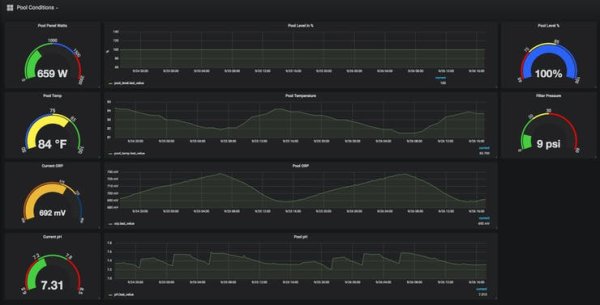
As I continue to extend the system and learn more about what I can do, I wanted to start to watch historical trends in my pool system along with a lot of other home automation stuff I have been playing around with lately. After looking around I choose Grafana and InfluxDB.
Basically I already had my data being recorded utilizing EmonCMS so I just needed to have a quick way to get it into InfluxDB so Grafana could do it's magic. Basically within the mail pool program whenever I get a pH, ORP or temp reading, I write it to the influxdb:
def get_ph_reading():
   log("DEBUG", "get_ph_reading() Started")
   pool_pump_running = read_pool_sensor_status_values("pool_sensor_status", "led_status", "pump_run_led" )
   if pool_pump_running == "True":
       if pooldb.temp_probe == "Yes":
           pool_temp = float(read_pool_sensor_status_values("pool_sensor_status", "system_status", "pool_current_temp" ))
           ph_value = float(get_ph.get_current_ph_with_temp(pool_temp))
       else:
           ph_value = float(get_ph.get_current_ph_no_temp())
       debug("Current pH is: {}".format(ph_value))
       influx_data.write_data("pH", ph_value)
       influx_data.write_data("pool_temp", pool_temp)
       if pooldb.emoncms_server1 == "Yes":
           res = requests.get("http://" + pooldb.server1 + "/" + pooldb.emoncmspath1 + "/input/post?&node=" + str(
               pooldb.ph_node) + "&csv=" + ph_value + "&apikey=" + pooldb.apikey1)
           log("DEBUG", "Sent current pH Value of {} to Emoncms Server 1".format(ph_value))
           debug("Sent current pH Value of {} to Emoncms Server 1".format(ph_value))
       if pooldb.emoncms_server2 == "Yes":
           res = requests.get("https://" + pooldb.server2 + "/" + pooldb.emoncmspath2 + "/input/post?&node=" + str(
               pooldb.ph_node) + "&csv=" + ph_value + "&apikey=" + pooldb.apikey2)
           log("DEBUG",
               "Sent current pH Value of {} to Emoncms Server 2".format(
                   ph_value))
           debug("Sent current pH Value of {} to Emoncms Server 2".format(
               ph_value))
       update_pool_sensor_status_values("pool_sensor_status", "pool_chemicals", "pool_current_ph", ph_value)
       log("DEBUG", "get_ph_reading() Completed")
   else:
       log("INFO", "Pool Pump is NOT running, cannot get accurate pH reading!")
       debug("Pool pump is NOT running, cannot get accurate pH reading!")
       log("DEBUG", "get_ph_reading() Completed")
and from influx_data.py:
import sys
sys.path.append('../')
from influxdb import InfluxDBClient
import pooldb
def write_data(measurement, value):
   client = InfluxDBClient(pooldb.influx_host, pooldb.influx_port, pooldb.influx_user, pooldb.influx_password, pooldb.influx_dbname)
   json_body = [
           {
               "measurement": measurement,
               "fields": {
                   "value": value
               }
           }
       ]
   client.write_points(json_body)
From there it is a simple matter of setting up Grafana to look at the InfluxDB and make the graphs:
Notifications
My system relies heavily on notifications. Currently the system can provide notifications via logging to a log file, debug messages to stdout allowing for the running of the main program from the command line with valuable, immediate feedback, pushbullet, email and SMS via Twillio. Because of all they types of notifications as well as areas where there can be notifications, I created a system which allows me to fine tune my notifications very easily via my web interface.
By setting up the code in this manner, I can very easily and quickly adjust my notification settings as well as different categories that I want to have those notifications applied to at that time. In future versions of the code, I am going to create an entire “Notifications” panel that allows me the ability to set specific notification types by category. For example I might want an SMS message about filling events, but email notifications about system errors and pushbullet notifications about my pump. In this manner I am able to tweak all of my notification settings to be exactly how I want then to notify me…both the how and the when!
root scruffy: www #  ./pool_control_master.py
Started is_database_online()
MightyHat Serial setup completed
System Reset Status = No Reset Requested
Started get_pool_temp()
get_pool_temp returned 67.30F
pool_temp in C is 19.61
Started is_pool_pump_running()
pool_pump_running_watts returned 563 watts in use by pump.
PUMP_RUN_LED should be ON. This is the YELLOW LED
Current unix datetime stamp is: 1521835161
Pool LEVEL sensor last updated at: 1521835044
Pool LEVEL sensor battery voltage is: 3.2
Pool LEVEL sensor battery percentage  is 100
Pool TEMP sensor last updated at: 1521835131
Pool TEMP sensor battery voltage is: 3.2
Pool TEMP sensor battery percentage  is 100
Pool FILTER PSI is: 21
Time dfference between last pool LEVEL sensor reading is: 117 seconds.
Time dfference between last pool TEMP sensor reading is: 30 seconds.
Everything appears to be OK with the pool sensors!
pool_sensors: Pool Resistance is: 724
pool_sensors: Pool Level Percentage is: 85
pooldb: Static critical pool level resistance set at (740).
pooldb: Static normal pool level resistance set at (710).
Our Pool Level is MIDWAY.
Total Gallons: 22462
Acid Level OK
Total Current Power Utilization: 2039 watts
Total Current Power Import: 415 watts
Total Current Solar Production: 1624 watts
Current GPM: 15
Current RPM: 2225
Starting get_ph_reading().
Current pH is: 7.043
Sent Emoncms Server 1 current PH Value: 7.043
Sent Emoncms Server 2 current PH Value: 7.043
Completed get_ph_reading()
Starting get_orp_reading().
Sent Emoncms Server 1 current ORP Value: 669.8
Sent Emoncms Server 2 current ORP Value: 669.8
Completed get_orp_reading()
Running from the cli
Alexa Skill and Interface
One of the last things I wanted to tackle was to integrate my pool control system with Alexa. We have Echo Dots and Echo Shows and I wanted to use the visual Echo Show when I could. So I spent a bunch of time learning how to do Alexa skills and then I used the Python microframework Flask-Ask to program the interconnection between my pool control system and the Alexa Skill.
It was a very interesting learning curve, but now I can query Alexa and get all of our pool stats and we can fill (or stop filling) our pool via voice commands:
Conclusion
I am running V3.5.0 of my code now which seriously changes the way I am checking sensors, and handling error checking. I have also started breaking out my code into separate python functions instead of a monolithic block of 4,000+ lines of code. I will put it up and include all of the Flask programming as well.
This project has taught me a lot about programming, the Pi and Arduinos.
To view all of the code, please visit my Github site HERE! Thank you for reading about my project.
Source:Pool Fill Control


