
The project is a vintage radio shell with a raspberry pi and external speakers inside of it. This project came from my need to have a tasteful raspberry pi enclosure without it looking like a raspberry pi case. I also had the need for some medium quality stereo speakers for my room so I incorporated both into this project. This project was completely made of reclaimed electronics.
Step 1: The materials I used.
I used one raspberry pi which this project is the case for. My raspberry runs XMBC on my TV as a home media center.
– I found a pair of old computer speakers in the basement of my house.
– I bought the broken radio I used for this project at a flea market for $12.
These are the materials that make up this project and all of them are reclaimed old electronics that in a different situation would have been thrown away ( except the raspberry pi but that doesn't really count).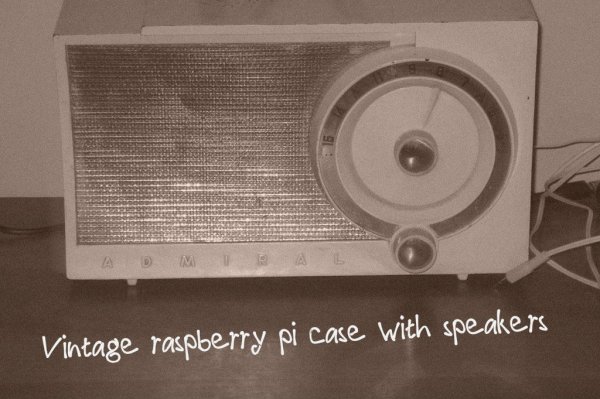
Step 2: Supplies I used.
I used multiple screwdrivers of different sizes.
– One hammer.
– Bunch of hot glue.
– And a liberal amount of black electrician tape.
All of these items are things that most people have sitting around their home ( I had to look around a bit for some of them).
Step 3: Cleaning out the radio.
First you have to take off the back cover of the radio which is only attached with bolts, so all you need is a crescent wrench or if you're lucky your fingers. Then to fit all the things that are going into the radio we have to clean out the circuit board and speaker. By the time I thought to take pictures I had already cleaned it out, but the process is fairly simple. The circuit board and speaker are both attached to the main body with screws, so all you have to do is unscrew it and everything comes tumbling out. The only thing stopping the circuit board is that its attached to the front knobs so all you have to do is pop them off and you'll attach them later.
Step 4: Taking out the speakers.
These speakers I'm using in this project I rescued from a box in my basement. As you can see in this particular set of speakers you can see that the only thing keeping the speaker in is eight normal screws. But to get the cord completely out of the case you have to break the case too. So to do that I took it out into my driveway and smashed it apart with a hammer. When breaking them out of their cases be careful not to break the audio cords. I now have the two speakers out of their cases and attached to each other.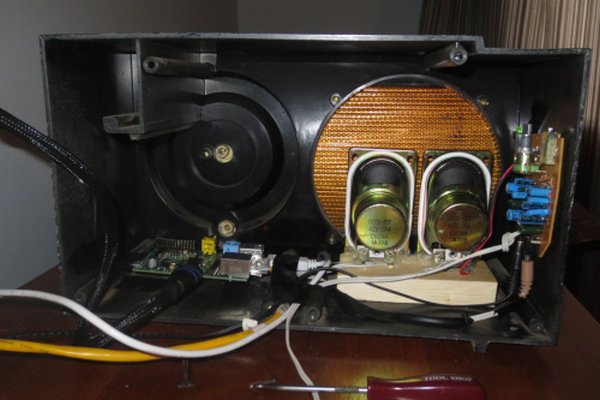
Step 5: Mounting speakers and fitting them.
The left speaker is connected to the right speaker with a AUX cord so I spliced it shorter so I wouldn't have to coil it inside of the case. The two speakers I then mounted them to a small block of wood with hot glue so they would stand up in the proper position inside of the case. The block was then hot glued to the bottom of the case to keep it all in place. The circuit board was then hot glued to the case wall next to the speakers to keep them out of the way. The AUX cable that comes out of the circuit board is then funneled out with the rest of the cords.
Step 6: Cord mangement.
On the back cover of the case I cut holes for all the cords to be routed through (with a steak knife). The cords on the inside are all routed through where the old power cord was located, and wrapped with the black tape. This keeps all the cords organized and less of a mess later.
For more detail: Raspberry pi gone vintage