An easy way to know if someone is at the door and take picture of that person.
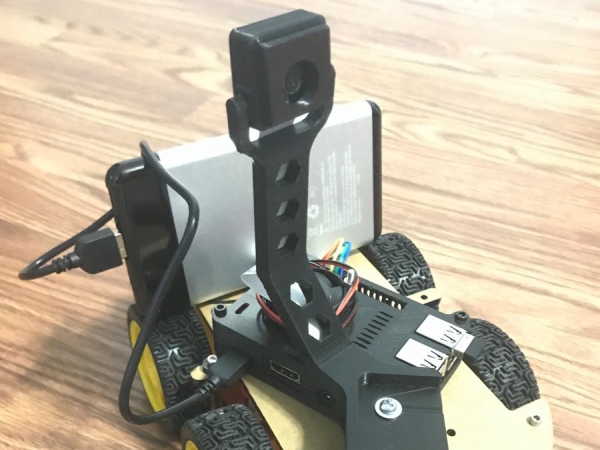
I am using Cayenne to send me notifications every time someone is at the door and to take a picture at the same time. It will save the picture and it allows remote access through Cayenne to take a look at it.
Hardware Required:
- Raspberry Pi
- Raspberry Pi Camera Module v2
- PIR Motion Sensor
- LED and 220hm resistor
- Breadboard
- Jumper wires
- Cayenne(IoT) Account: https://mydevices.com/cayenne/signin/
- YouTube Link: https://www.youtube.com/watch?v=IVuDzISfQ1E
Why use Cayenne and not Blynk:
Because in Cayenne you can add more sensors without a need to pay. Also, you can Remote Access through your phone or any PC and be able to see the picture. As well, you can turn on/off anything in the house, lock/unlock the door with a motor, and add more sensors to it such as a temperature sensor.
How it works:
PIR motion sensor will turn on the light and take a picture at the same time. When the light is on, Cayenne will send you a notification saying “Someone At Door.”
Follow these steps
Step 1: Connect the camera and make sure it’s working. Refer to the following link to setup the camera: https://projects.raspberrypi.org/en/projects/getting-started-with-picamera
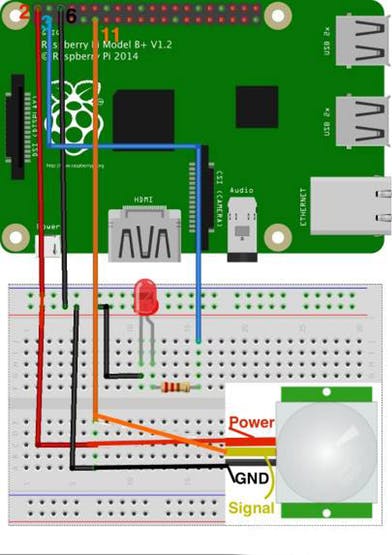
Step 2: Connect the PIR motion sensor, LED and 220 ohm resistor. We will use the same code to get notifications via Cayenne. I will add steps for Cayenne below.
This is the website from where I got the code: https://diyhacking.com/raspberry-pi-gpio-control/
Step 3: Now install Cayenne for the Raspberry Pi.
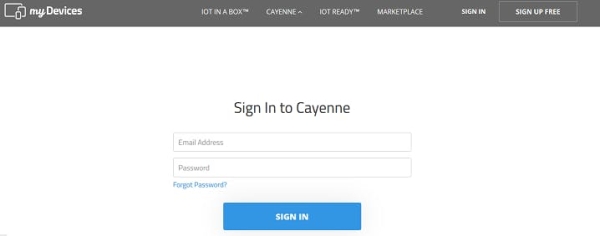
First create an account with Cayenne: https://mydevices.com/cayenne/signin/
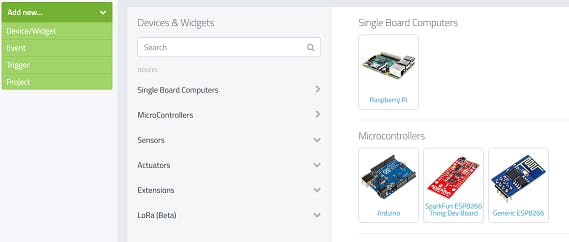
Click on Add new > Device/Widget: now add Raspberry Pi
Now copy and paste the 2 line code in Raspberry Pi Terminal:
Follow this video:
Step 4: Cayenne LED setup
Left top: Go to Add new > Device/Widget > Actuators > Light > Add Actuator
Why Channel 5: for LED GPIO3 which is Pin (5) in Raspberry Pi; look at the Raspberry Pi pinout on Google.
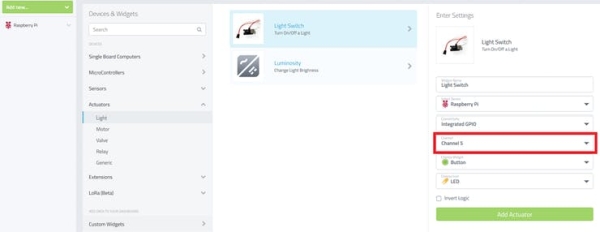
Step 5: Notification setup for Cayenne and phone
Go to Add new > Trigger > follow picture below: add your number
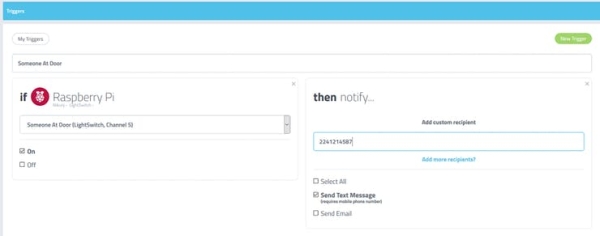
After you've setup to this point: you can go to the Raspberry Pi Terminal and run this Pirtest.py code, and when the PIR motion sensor turns on the LED, you will get a notification sent to your phone number.
Now let's take a picture at the same time you are notified:
Step 6: Camera & PIR motion sensor setup
The good thing is that you only need code for this, which I have attached in a file: “campir.py”. I added time in the code to just preview for a few seconds, adding a display to the Raspberry Pi.
For reference only: https://projects.raspberrypi.org/en/projects/parent-detector
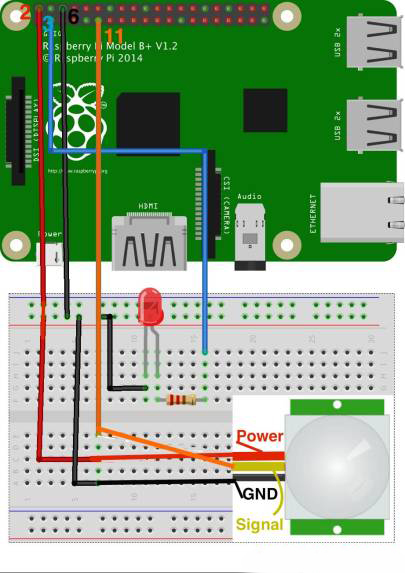
Schematics
PIR & LED
Connect the PIR & LED to Raspberry Pi
Code
from gpiozero import MotionSensor

pir = MotionSensor(17) #pin 11 in raspberry pi

from picamera import PiCamera
from time import sleep # To preview on display time
camera = PiCamera()

i=1
while True:
    pir.wait_for_motion()
    print("You Moved")
    camera.start_preview()
    sleep(5) # To see on the display for 5 sec or use # to just take picture and no preview on dispaly
    camera.capture('/home/pi/Pictures/img%s.png'%i)
    i+=1
    pir.wait_for_no_motion()
    camera.stop_preview()
Source: Raspberry Pi Security Camera System with Notification

